
- July 24, 2021
- Posted by: Surender Kumar
- Categories: Android, Tips & Tricks
Setup Android Cmd-line Tools in Windows
Table of Contents
The purpose of this article is to help a system administrator in setting up Android command-line tools on a Windows computer so that anyone can use Android emulator and other command-line tools without having to install complete Android Studio SDK. This will save the disk space on a system if the user need to use cmdline tools only and does not need a full-blown android studio development environment.
Downloading and installing Java JDK
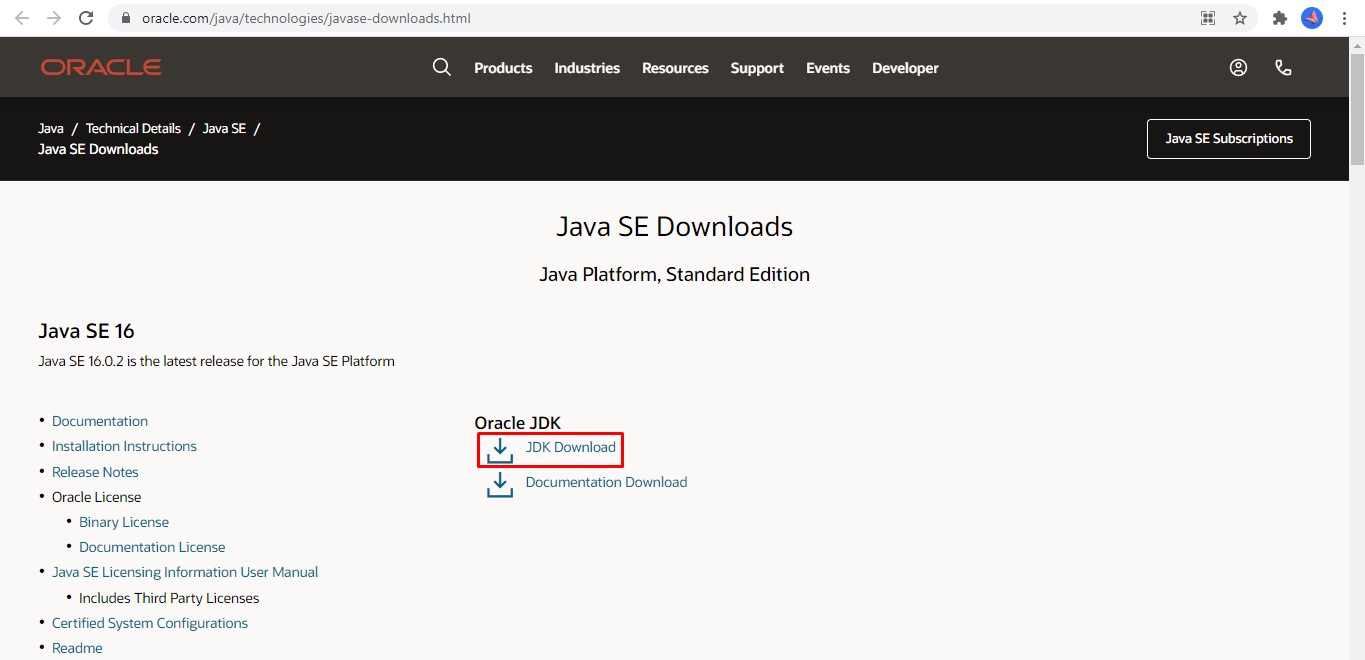
- Download and install the latest version of Java JDK using following link:
https://www.oracle.com/java/technologies/javase-downloads.html
- Click on JDK Download
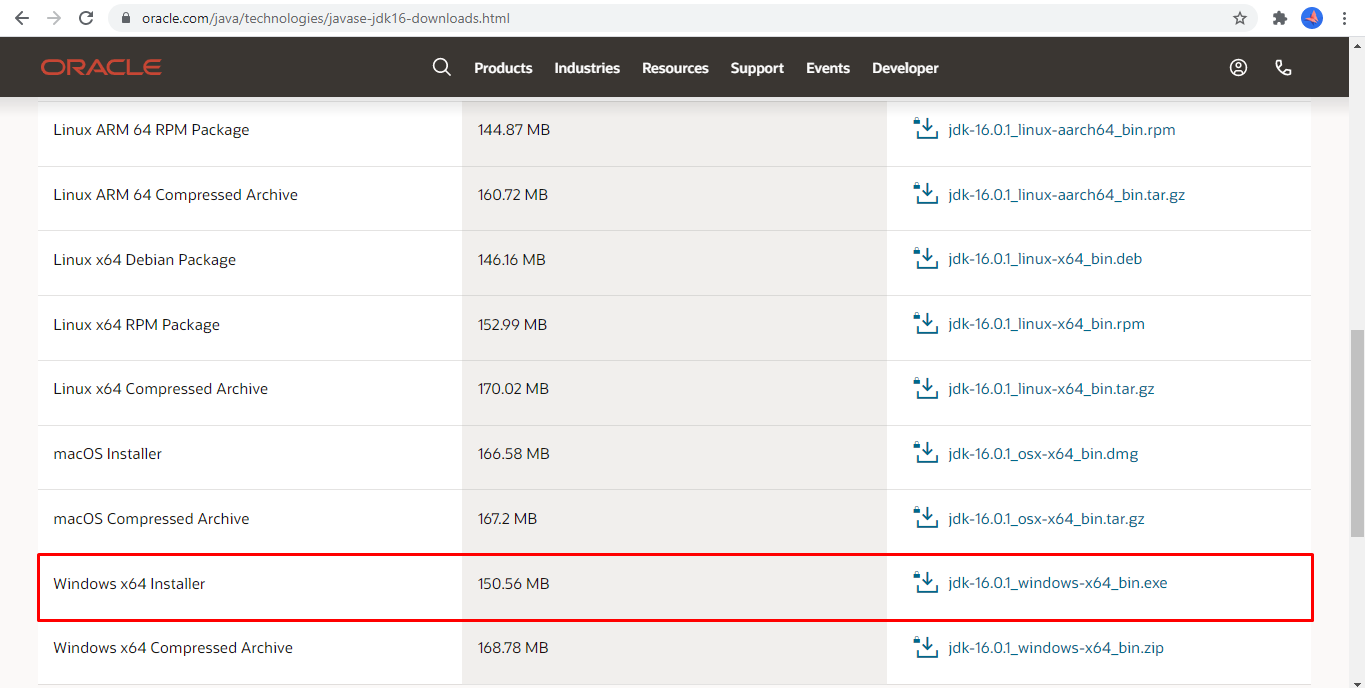
- On downloads page, scroll down and click on download link next to Windows x64 Installer.
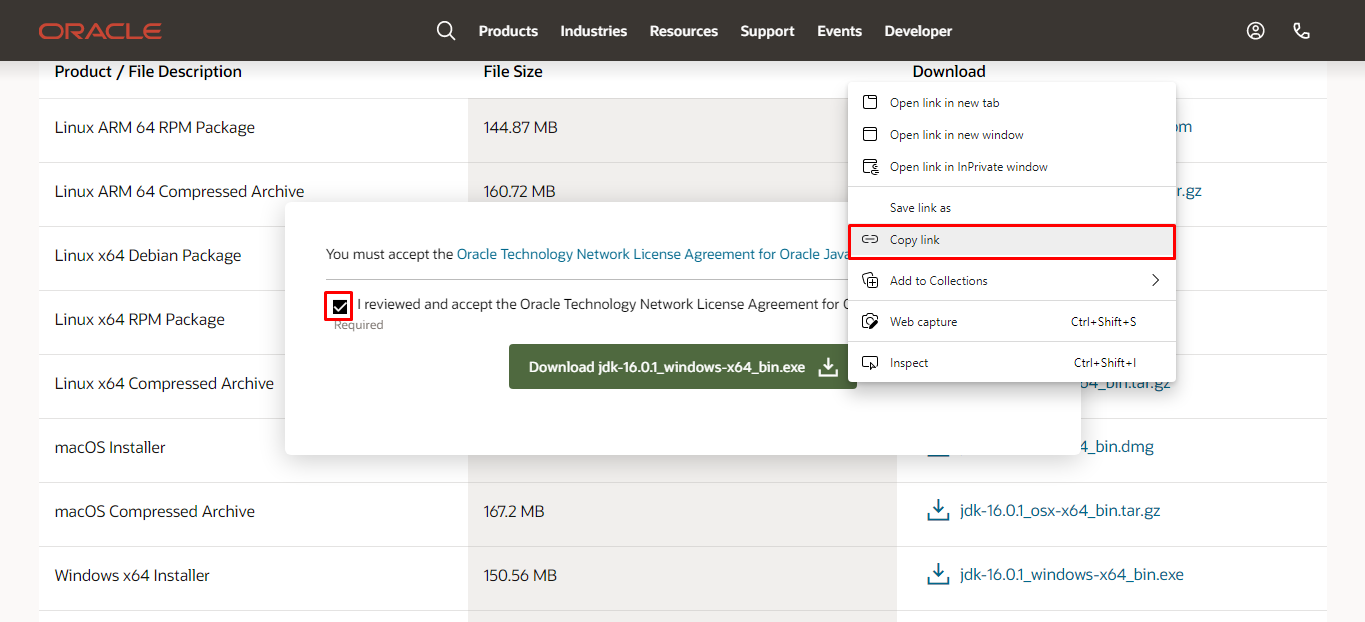
- This will open a popup with a checkbox and a download button. You need to check the box but do not directly click the download button here since this will take you to a login page. Instead, right click on the button and select Copy link option from context menu.
- Open a text editor, paste the copied link, and change the download link as shown in following image.

You just need the URL highlighted in red and then modify the text where it says “otn” to “otn-pub” and then paste the modified link (highlighted green) in browser address bar. This will start the download.
- When the download is completed, install the JDK to default location. Please note that the commercial use of Oracle JDK may require a valid license to be purchased. If you don’t want to purchase a license, you could use OpenJDK as discussed in this article.

Downloading and installing Android command-line tools
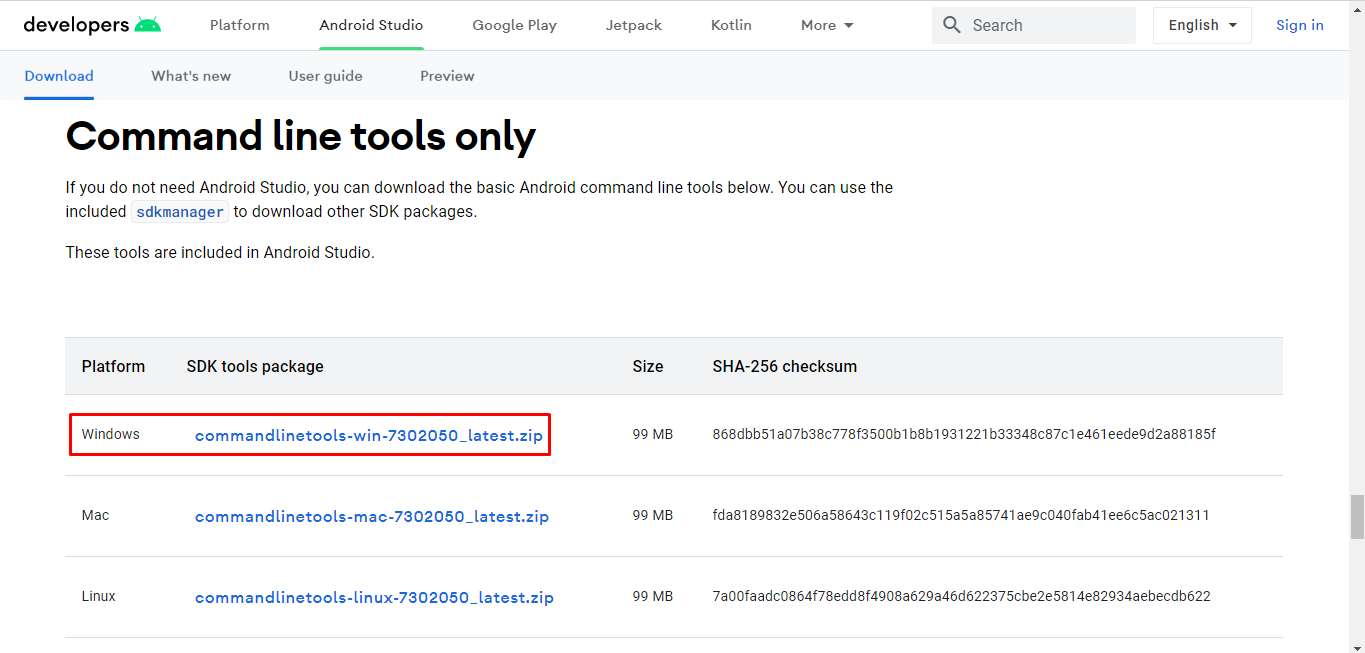
- Open the following link in browser and click on Download Options button:
https://developer.android.com/studio

- Scroll down to Command line tools only section and click on the download link next to Windows. This will download a zip file.
- The latest version of cmdline-tools has some issues and it is rarely documented how to fix these issues. So please follow the next steps exactly the same way as mentioned:
- Open run dialog (press windows logo key + R), type the following path and hit enter:
C:\Users\Surender\AppData\Local\
Make sure you change your username.
- Now create a new folder named Android and inside that create another folder named cmdline-tools and inside that create another folder named tools. So, in the end you will have:
C:\Users\Surender\AppData\Local\Android\cmdline-tools\tools
- Now open the zip file downloaded in step 2 with 7-zip. Many users reported the issues when used inbuilt zip utility of windows to extract the downloaded zip file. So, we will use 7-zip (a free tool) to extract the zip file. You can download the 7-zip utility from https://www.7-zip.org/download.html
- In 7-zip manager, you will see a folder named cmdline-tools.
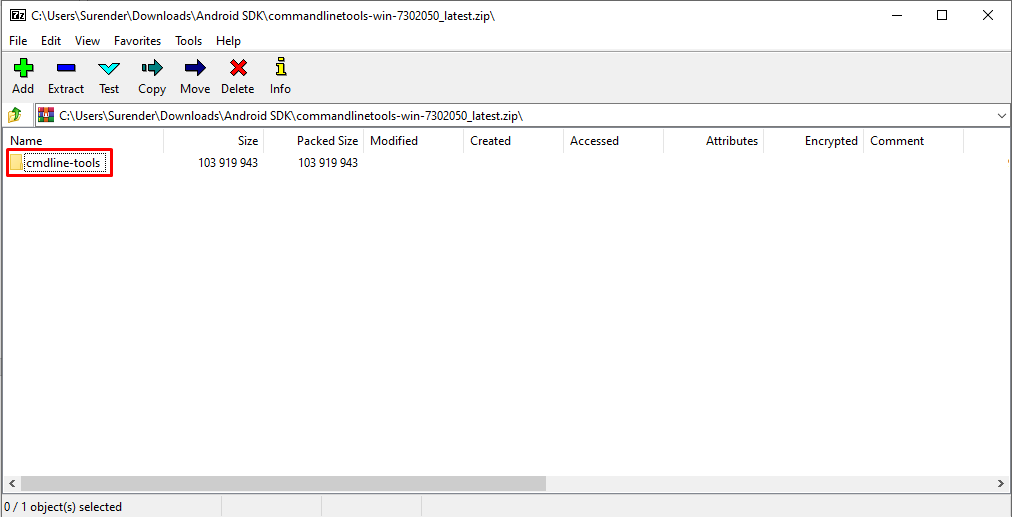
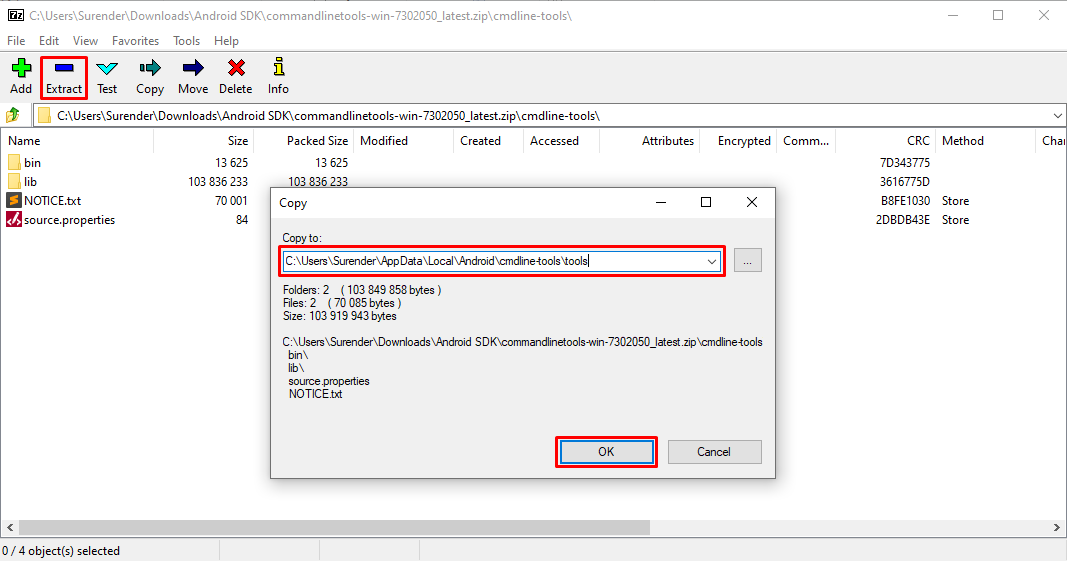
- Double click on cmdline-tools folder to go inside. Now you will see 4 items (bin, lib, NOTICE.txt, and source.properties).
Click on the extract button and paste the “C:\Users\Surender\AppData\Local\Android\cmdline-tools\tools” path in Copy to field and click OK. Again, make sure you change your username.
- Open the directory where you extracted the files. Now rename the folder named “bin” to “latest”. So, in the end you will have directory structure as shown in following image:
C:\Users\Surender\AppData\Local\Android\cmdline-tools\tools\latest

- You can copy this path as you will need this in next section while setting up environment variables.
Setting up environment variables
- Open run dialog (press windows logo key + R).
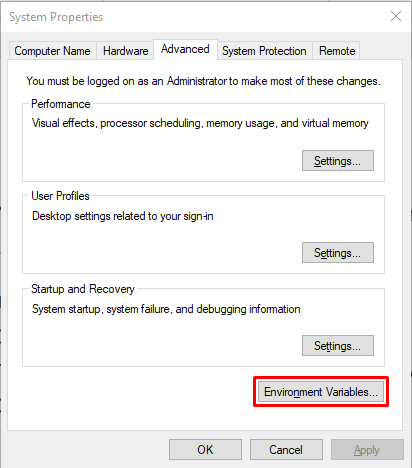
- Type “sysdm.cpl ,3” without quotes to open advanced system properties.
- Click on Environment Variables
-
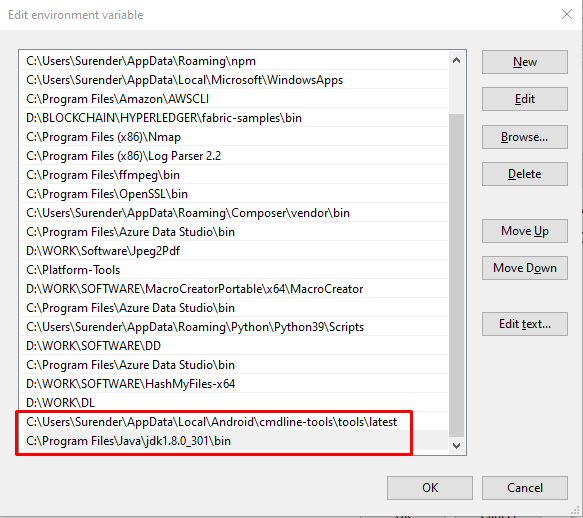
- Under User variables section, select Path and click on Edit
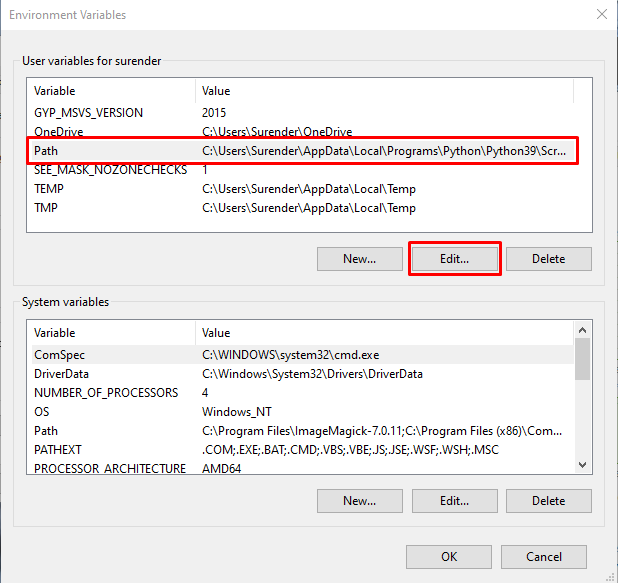
- Now click on New and paste the path that you copied from step 10 from previous section.
C:\Users\Surender\AppData\Local\Android\cmdline-tools\tools\latest
-
- Repeat step 5 again to add the environment variable for Java JDK you installed initially. For your reference, on my PC JDK was installed in C:\Program Files\Java\jdk1.8.0_301\bin, So, I will copy this path.
- Now click on OK twice and you are good to go to next section.
Updating and running SDK manager
If everything you have done so far is correct, you will not run into any issues. To update the SDK manager command-line tool, follow these steps:
- Open run dialog, type cmd, and hold Ctrl + Shift keys and hit Enter. Press YES on the popup. This will launch an elevated command prompt.
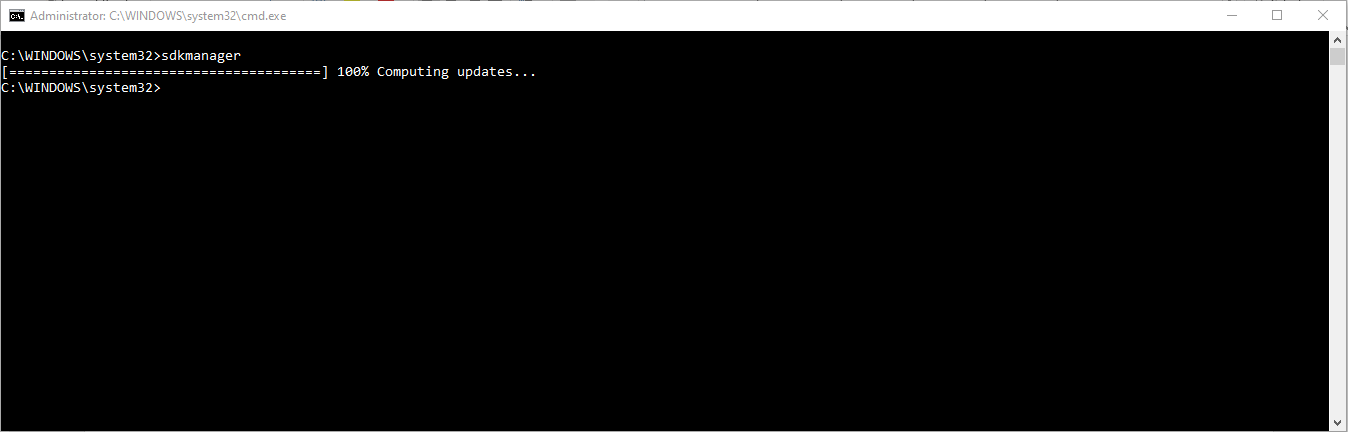
- Now type “sdkmanager” without quotes and hit enter. If you do not get any error, that’s a success.
Common Problems
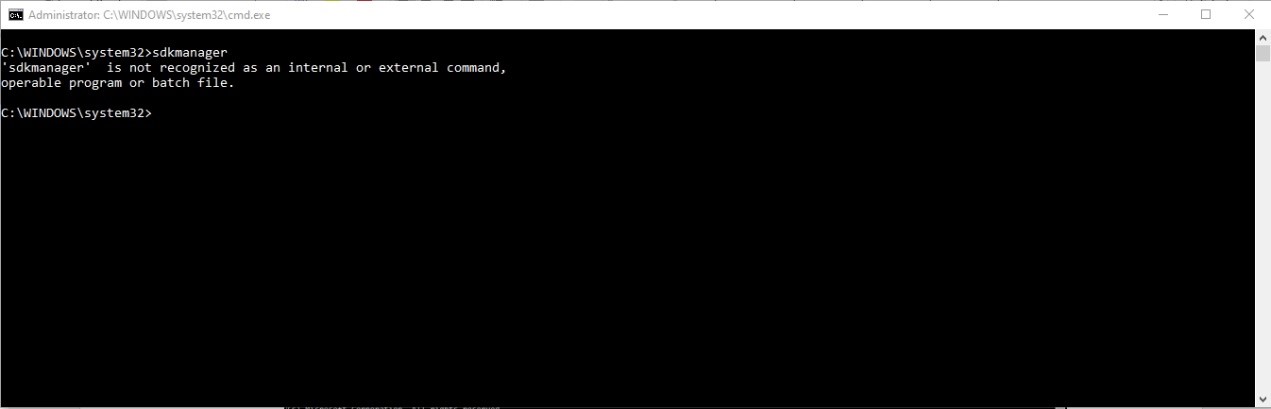
Problem 1
You see an error that says “sdkmanager is not recognized as an internal or external command, operable program or batch file.”
Solutions:
You need to revisit the Setting up environment variables section and see if you correctly added the environment variable and copied the correct path for android cmdline-tools. Checkout this video to learn how to setup environment variables in Windows
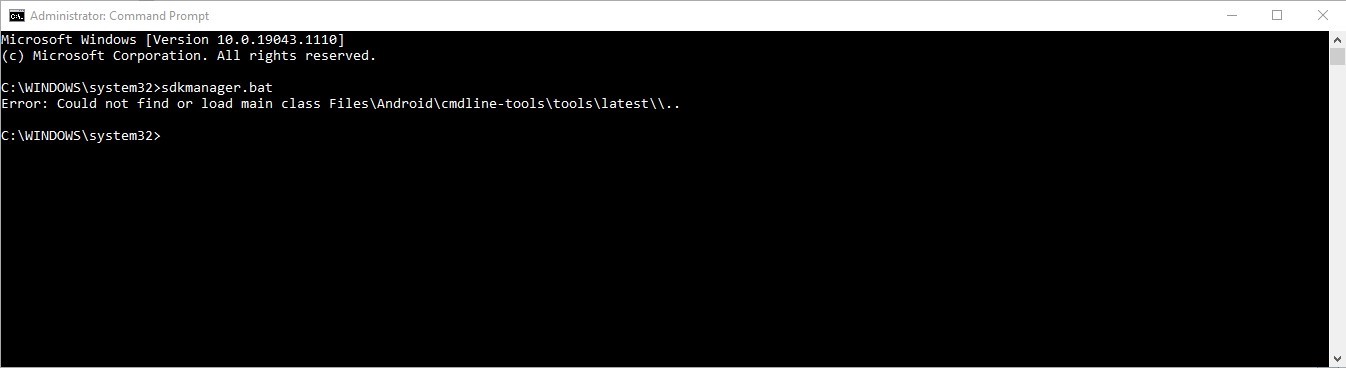
Problem 2
You see an error that says “Error: Could not find or load main class”.
Solutions:
You need to make sure you extracted the android cmdline-tools in AppData directory inside your user profile. If you extracted it inside the Program Files directory, you might run into this error.
Another thing you need to do is to revisit the Setting up environment variables section and see if you correctly added the environment variables.
Problem 3
You see a warning that says “Warning: Failed to download any source lists!” OR “Warning: IO exception while downloading manifest” OR “Warning: Still waiting for package manifests to be fetched remotely”
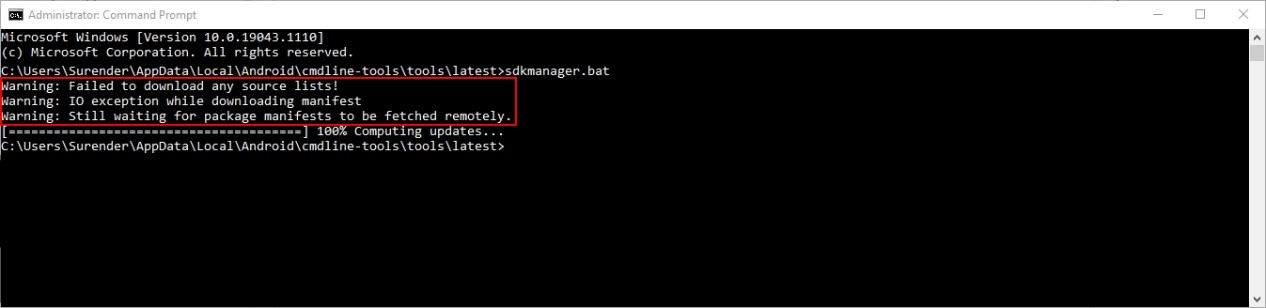
Solutions:
You need to see if something is blocking your connection. Most probably it will be your Antivirus software. You could temporarily disable it or at least disable scanning of encrypted connections.
Installing Platform Tools, System images and APIs
Now we can install the platform tools, system images, emulator, google API levels etc directly from command line. To do this, follow these steps:
- Open run dialog, type cmd, and hold Ctrl + Shift keys and hit Enter. Press YES on the popup. This will launch an elevated command prompt.
- Type the following command and hit enter:
sdkmanager "platform-tools" "platforms;android-29" "system-images;android-29;google_apis;x86_64"
In above command, “android-29” means Android version 10. If you want to download and try Android 11, you can replace “android-29” with “android-30”. You can install multiple android versions simultaneously but make sure your PC has enough storage space.
- You will be prompted with a license agreement. Type Y to agree and hit enter to continue.
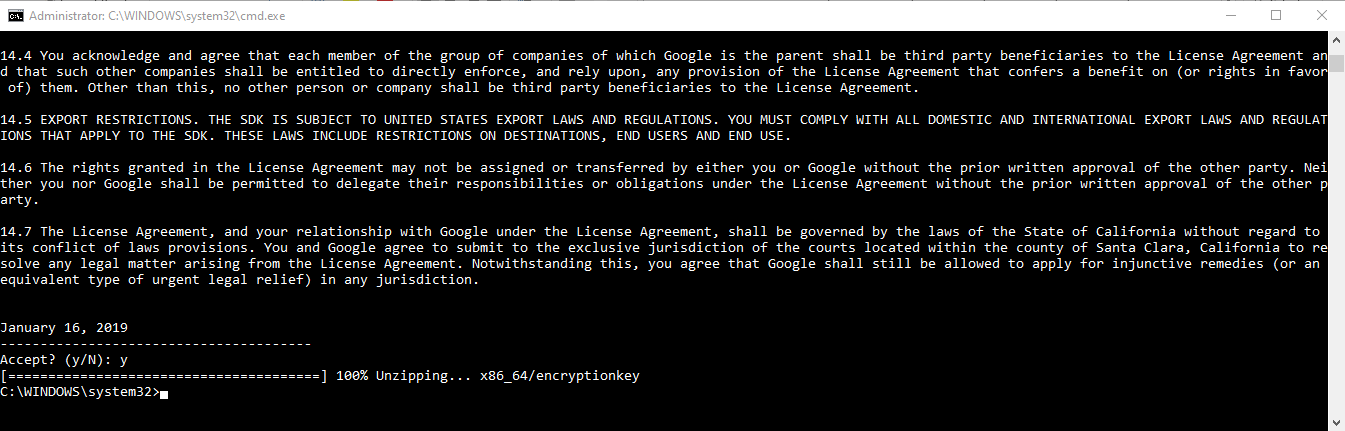
This command will take a while to complete since it will download a lot of packages from internet. Make sure you are connected to an unmetered connection where data charges do not apply.
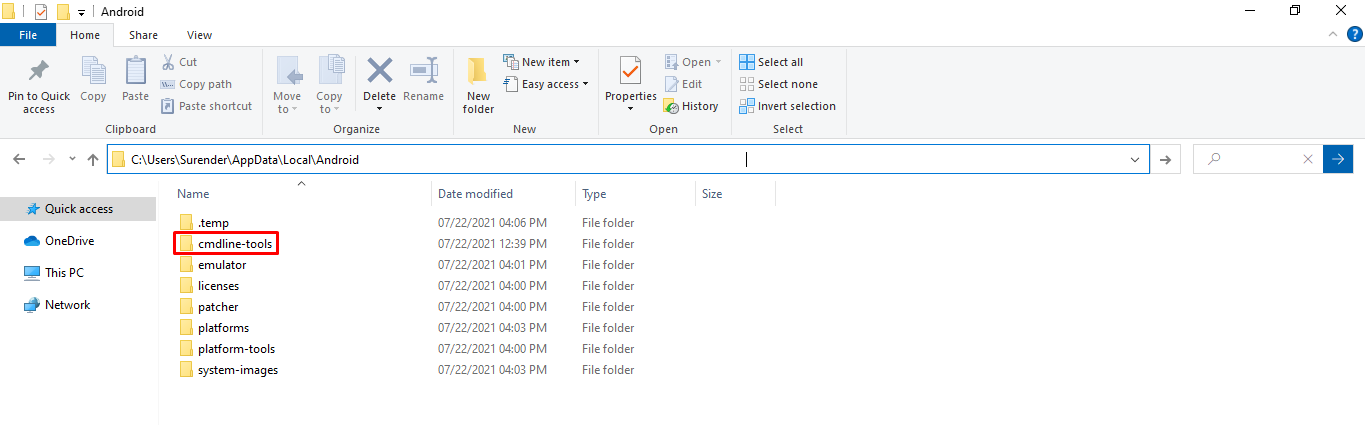
- Once the above command is complete, you will see multiple directories got created inside C:\Users\Surender\AppData\Local\Android
- Next, we will add an environment variable for emulator directory. Go inside emulator directory, click on address bar of file explorer and copy its path.
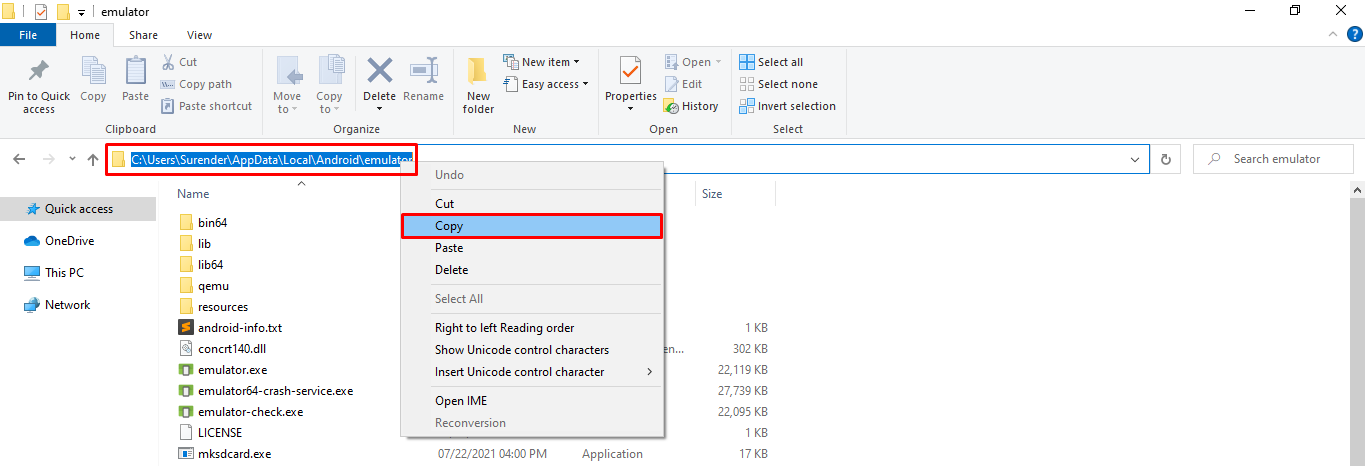
- Repeat the steps 1 through 5 from Setting up environment variables section to add emulator directory to Path.
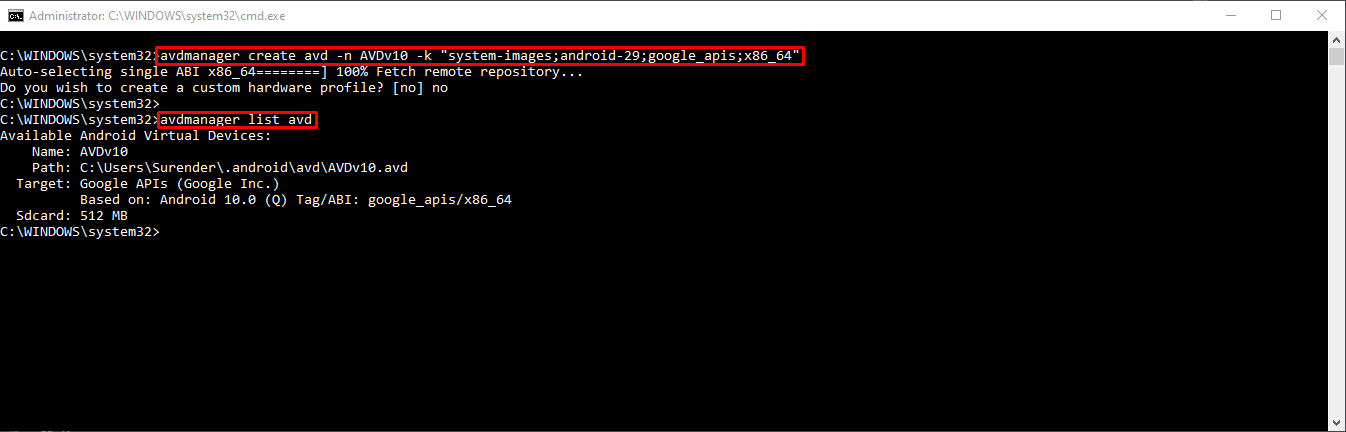
- Now we will create our first android virtual device (aka AVD). To create an AVD, type the following command and hit enter:
avdmanager create avd -n AVDv10 -k "system-images;android-29;google_apis;x86_64"
You can specify the name for AVD with -n switch. I chose AVDv10 since it will be an Android 10 device.
- You can use “avdmanager list avd” command to view the created AVDs.
Launching your android virtual device (AVD)
To launch your first android virtual device, follow these steps:
- Open run dialog, type cmd, and hold Ctrl + Shift keys and hit Enter. Press YES on the popup. This will launch an elevated command prompt.
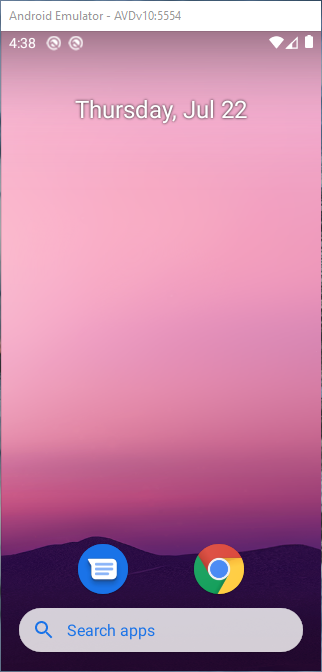
- Type the following command and hit enter:
emulator @AVDv10
This command will start showing some output and you will see your first AVD launching in new window.
If you see an error that says “emulator is not recognized as an internal or external command, operable program or batch file.”, you need to make sure you have correctly added the emulator directory to Path variable (see steps 5 and 6 from Installing Platform Tools, System images and APIs section).
Deleting your android virtual device (AVD)
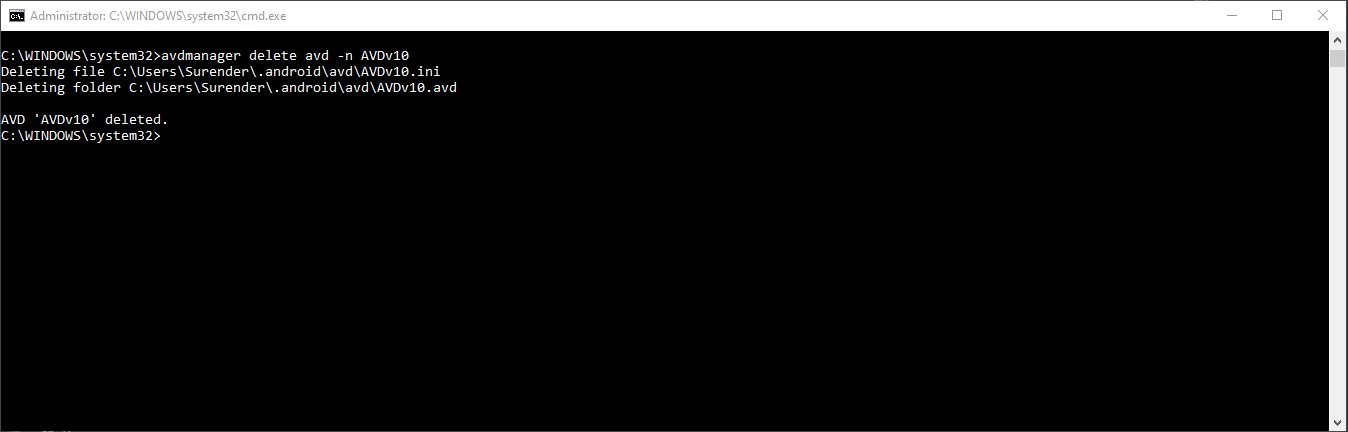
To delete the AVD you just created, you can use the following command:
avdmanager delete avd -n AVDv10
Using Android Debug Bridge (ADB)
Android Debug Bridge (adb) is a command-line tool that lets you communicate with an android device. The adb command facilitates a variety of device actions, such as installing and debugging apps, transferring data to/from android device, running shell commands on android device etc.
If you are following along this guide since start, you have already installed the adb tool. You only need to add it to environment variable so that you can start it from anywhere in command prompt. To add the environment variable, do the following:
- Open the following path in file explorer:
C:\Users\Surender\AppData\Local\Android\platform-tools
Make sure you change your user name. If you cannot find the “platform-tools” directory in your PC, run the following command in an elevated cmd prompt:
sdkmanager "platform-tools"
- Copy “C:\Users\Surender\AppData\Local\Android\platform-tools” directory path from explorer’s address bar.
- Add the copied path to environment variable. For more information on how to do it, see steps 1 through 5 in Setting up environment variables section.
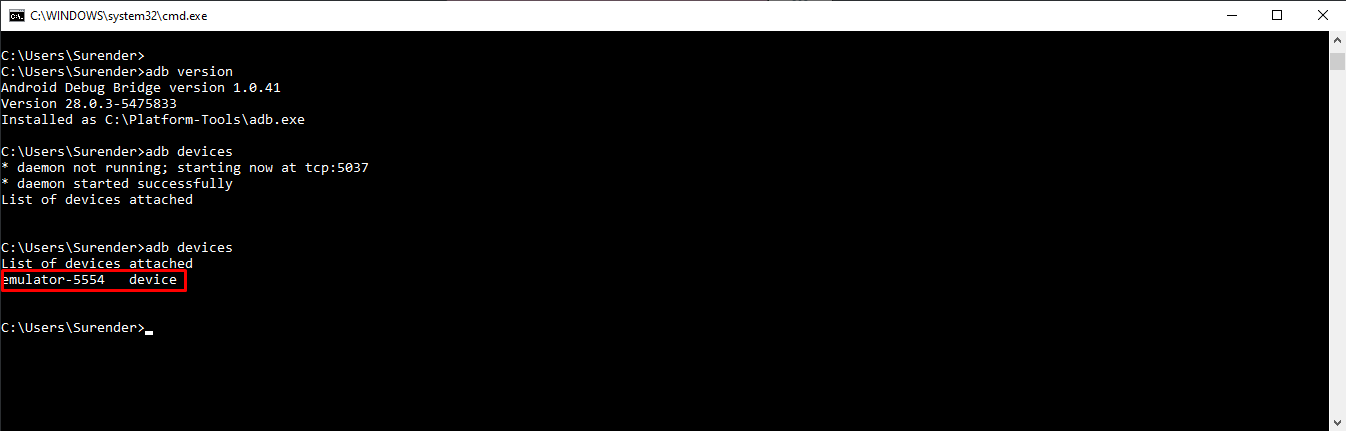
- Once the environment variable is set, open a command prompt, type “adb version” and hit enter.
- If you do not see any error, you are good to go to next step. If you see an error that says “adb is not recognized as an internal or external command, operable program or batch file.”, please check you have correctly followed steps 1 through 3 in this section.
- To see a list of devices connected, you can use “adb devices” command without quotes.
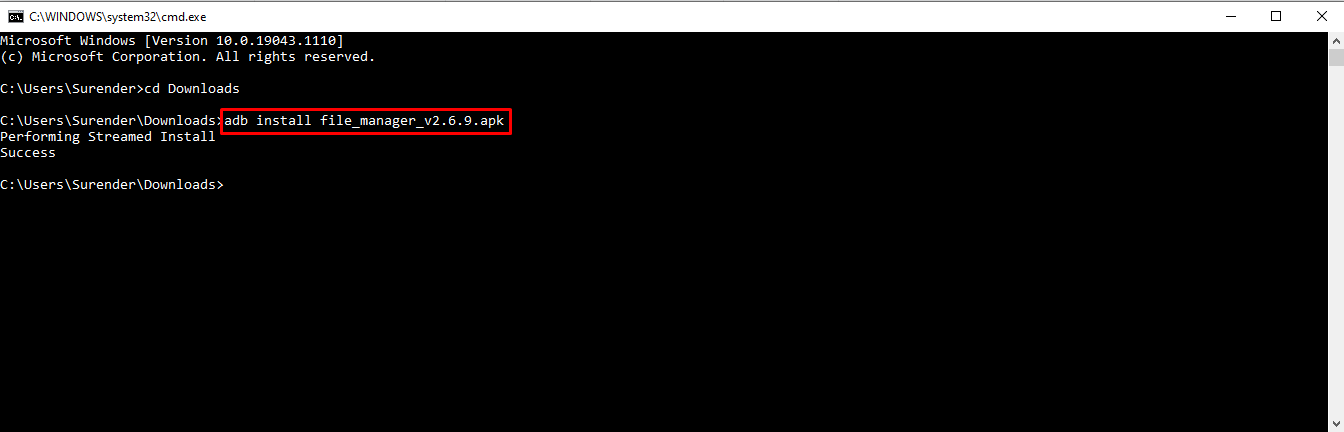
- To install an app using apk file, you can use “adb install apk_name” command without quotes.
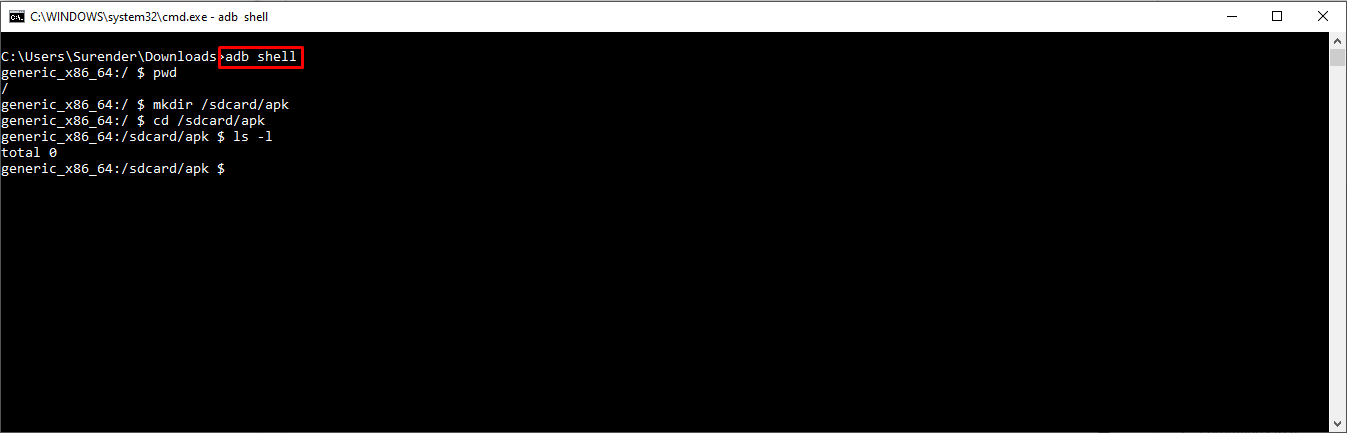
- To launch a shell to run commands on connected android device or AVD, you can use “adb shell” command without quotes.
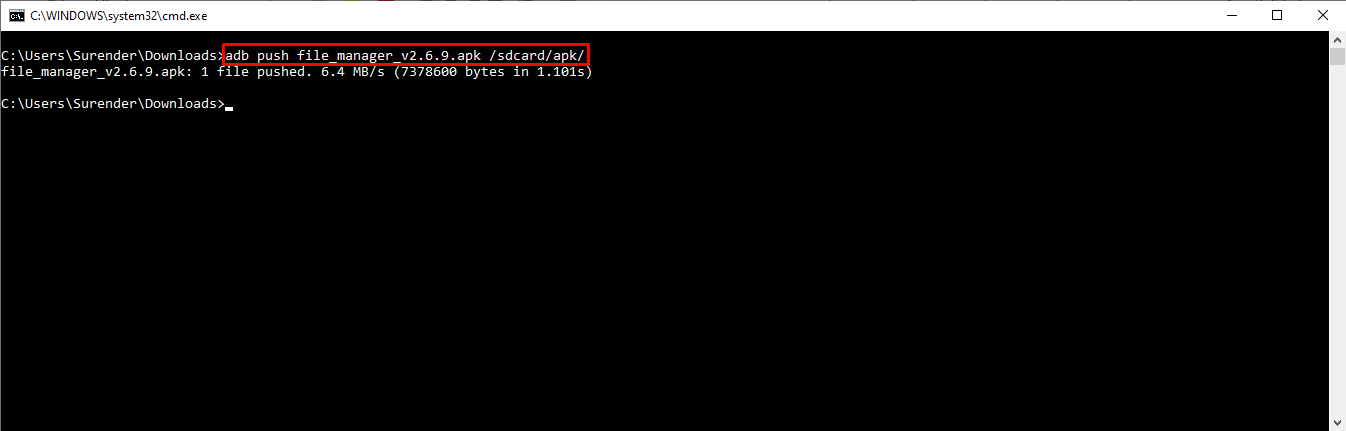
- To transfer a file to connected android device or AVD, you can use “adb push source destination”.
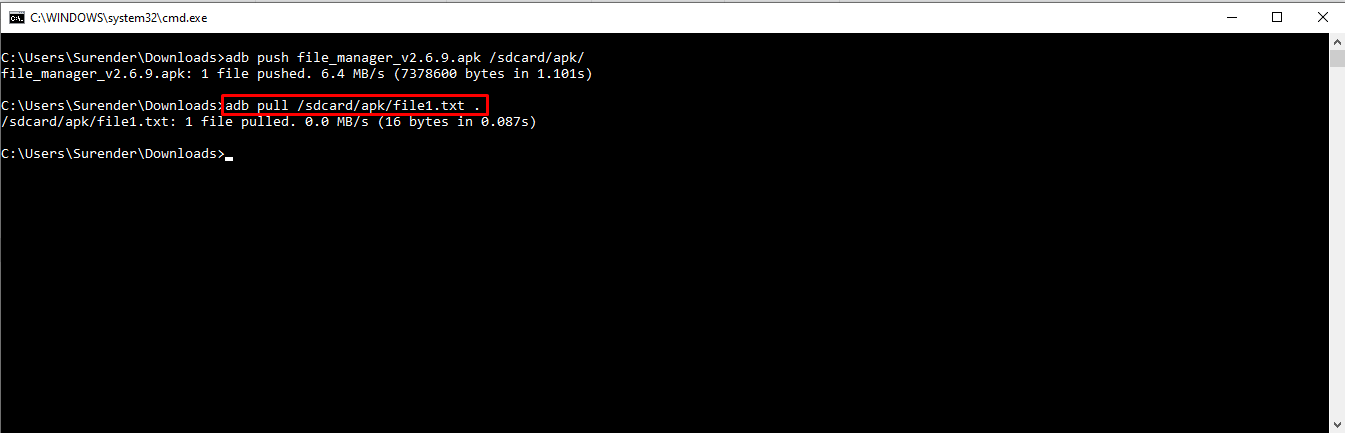
- To transfer a file from the connected android device or AVD to your computer, you can use “adb pull source destination”.
- To shutdown the connected android device or AVD from your computer, you can use “adb shell reboot -p” command (-p stands for -poweroff).

This is just a glimpse of what you can do with adb. There is a lot more to this but you got the idea anyway.
If you like this post, please share this with your family and friends.
Please how can I run flutter app in vs code on my real android device. I have installed adb and also SCRCPY which my PC and also vs code can detect but flutter fails to run on my device. This is the debug console below.
failure: build failed with an exception. * where: build file ‘c:\users\dot\documents\projects\flutter\learningdart\android\app\build.gradle’ line: 26 * what went wrong: a problem occurred evaluating project ‘:app’. > could not open cp_dsl generic class cache for script ‘c:\src\flutter\packages\flutter_tools\gradle\flutter.gradle’ (c:\users\dot\.gradle\caches\7.4\scripts\divzwgaymu57a972yid254mdl). > bug! exception in phase ‘semantic analysis’ in source unit ‘_buildscript_’ unsupported class file major version 63 * try: > run with –stacktrace option to get the stack trace. > run with –info or –debug option to get more log output. > run with –scan to get full insights. * get more help at https://help.gradle.org build failed in 1m 25s exception: gradle task assembledebug failed with exit code 1 exited (sigterm)
Is JAVA_HOME environment variable correctly set on your computer?
While downloading the platform tools using the command “sdkmanager “platform-tools” “platforms;android-29” “system-images;android-29;google_apis;x86_64″” in command prompt ,I got the error like
“Warning: Failed to read or create install properties file.
[=== ] 10% Installing Android SDK Platform 29”
Please suggest how could I solve this?
Seems like a permission issue to me. You should run this command in an elevated command prompt.