- March 14, 2022
- Posted by: Surender Kumar
- Category: How-Tos
Install and Configure OpenJDK in Windows
Table of Contents
The Oracle JDK license has been changed since the release of Java Standard Edition (JDK 8 and above) on April 16, 2019. While this license change does not impact people using Oracle JDK for personal, development, and training purpose, there are a lot of people who started looking for an alternative option. The use of Oracle JDK in production environment now needs a commercial license to be purchased. However, No-Fee Terms and Conditions (NFTC) still allows the users to use Oracle JDK free of cost (even in production environment) as long as the end product is not distributed for a fee.
I am neither a lawyer nor a licensing expert so I will not discuss the licensing and technical details here. In this article, I will discuss how you can install and configure OpenJDK – a completely free and open-source implementation of the Java SE – in Windows. The main problem with OpenJDK is that it does not provide the installer packages like Oracle JDK. The executable installer packages of Oracle JDK made it incredibly easy for users to install and setup JDK without hassle – particularly in Windows. OpenJDK is available as compressed archives which require manual configuration in Windows. So lets discuss how to install and configure OpenJDK in Windows.
Downloading OpenJDK
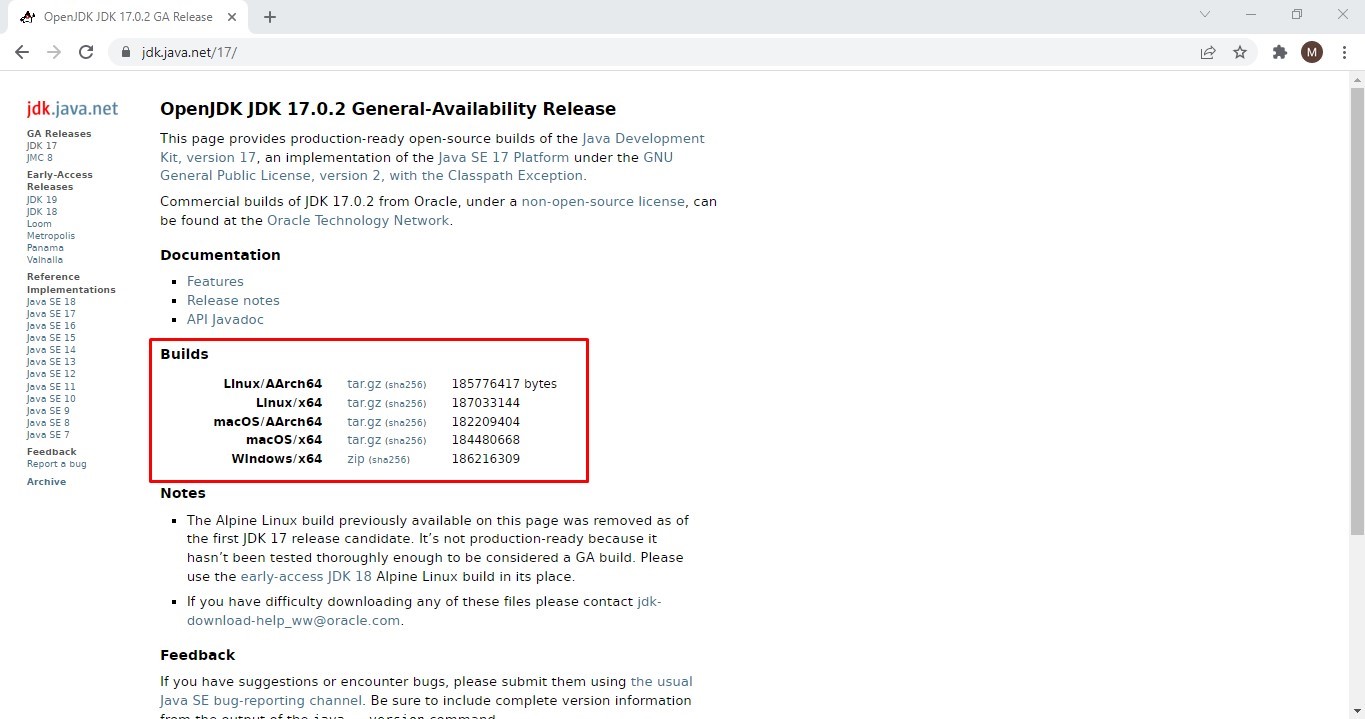
The OpenJDK is available for download at https://openjdk.java.net. You can download the compressed archive of a particular build for your operating system as shown in the following screenshot:
Installing OpenJDK
Once you download the compressed archive, the installation is fairly simple. You just need to extract the archive into a folder of your choice. I will extract mine into “C:\Program Files\Java” using the following PowerShell command:
Expand-Archive -Path "$env:USERPROFILE\downloads\openjdk-17.0.2_windows-x64_bin.zip" -DestinationPath "C:\Program Files\Java" -Force

Assuming the OpenJDK archive is located in your downloads folder, this command extracts it to the “C:\Program Files\Java” folder. The destination folder will be automatically created if it doesn’t exist. Next step is to setup the environment variables in Windows so that OpenJDK can be accessed by users and programs the same way as that of Oracle JDK.
Configuring Environment Variables for OpenJDK
To setup the environment variables for OpenJDK, follow these steps:
- Open Run dialog (WinLogoKey + R) and then type “sysdm.cpl ,3” or “SystemPropertiesAdvanced” without quotes and press Enter. This will open advanced system properties.
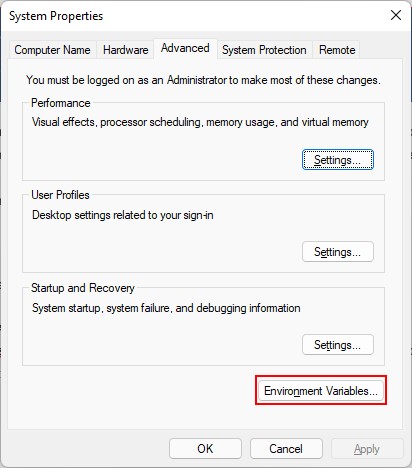

- Click on the Environment Variables
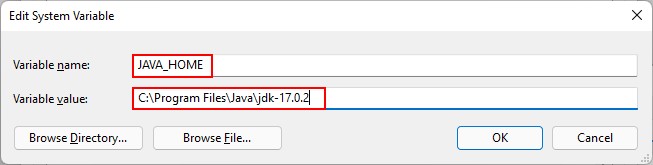
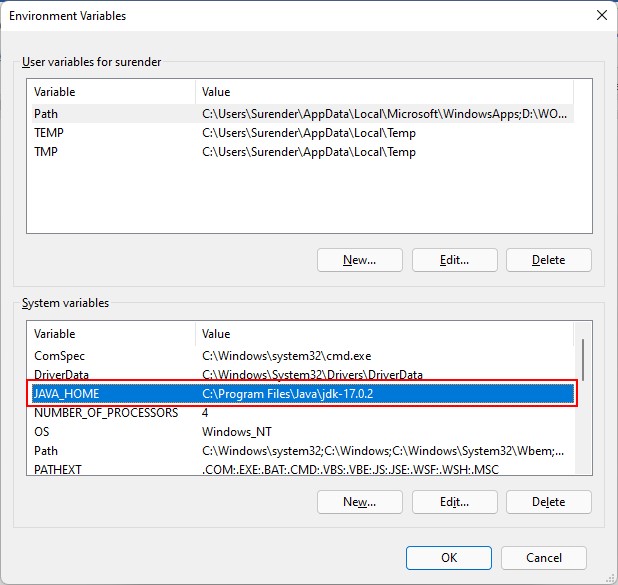
- Under System variables section, click on New button. Now under Variable name, type “JAVA_HOME” without quotes and under Variable value, paste the path of folder where you extracted the OpenJDK archive (“C:\Program Files\Java\jdk-17.0.2” in our example) and click OK button. See the following screenshot for reference.
- The JAVA_HOME system variable should now be available as shown in the following screenshot:
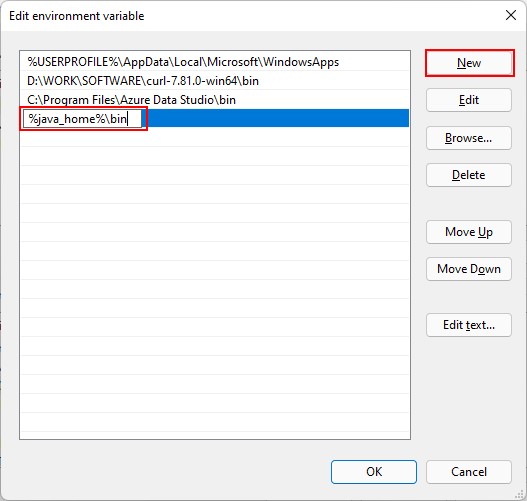
- Now select the Path variable under User variables section and double click to edit it.

- Click on New button and type “%JAVA_HOME%\bin” without quotes as shown in screenshot and click OK.
- Finally, click OK twice to close advanced system properties.
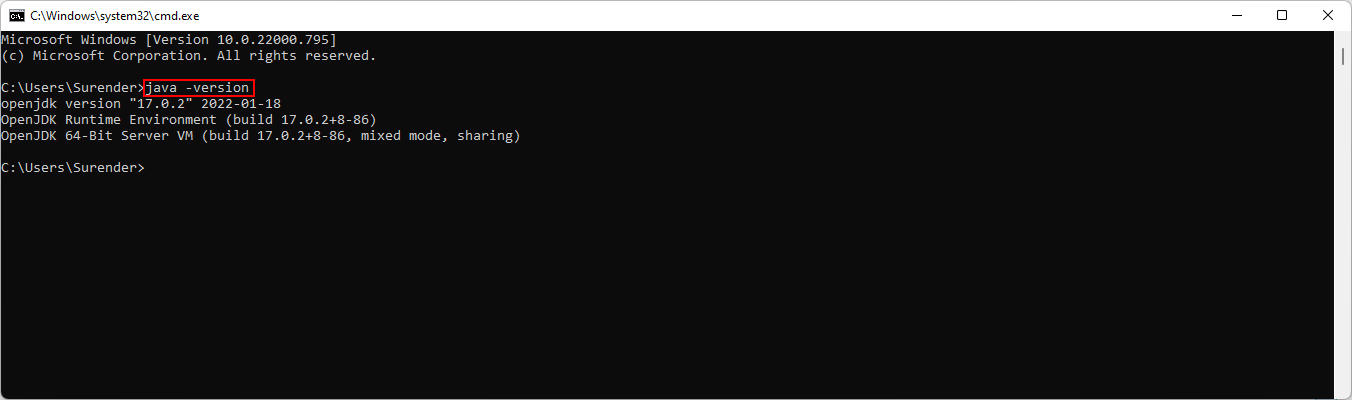
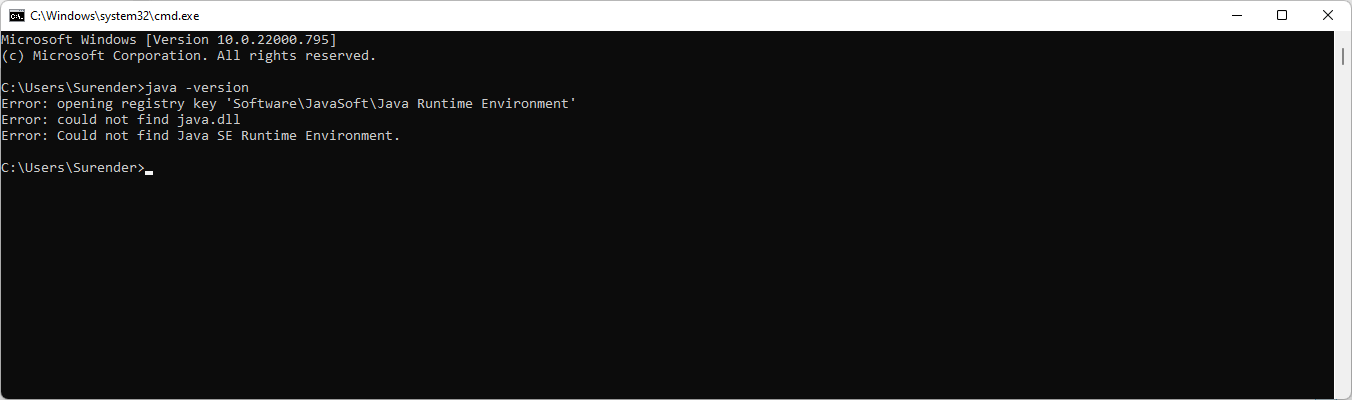
- To confirm if Java environment is setup properly, open a command prompt (cmd.exe) and type
java --versioncommand and press Enter. - If you’ve done everything correct so far, you will see the Java version as shown in the screenshot below:

- If you see an error that says ‘java’ is not recognized as an internal or external command, operable program or batch file, there is some problem with the environment variables you created.

If you see this error, watch this video to learn how to setup environment variables in Windows. You could also try to setup environment variables using PowerShell commands as shown in the next section.
Configuring Environment Variables for OpenJDK using PowerShell
If the environment variable you created using GUI does not work, you could use the commands mentioned in this section to setup the environment variables using PowerShell commands. The benefit of using this method is that there are less chances of errors.
- Launch an elevated session of Windows PowerShell console. To do this, right click on Windows PowerShell and select “Run as Administrator” option.
- Now type the following command and press Enter:
[Environment]::SetEnvironmentVariable("JAVA_HOME", "C:\Program Files\Java\jdk-17.0.2", "Machine")

If you do not see any error, it means the system variable is created successfully. Please modify the folder path as per your system.
- Next step is to create user variable referencing to the Java binaries. To do that, use the following commands:
$path = [System.Environment]::GetEnvironmentVariable("Path","Machine")

[System.Environment]::SetEnvironmentVariable("Path", $path + ";%JAVA_HOME%\bin", "Machine")
- After running these commands, the Path user variable is updated to include java binaries. To view the Path user variable, you could use the following command:
[System.Environment]::GetEnvironmentVariable("Path","Machine") -Split ";"

These commands will set the environment variables that are required for Java to work on your Windows system. To verify the setup, launch a new command prompt and type java --version command and press Enter. This time you should see the Java version configured on your system.
Troubleshooting
If you follow this guide properly but still get the following error:
Error opening registry key 'Software\JavaSoft\Java Runtime Environment'
Error: could not find Java.dll
Error: could not find Java 2 Runtime Environment
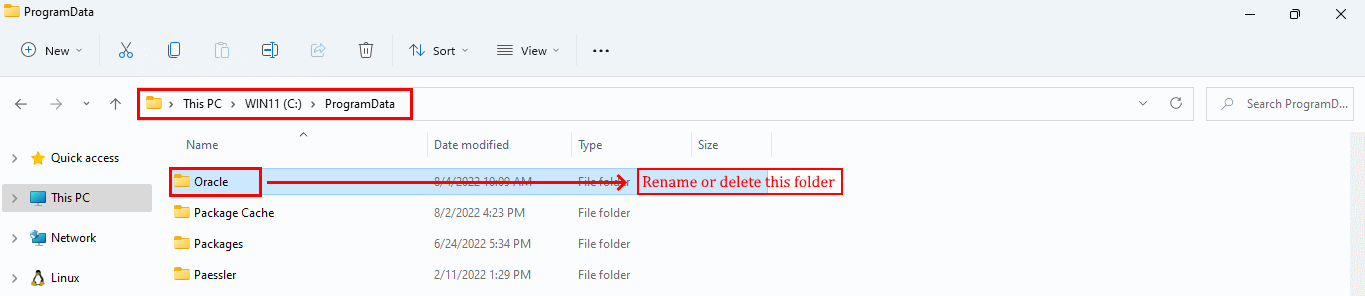
This error occurs when the previously installed Java SE isn’t properly removed from your system. To fix this error, go to C:\ProgramData directory, locate the directory named Oracle, then rename or delete it. See the screenshot for a reference:
After removing the said directory, run the java -version command again and the error will go away.