
- September 20, 2022
- Posted by: Surender Kumar
- Categories: Windows 10, Windows 11
Install Podman in Windows with PowerShell
Table of Contents
Docker for windows has been around for years and most IT admins are already familiar with it. Not along ago, Red Hat launched their own containerization tool named Podman which works just like Docker. In fact, you can consider Podman as a best Docker alternative for containerization because it works in daemon-less and root-less mode by default as opposed to Docker. That is why people having a security mindset prefer using Podman instead of Docker. If you’re looking for Docker Desktop alternative, check out Podman Desktop.
In this article, you will learn how to get started with Podman in Windows 10 or Windows 11. Please note that Podman requires WSL2 installed in Windows. If it is not installed already, Podman installation will do it for you. Now let’s get started.
Important Note
If you’re trying to run Podman in a Hyper-V virtual machine (VM), run the following command on Hyper-V host to enable nested virtualization support:
Set-VMProcessor -VMName <VM-Name> -ExposeVirtualizationExtensions $True

Make sure you supply the right VM name and also make sure that the VM is powered-off while you run this command.
Install Podman using PowerShell and Winget
To install Podman in Windows 10 or Windows 11, launch an elevated PowerShell console and run the following command:
winget install -e --id RedHat.Podman --accept-source-agreements --accept-package-agreements
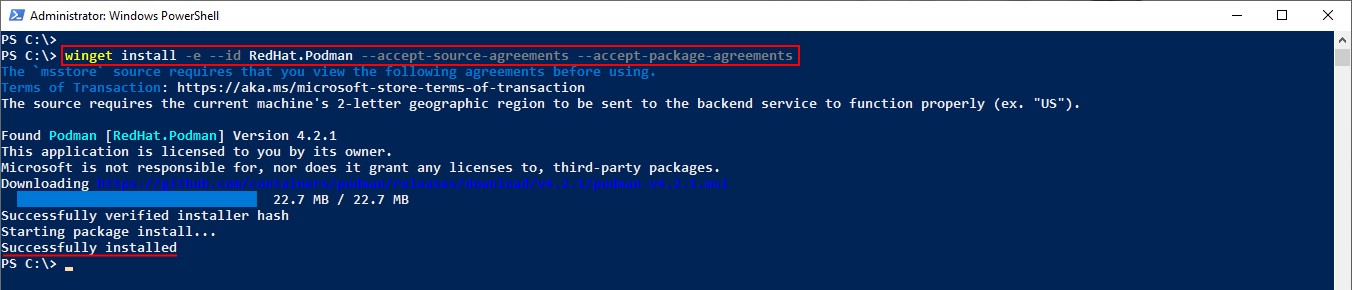
This command will install Podman without requiring any user interaction as you can see in the screenshot. If winget command doesn’t work, please read this post to fix it.
Initialize Podman Machine
Once the Podman installation finishes, close the existing PowerShell console, launch a new one and type the following command to initialize the Podman machine in WSL environment:
podman machine init
If WSL is not already installed, this command will prompt you to install it and reboot your computer to complete the WSL setup as shown in the screenshots below.

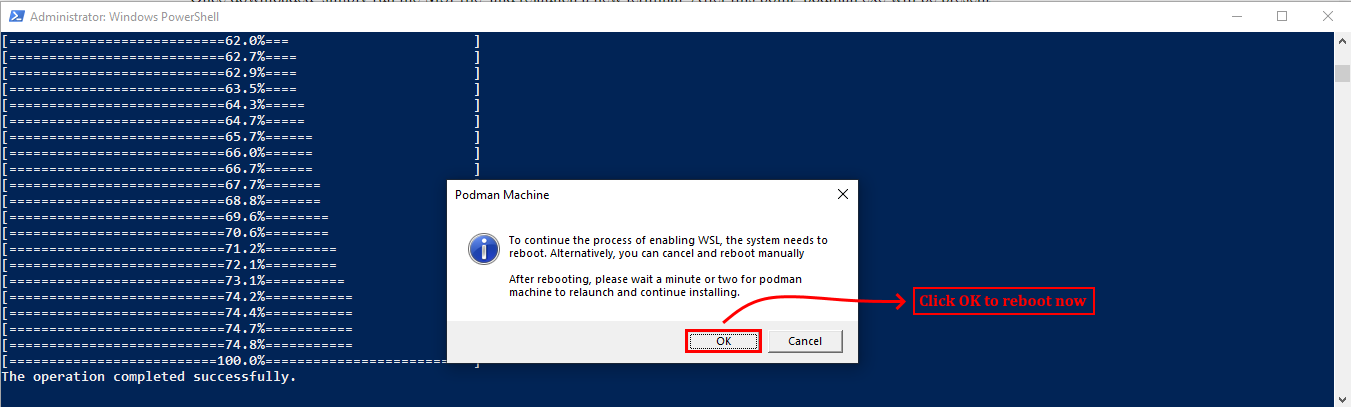
After the reboot, please wait a few minutes for installation to resume automatically. You will see a screen like this:
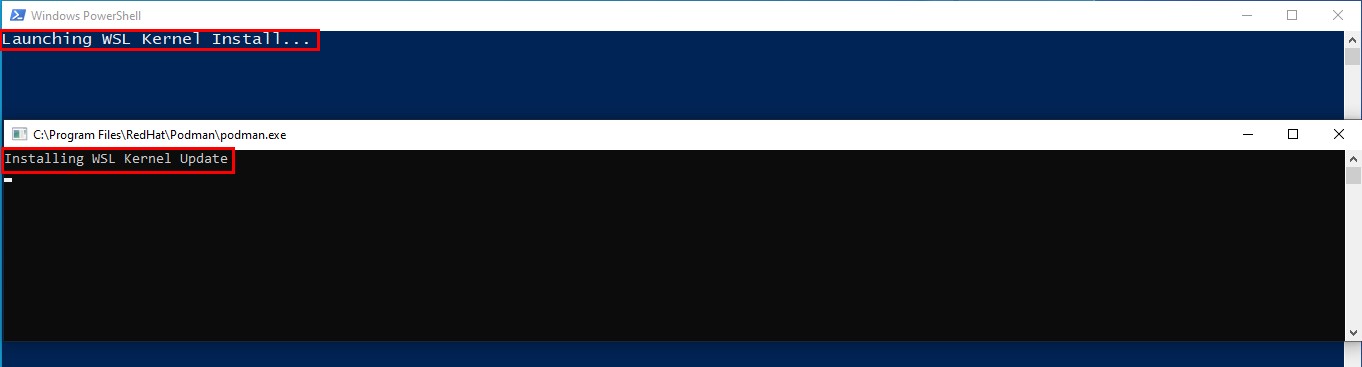
If you see any error at this stage, see the troubleshooting section.
Start Podman Machine
After machine initialization, you are ready to start the Podman machine. To do that, run the following command:
podman machine start
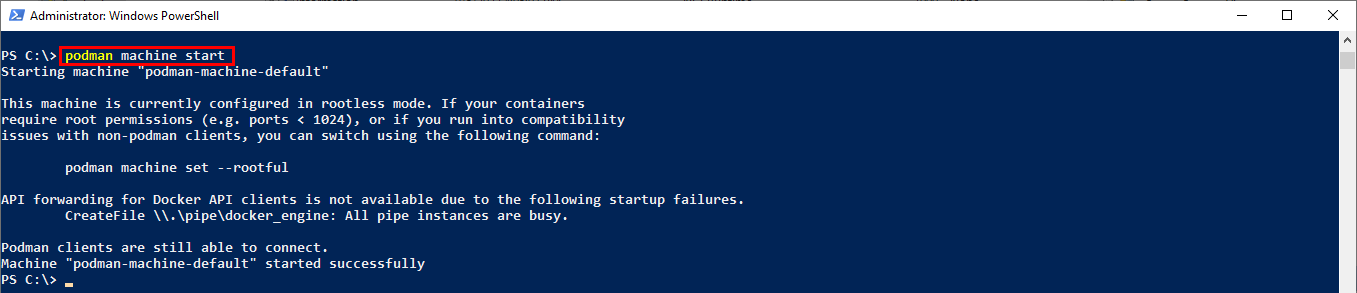
By default, Podman machine will start in rootless mode. This is good from security perspective but if your containers require a root permission, you might want to run the following command before running podman machine start:
podman machine set --rootful
This command causes the Podman machine to run in root mode. At this point, you could use wsl -l -v command to see a podman WSL container running on your computer.

Using Podman
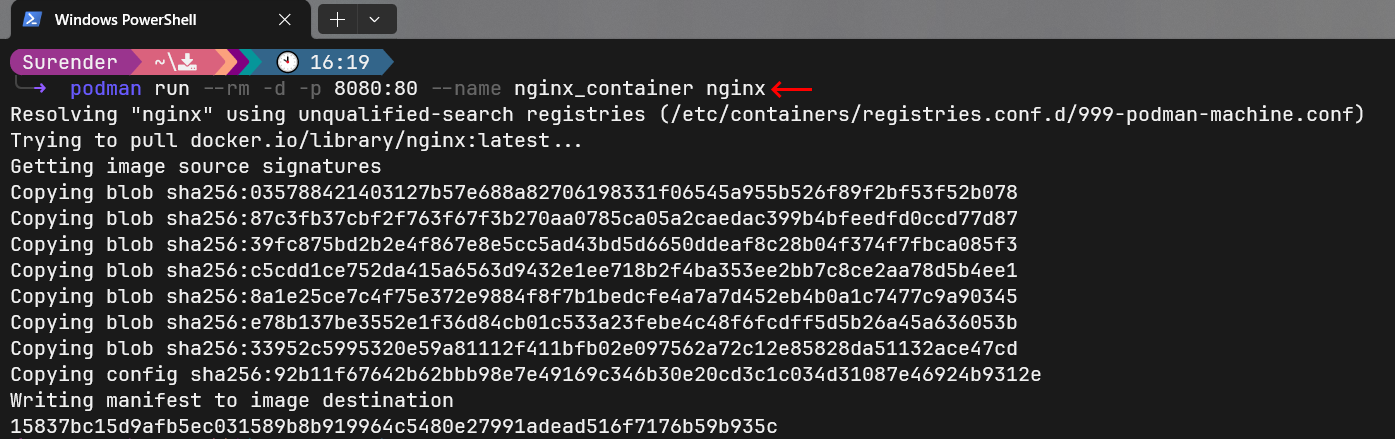
Now you have the Podman up and running, you could use the commands similar to Docker to pull an image from Docker or Quay registries and launch a Podman container. The following command runs an nginx container:
podman run --rm -d -p 8080:80 --name nginx_container nginx
You can now use podman ps command as opposed to docker ps to see the running podman containers.

You can see that Podman container is now running on your Windows system. If you want, you can use curl to verify if port forwarding is working properly between podman container and your host system. To do that, run the following command:
curl http://localhost:8080/ -UseBasicParsing
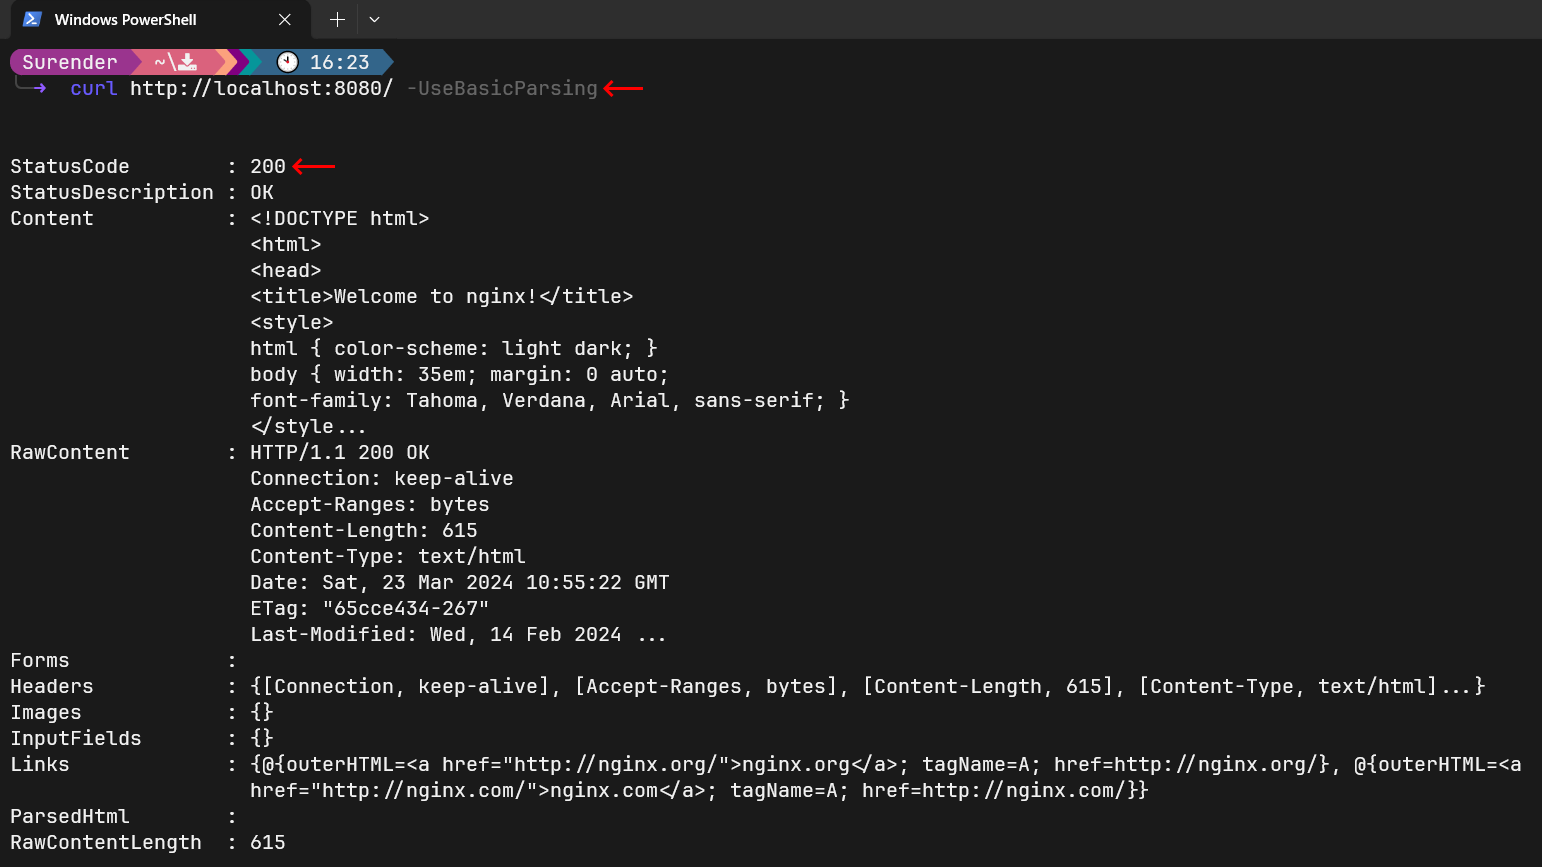
That’s it. The 200 status code means success! The port 80 of Podman container is now mapped with port 8080 on your host system. If you want to map it with a well-known port (any port lower than 1024) on your host system, you need to start the Podman container in rootful mode using podman machine set --rootful command.
Finally, to stop the Podman container named nginx_container, use podman stop nginx_container command. Make sure you supply the right name for container after stop command.
Troubleshooting
While Podman machine initilization, you might see Error: the WSL import of guest OS failed: exit status 4294967295

Or you might see Error: package permissions restore of shadow-utils on guest OS failed: exit status 4294967295

To fix both these errors, run the following commands in the same order in an elevated PowerShell console:
wsl --set-default-version 2
wsl --unregister podman-machine-default
wsl --shutdown
podman machine init
See the following screenshot for a reference:
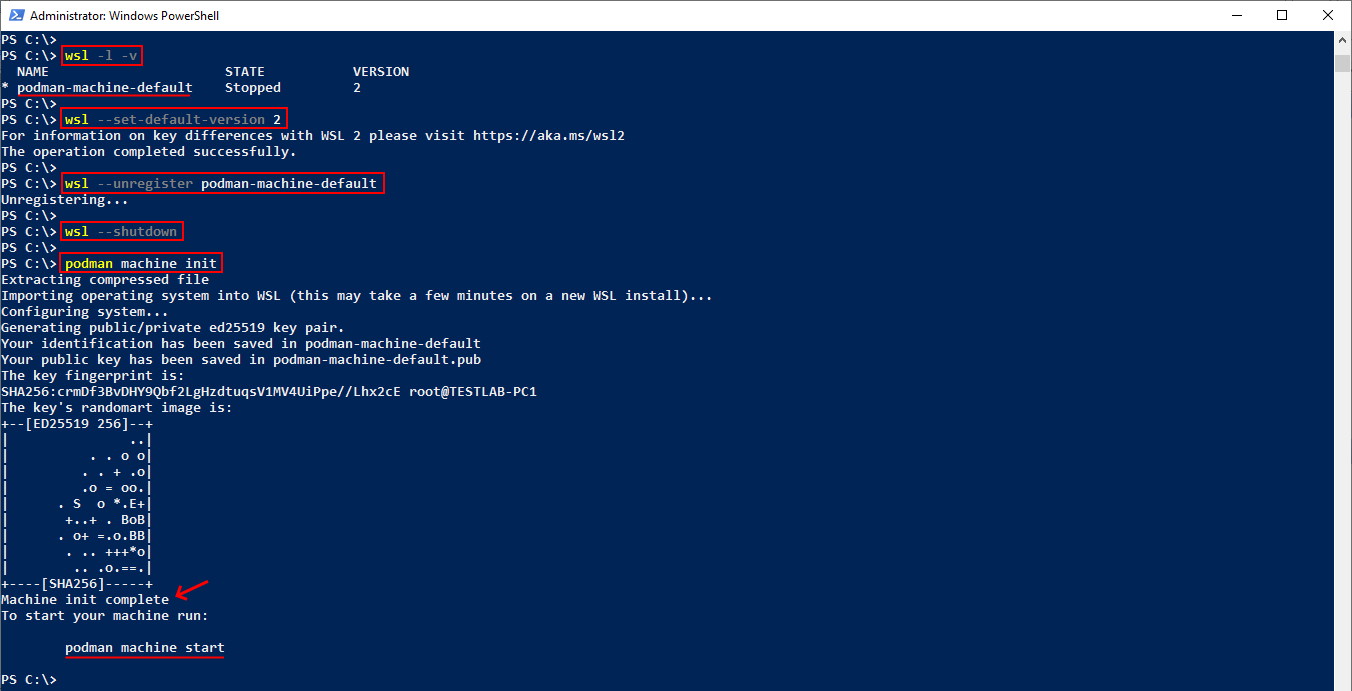
You can see, after running aforementioned commands, the podman machine init command completed successfully in the end. If error still persists, you could try the netsh winsock reset command.