
- February 7, 2022
- Posted by: Surender Kumar
- Categories: Windows 10, Windows 11
Download Windows 10/11 Enterprise Edition
Table of Contents
If you’re looking for a really easy way of downloading Windows 10 or Windows 11 ISO file, the official Media Creation Tool (MCT) is the way to go. If you run this tool directly, it will download the ISO image for the latest version of Windows 10 (or Windows 11) consumer editions such as Home, Education, Professional etc. But what if you want to download the Enterprise edition?
Normally the Enterprise edition of Windows is available to Volume Licensing Service Center (VLSC) and Microsoft Developer Network (MSDN) subscribers only. However, you can run the media creation tool via command-line with some additional switches, to download the Enterprise edition directly – no subscription is needed.
In this article, I will show you step by step how to download the ISO file for Windows 10 or Windows 11 Enterprise edition using media creation tool.
Downloading Windows 10/11 ISO File
To download the latest version of Windows 10 (or Windows 11) directly from Microsoft servers, the first thing you’ll need is the Media Creation Tool. Please note that Windows 10 and Windows 11 have their own version of media creation tool. So, if you want to download the ISO image of Windows 11, you need to download the media creation tool for Windows 11.
In this article, I will download Windows 10 Enterprise ISO file but the steps and command will be same for downloading Windows 11 Enterprise as well. The only difference will be the media creation tool. You can grab the tool for Windows 10 and Windows 11 from following official links:
Once you have the media creation tool downloaded, follow these steps:
-
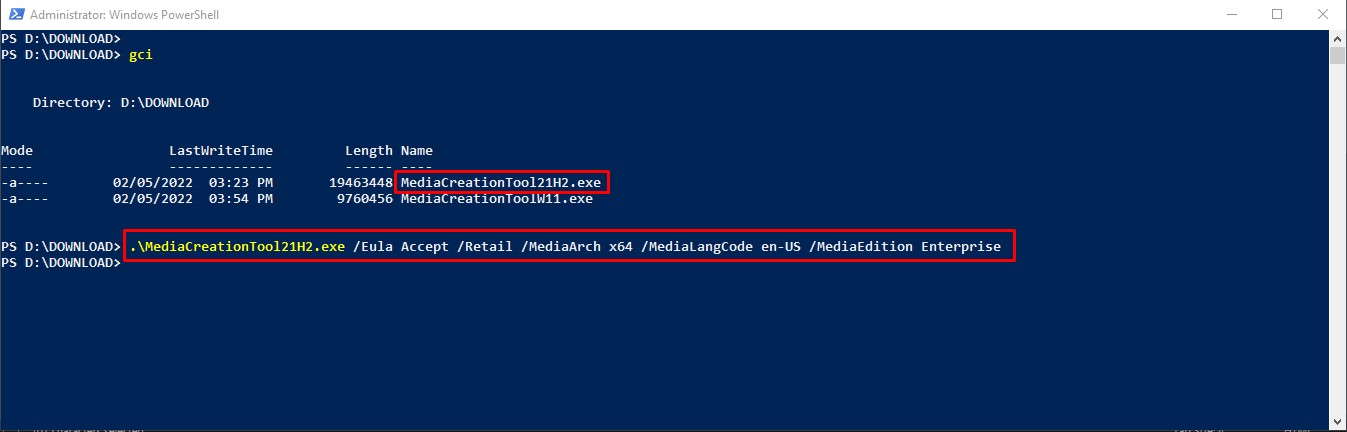
- Launch the Windows PowerShell console.
- Navigate to the folder where you downloaded the media creation tool. On my PC, I have it downloaded to D:\DOWNLOAD.
- Now run the following command:
.\MediaCreationTool22H2.exe /Eula Accept /Retail /MediaArch x64 /MediaLangCode en-US /MediaEdition Enterprise
Where, MediaCreationTool22H2.exe is the media creation tool executable file name (which could change in the future). Brief explanation of other important parameters:
/MediaArch :The architecture you want to download. It can accept x86, x64, or ARM64./MediaLangCode :The OS language tag. The en-US is for English (United States). Read this article to see all language tags./MediaEdition :The edition you want to download. The possible values can be Enterprise, EnterpriseN, Education, EducationN, Professional, ProfessionalN. If you need “Enterprise edition”, you can typeEnterprise(or EnterpriseN). If you need a consumer edition, you can typeProto get a multi-edition ISO file containing Windows 11 Home, Education, and Pro editions along with theirNcounterparts. The “N-edition” does not contain media-related technologies such as Windows Media Player, Skype, Music, Video etc.
This command will launch the
Media Creation Toolfor Windows 10. If you want to download the ISO image for Windows 11 Enterprise, just change the name of executable that you downloaded for Windows 11 and use the command as shown below:.\mediacreationtool.exe /Eula Accept /Retail /MediaArch x64 /MediaLangCode en-US /MediaEdition Enterprise
Now follow the on screen instructions.
- First thing it will ask is the Product Key for Windows 10 (or Windows 11) Enterprise. You can use your product key if you have one. If you do not have any key at this point, you can use the KMS keys mentioned on this official article. After Windows installation using this ISO file, you will need to use your own product key to unlock and activate the right edition for you.
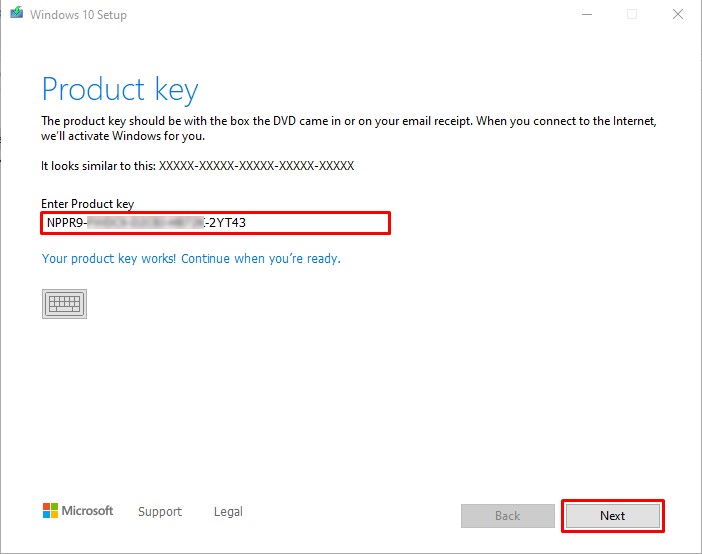

In my case, I am downloading the ISO file for Windows 10 Enterprise. So, I’ll use the my key and click on Next.
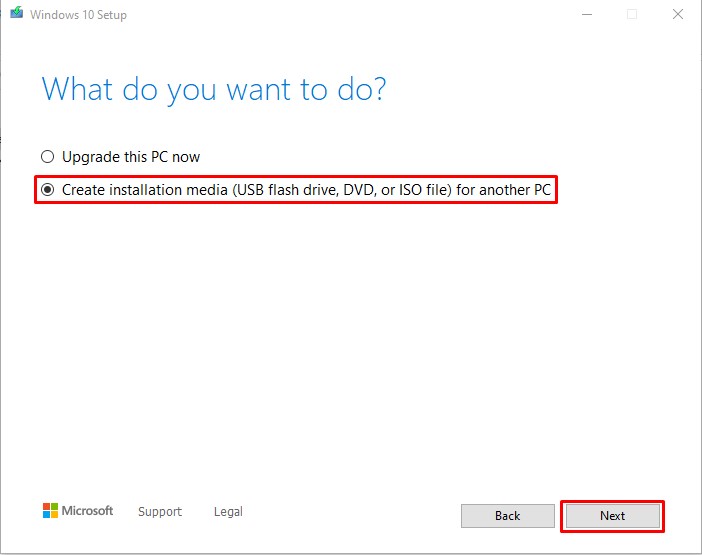
- Now select the option that says
Create Installation Media (USB flash drive, DVD, or ISO file) for another PCand click on Next.
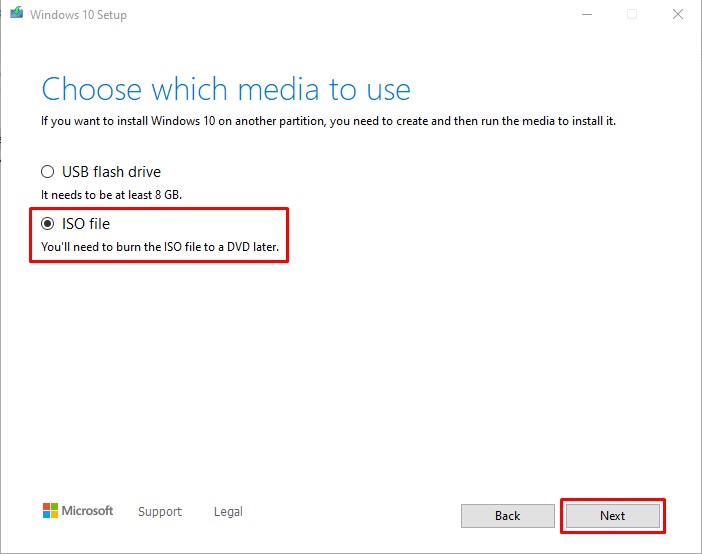
- Now select the second option that says
ISO fileand click on Next. You’ll be prompted to select the path to save the ISO file.
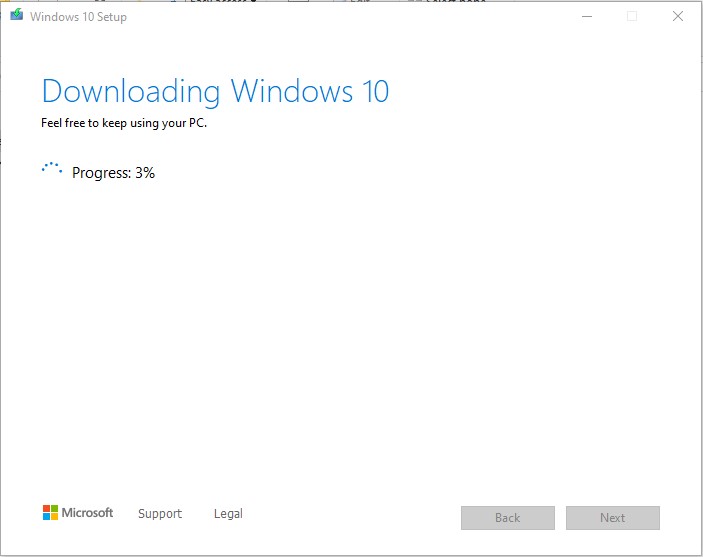
- The media creation tool will now start the download process and it could take a while depending upon the speed of your internet connection.
- Once downloaded, you’ll see the path of your ISO file. Just click on Finish button to close the media creation tool.
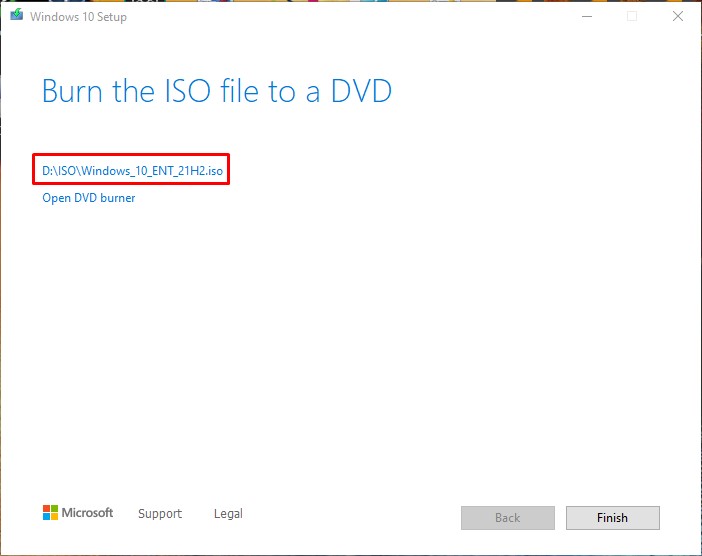
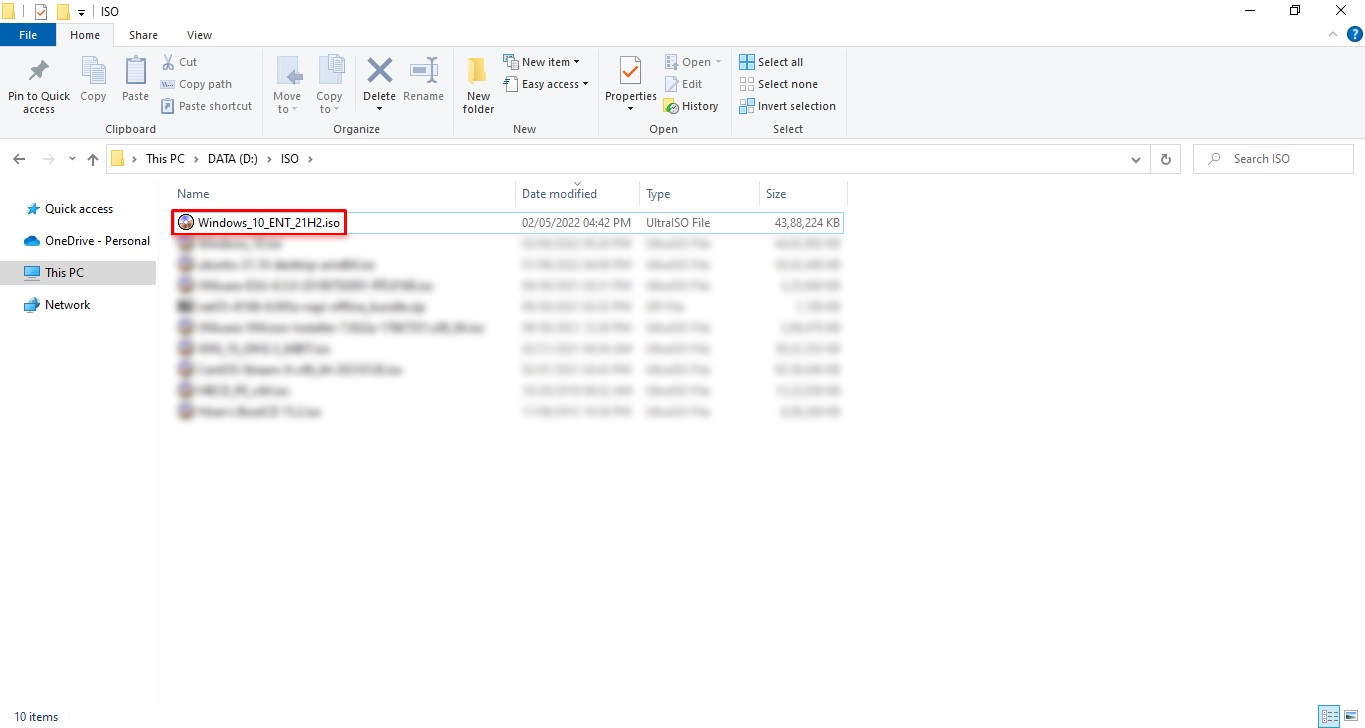
- I saved my ISO file to
D:\ISO\Windows_10_ENT_21H2.iso.
- The ISO file for Windows 10 (or Windows 11) is now ready. You can burn it to DVD or to a USB drive to create the bootable installation media. If you want to learn how to make a bootable USB using ISO file, checkout our Manually Create Bootable USB for Windows article.
If you’re curious to know the contents of the ISO file, continue reading the remaining article.
View the contents of Windows 10/11 ISO file
Did you ever try to identify what is inside the Windows ISO image? You might find yourself in a situation where you must know what version of Windows operating system is inside an ISO before you can burn it to a DVD or extract it onto a USB drive.
In this section, I’ll show you how you can determine the Windows edition and Windows version by looking at the contents of an ISO file. You can use Windows PowerShell which is pre-installed in your Windows OS. You do not need to install any additional program for it.
-
- Launch the Windows PowerShell console with Administrator privilege.
- Run the following command:
Mount-DiskImage -ImagePath "D:\ISO\Windows_10_ENT_21H2.iso"
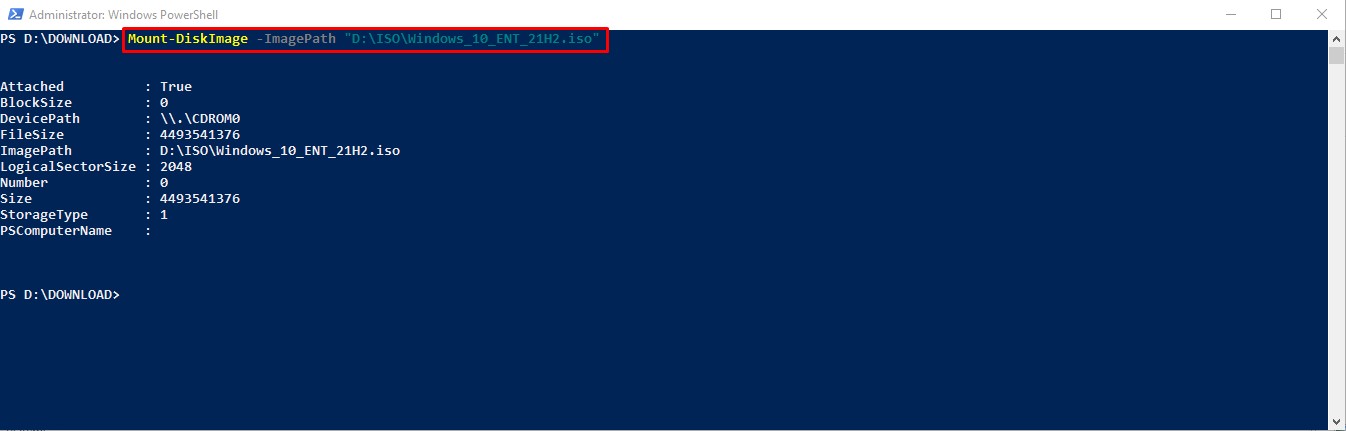
This command will mount the ISO file and you’ll see a new drive in your Computer.
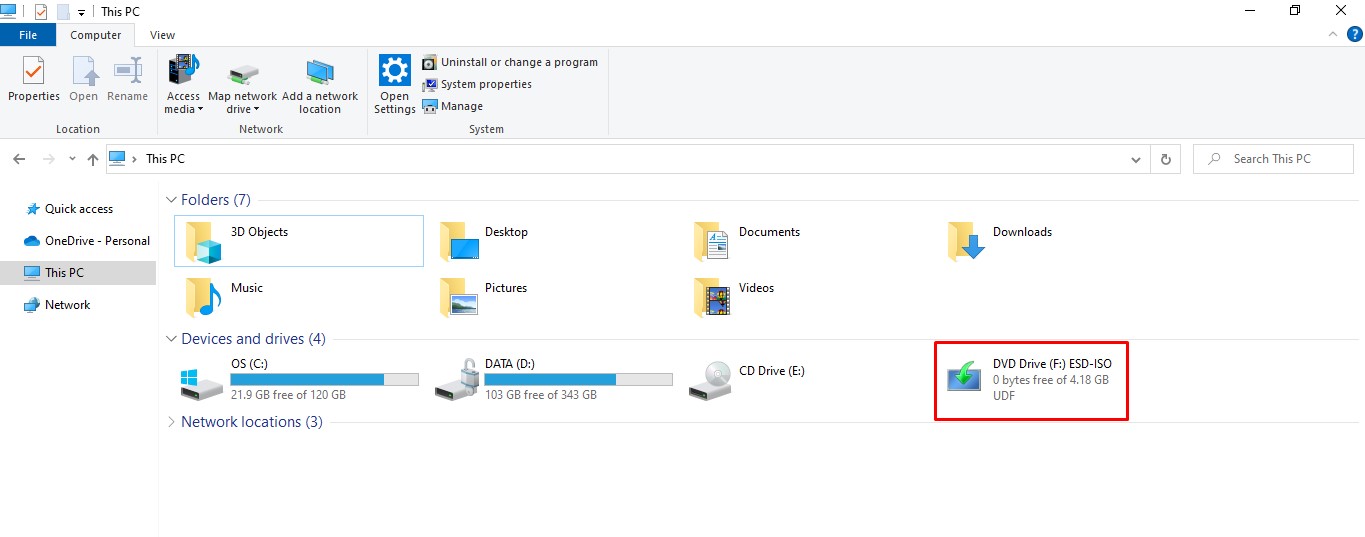
Take a note of the drive letter mounted in your computer. On my PC, I got it mounted as
F:drive. - Now run the following command:
Get-WindowsImage -ImagePath "F:\sources\install.esd" | Format-Table ImageIndex, ImageName
You need to replace the
F:with the drive letter as per your PC. This command will show a list of Windows editions that are available for installation in a nice tabular format with ImageIndex and ImageName columns.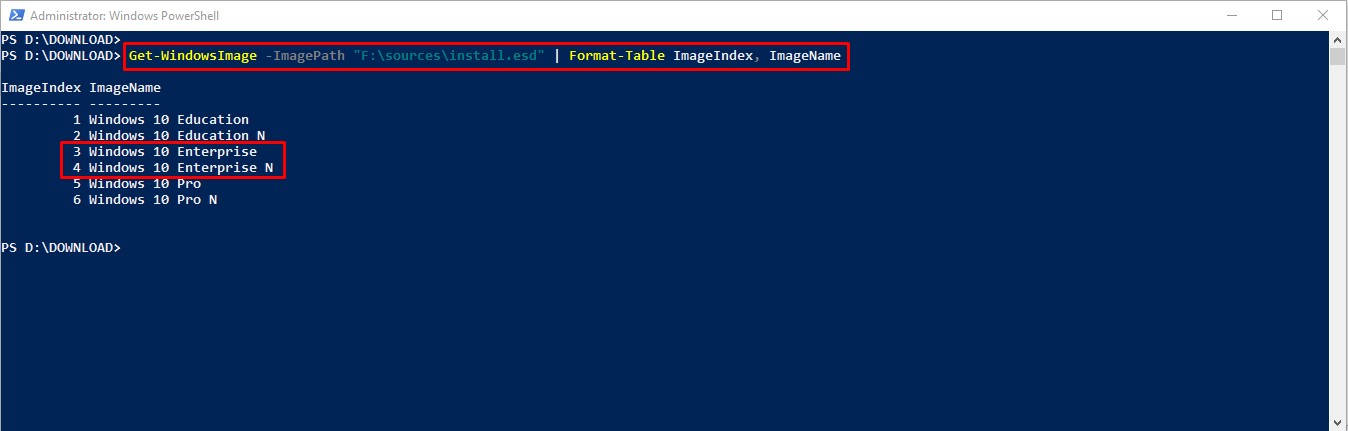
If you get an error that says
The system cannot find the file specified.as shown in the image below, it is possible that your ISO file containsinstall.wimfile instead ofinstall.esd.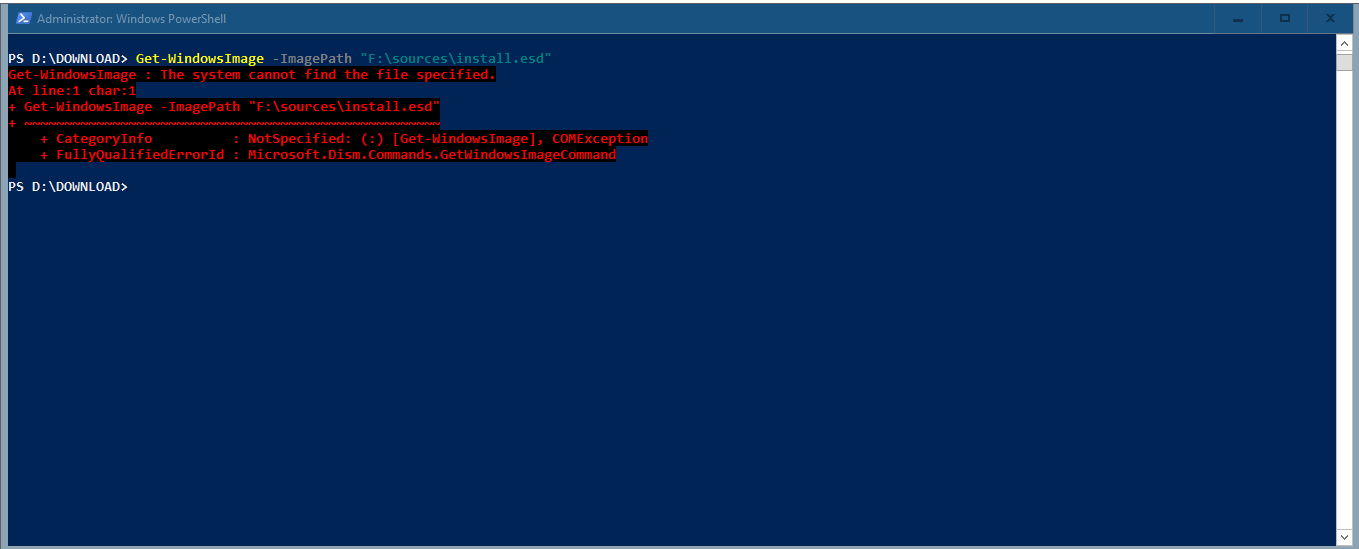
In such case, you need to modify the command as shown below:
Get-WindowsImage -ImagePath "F:\sources\install.wim" | Format-Table ImageIndex, ImageName
- To get more details about a specific edition (e.g., Windows 10 Enterprise) you can use
-Indexparameter and specify the Index number shown by above command.
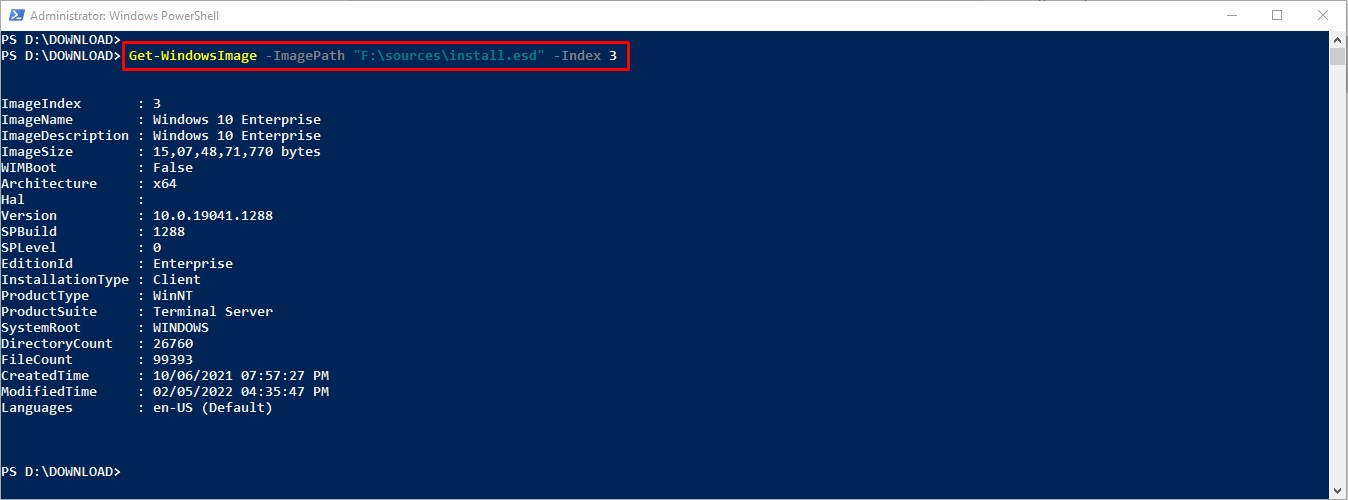
This command will show you the more details (e.g., Architecture, Version, EditionId, Languages etc.) about a particular Windows edition.
- When you’re done, run the following command to dismount the mounted iso file:
Dismount-DiskImage -ImagePath "D:\ISO\Windows_10_ENT_21H2.iso"