
- December 17, 2020
- Posted by: Surender Kumar
- Categories: Tips & Tricks, Windows 10, Windows and Linux
Windows Subsystem for Linux (WSL)
Table of Contents
The Windows Subsystem for Linux (WSL) is an optional feature added by Microsoft in Windows 10 that supports running a Linux environment directly on Windows without having to use traditional virtual machine or dual-boot configuration.
WSL2 is the latest version of Windows Subsystem for Linux offering two main benefits over previous version (i.e. WSL1)
- Increased file system performance
- Supports full system call compatibility
Difference between WSL1 and WSL2
WSL1 used a translation layer to convert Windows system calls to Linux and vice-versa. There is a limited system call compatibility in WSL version 1.
WSL2 now runs a real Linux kernel (built and maintained by Microsoft) inside of a lightweight utility VM. This allows us to run applications such as Docker, FUSE etc. more efficiently with WSL2. You can download and install the WSL2 kernel from following link:
After one-time installation, the future kernel updates will be served along with Windows updates, which means you will get the latest security fixes and kernel improvements without needing to manage it yourself.
The kernel is open-source with its source code available on following GitHub link.
https://github.com/microsoft/WSL2-Linux-Kernel
Requirements for WSL2
To be able to install and run WSL2, your system must be running:
- Windows 10 version 1903 or higher (with Build 18362 or higher) for x64 based systems
- Windows 10 version 2004 or higher (with Build 19041 or higher) for ARM64 systems
To check your Windows version and build, just type “winver” command without quotes in Run dialog and hit enter.
Windows 10 builds lower than 18362 do not support WSL 2.
Installing WSL2 on Windows 10
If you have a supported Windows 10 version, you can follow the steps outlined below to install the WSL2.
- Launch Windows PowerShell console with administrator privilege.
- Type the following commands and hit enter:
dism.exe /online /enable-feature /featurename:Microsoft-Windows-Subsystem-Linux /all /norestart
dism.exe /online /enable-feature /featurename:VirtualMachinePlatform /all /norestart
- Restart your computer to make sure everything is installed properly.
- Now download and install the Linux Kernel from this link: https://aka.ms/wsl2kernel.
- To verify the WSL2 installation, open cmd.exe or PowerShell console and type following command:
wsl --list --verbose
This command is used to display the Name, State, and Version of all the Linux distributions installed on your computer. If you just finished installing WSL2, the command won’t show anything.
- To install any Linux distribution, open Run dialog (Windows key + R), then type “
ms-windows-store:” without quotes and hit enter. This will launch Microsoft Store app. - Click on the search, type “Linux” and hit enter. You will see all the popular Linux apps.
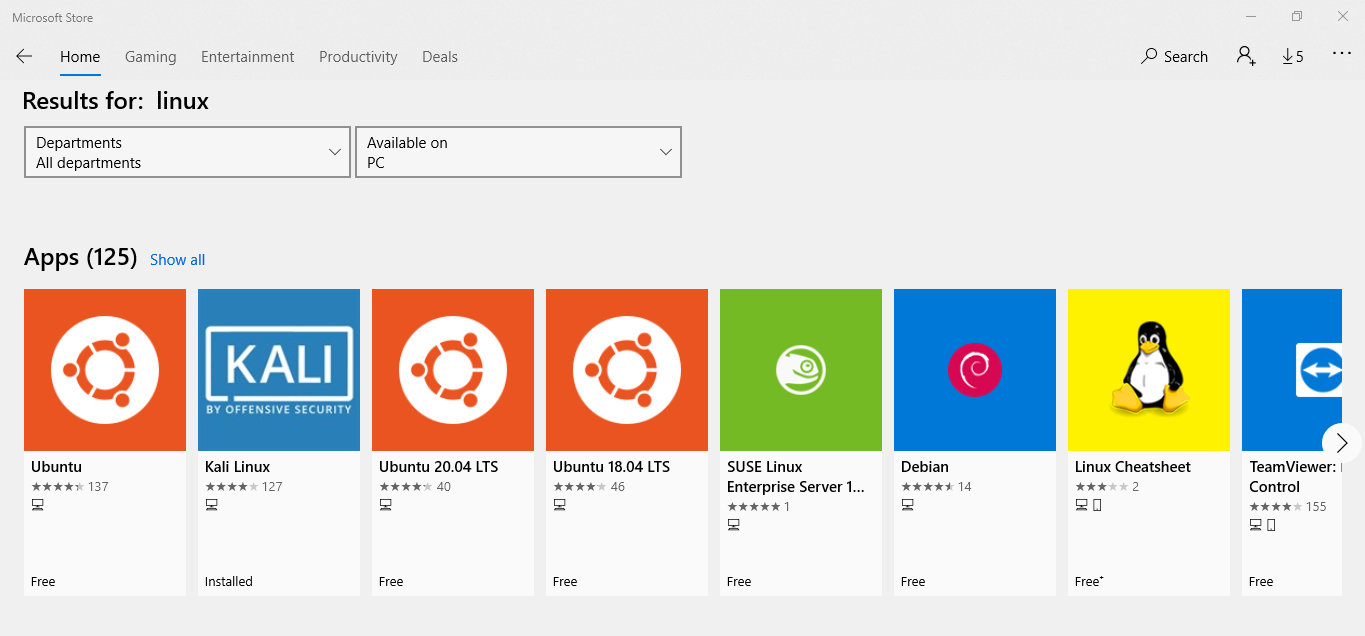
- Select your favorite Linux distribution and click on Install (or Get) button. If it asks you to login with Microsoft account, just click on No, thanks. This will start downloading and installing the selected Linux app.
- To launch the distribution, click on start and search by typing the name of your Linux distribution.
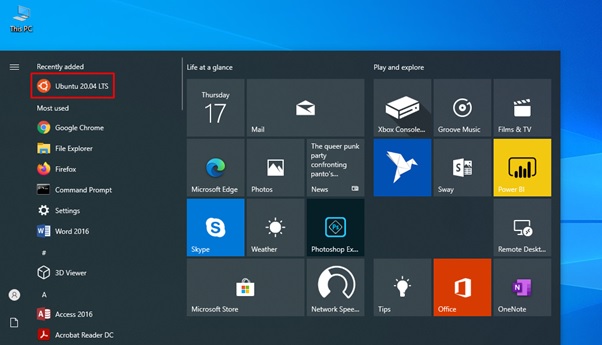
Tip: The most recently installed item will probably be displayed on top of start menu. In my case, it is “Ubuntu 20.04 LTS”
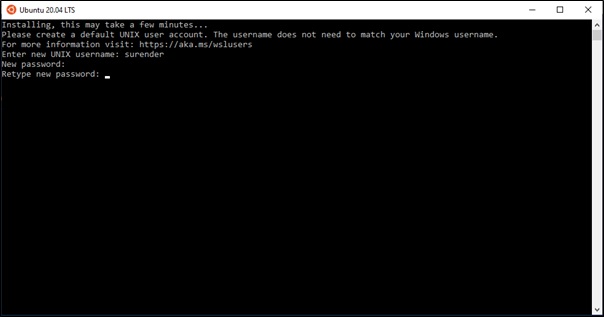
- Click on your Linux distribution name and it will display a terminal window with a text “Installing, this may take a few minutes”. This will happen only first time after installation.
-
- Once done, you will be asked to type a user name and then set a password. After typing password twice, you will be logged in to your Linux environment. Now you can start using your favorite Linux tools.
-
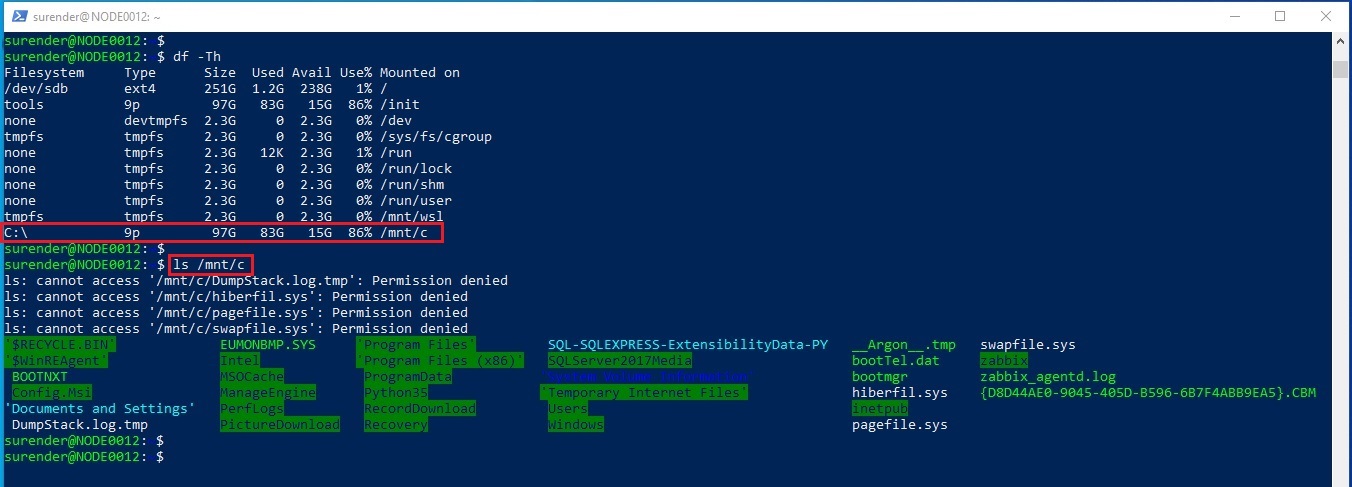
- The good thing is that your Windows C: drive is automatically mounted to /mnt/c directory in Ubuntu. So you can browse and seamlessly transfer the files across Windows and Ubuntu. Take a look at the following image:
Important WSL Commands
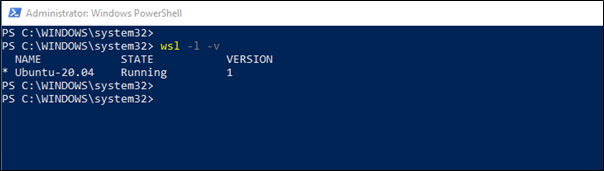
wsl --list --verbose
This command displays Name, State and Version of WSL distributions installed on your machine. The following image shows that I have only Ubuntu-20.04 installed, which is currently in running state and the distribution is in WSL version 1.
If you want to see the running WSL distributions only, use wsl --list --running command.
wsl --set-version Ubuntu-20.04 2
This command will convert the “Ubuntu-20.04” distribution from WSL version 1 to version 2. Your distribution will stop and it might take a while for conversion to complete. To revert it back to version 1, just type wsl --set-version Ubuntu-20.04 1 command and hit enter.
Once the conversion is complete, you can directly start it using wsl -d Ubuntu-20.04 command. 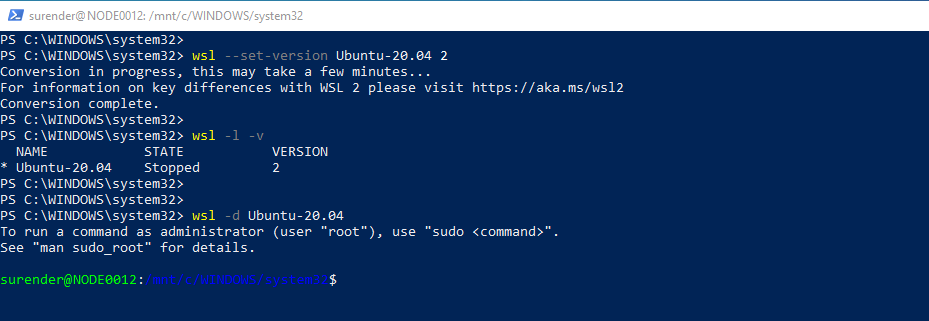
wsl --set-default-version 2
Every Linux distribution you install will be in WSL version 1 by default. This command changes the default WSL version for all new distributions installed to that system to version 2.
wsl --terminate Ubuntu-20.04
This command terminates (Stops) the “Ubuntu-20.04” WSL distribution.
wsl --shutdown
This command terminates all running WSL distributions immediately.
Import any Linux Distro to WSL
To learn more about WSL in detail, checkout Install Windows Subsystem for Linux (WSL) in Windows 11. If you interested in running your favorite Linux distro in WSL but worried that it is not available in Microsoft online store for installation straight away, don’t worry. Read this article to learn how to import any Linux distribution in WSL2 with the help of Docker.