
- January 30, 2018
- Posted by: Surender Kumar
- Categories: Hyper-V, Kali Linux, PowerShell
Setup Kali Linux and Metasploitable in Hyper-V in Windows 10
Table of Contents
Learning Ethical Hacking or Penetration Testing may require you to install Virtual Box on your Windows host OS. For those who don’t know about VirtualBox (or Hyper-V); these are virtualization software that you can use to run virtual machines inside your main operating system. Both of these software do same thing. So, they are not compatible with each other. What I mean is you can run either of these software but not both.
Most of Ethical Hacking tutorials will guide you to setup the lab environment using VirtualBox since this is an open source virtualization software available for all major platforms such as Microsoft Windows, Apple Macintosh and Linux totally free of cost. However, if you are on Windows (Education, Professional, or Enterprise) and using Microsoft’s proprietary virtualization software Hyper-V for something important and do not want to remove it. Since Hyper-V and VirtualBox both cannot work at the same time, you would most probably want to stick with Hyper-V for setting up your Ethical Hacking lab environment. This article will help you in such scenario.
Lab Overview
In this test lab, we will setup two virtual machines. The first one will be the attacker machine (kali linux) and the second one will be victim machine (metasploitable2).
Enable Hyper-V Feature
If you have not already enabled Hyper-V, just enable it via single command. Just open an elevated Windows PowerShell console and enter the following command:
Enable-WindowsOptionalFeature -Online -FeatureName Microsoft-Hyper-V –All
This will take a while and install all features related to Hyper-V. Restart your computer if prompted.
Create NAT Network
The first step is to create an Internal virtual switch. This switch will not be connected to a physical NIC of the host. Instead, the host OS will have a virtual NIC that will connect to the virtual switch. At the end, the virtual machines connected to the internal virtual switch will be able to talk to the host OS, but cannot talk to the external network the host OS is connected to. Open an elevated Windows PowerShell console and enter the following command:
New-VMSwitch -SwitchName "NATSwitch" -SwitchType Internal
The next step updates the virtual NIC that connects the host OS to the internal virtual switch. The following command will assign an IP address to this virtual NIC, and this IPv4 address will act as default gateway for NAT network that we are creating.
New-NetIPAddress -IPAddress 192.168.10.1 -PrefixLength 24 -InterfaceAlias "vEthernet (NATSwitch)"
The last step is to configure the network address of the NAT network that will run on the virtual switch. This essentially is the private address range used by the virtual machines connected to virtual switch. Make sure that the IPv4 address in the previous step must be in this range.
New-NetNat -Name "NATNetwork" -InternalIPInterfaceAddressPrefix 192.168.10.0/24
This is it. Any virtual machine that connects to virtual switch will use an IPv4 address in the 192.168.10.0/24 address range. The machines will route to the LAN via the host OS’s NIC and NAT exactly the same way that your laptop accesses the Internet via the router in your home.
One of the most important thing to note is that there is no DHCP functionality in the virtual switch like VirtualBox. If you want DHCP service so that all virtual machines connected to this virtual switch automatically obtains the IP configuration, then you must build a DHCP server virtual machine and connect it to the same virtual switch. Otherwise, if you do not worry about DHCP, you can assign static IP addresses to the virtual machines. In our Ethical Hacking lab setup, we will be using only two virtual machines and we can easily configure static IP on both of them.
Setup Kali Linux Virtual Machine
Firstly we will setup our Kali Linux virtual machine that will act as attacker device.
Downloading Kali
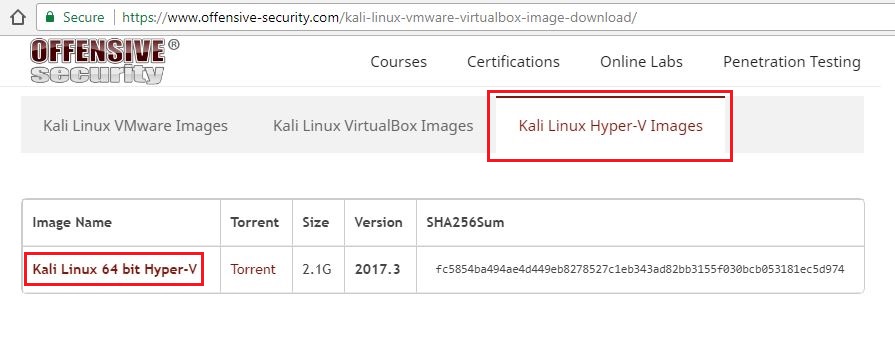
You need to download the virtual disk image for Hyper-V. You can download the Kali Linux image that is ready to be used right out of box saving you lot of time from installing it from scratch. Visit the offensive security link and go to Kali Linux Hyper-V Images tab, then click the download link as shown in following image.
 After downloading, you will get a 7z archive. Just extract the archive to your preferred location on disk. I would like to keep mine in D:\VM\Hyper-V\kali-linux-2017.3.
UPDATE 18-March-2019: Since Offensive Security website no longer offers Kali Hyper-V image, I have uploaded Kali version 2017.3 image to my Google drive just in case someone want to download it. After downloading the zip file, extract it, and import the Kali VM.
Importing Kali VM
- Click Start button, type Hyper-V Manager. Launch the Hyper-V Manager from there.
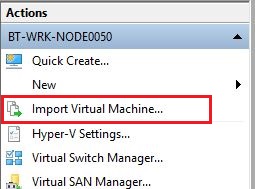
- In the Action page, click Import Virtual Machine link. This will launch Import Virtual Machine wizard. Click Next.
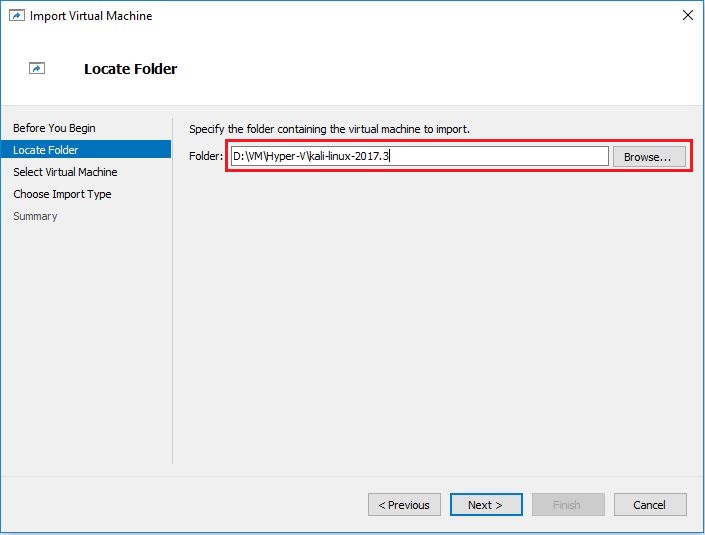
- In Locate Folder screen click Browse and select the location where you extracted the downloaded file and click Next.
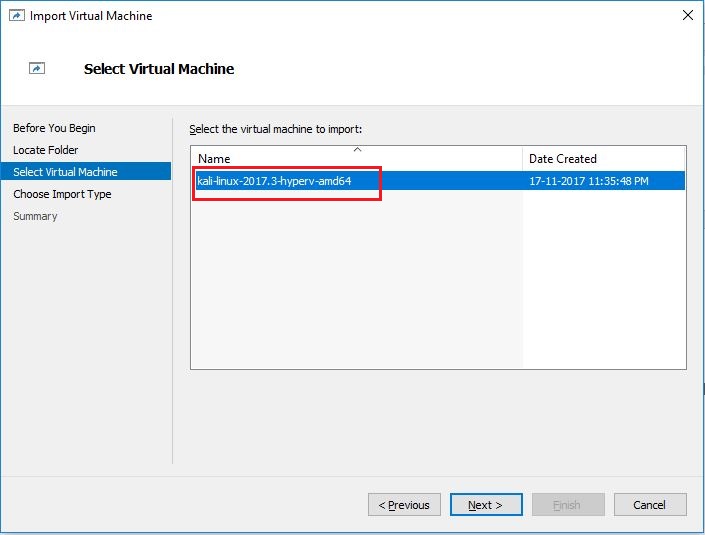
- Now select the name of virtual machine you want to import and click Next.
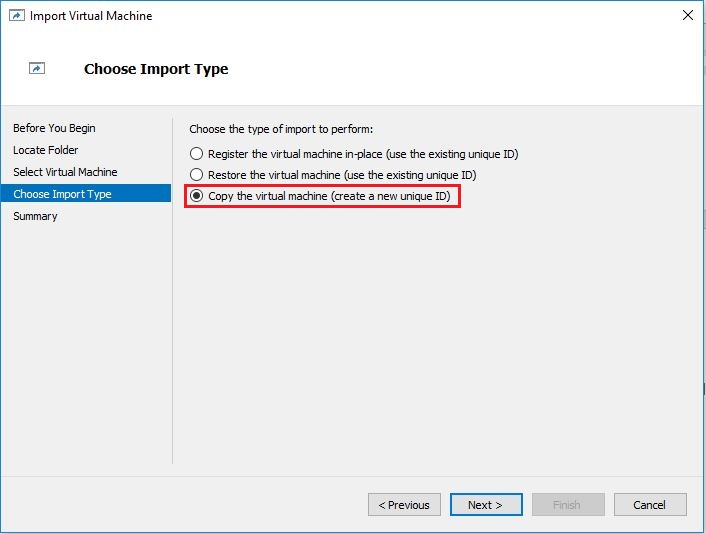
- On Choose Import Type screen, select Copy the virtual machine
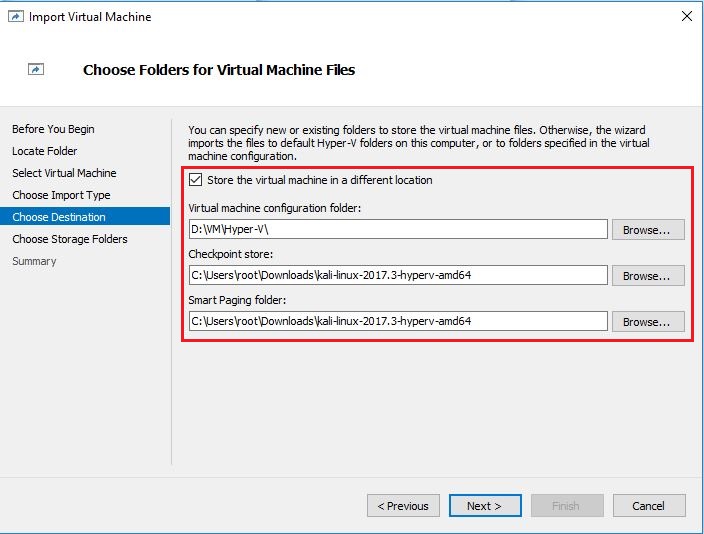
- On Choose Destination screen, click the checkbox next to Store the virtual machine in a different location. Here you can select your preferred location for VM.
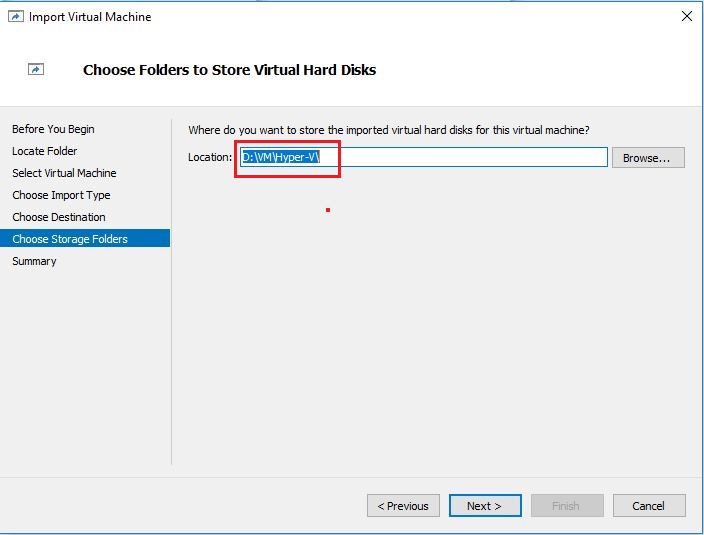
- Now choose storage folders to store Virtual hard disk of imported machine.
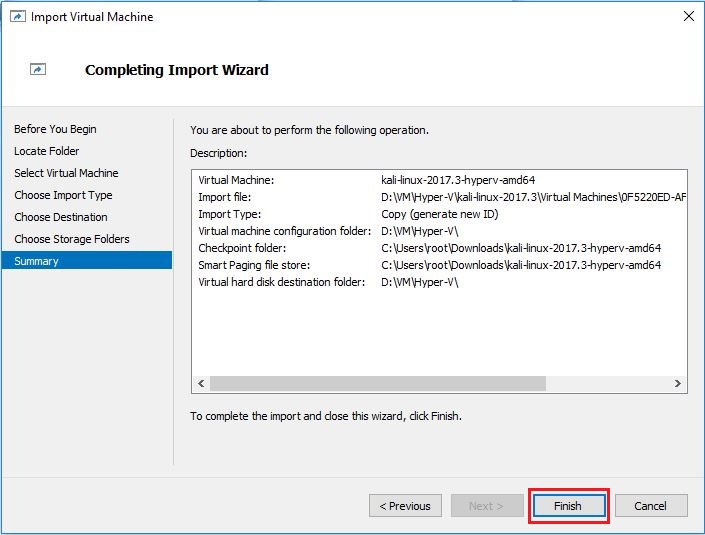
- In summary screen, verify your settings and click Finish button to start the import.
- After import is successful, you will see Kali linux virtual machine in Hyper-V Manager.
Connecting Kali VM to NAT Network
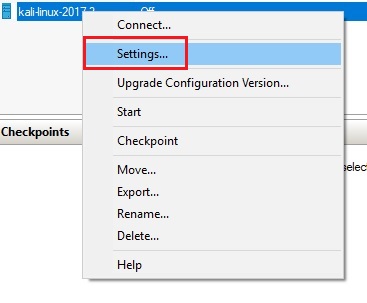
- In Hyper-V Manager, right click Kali virtual machine and select Settings from context menu.
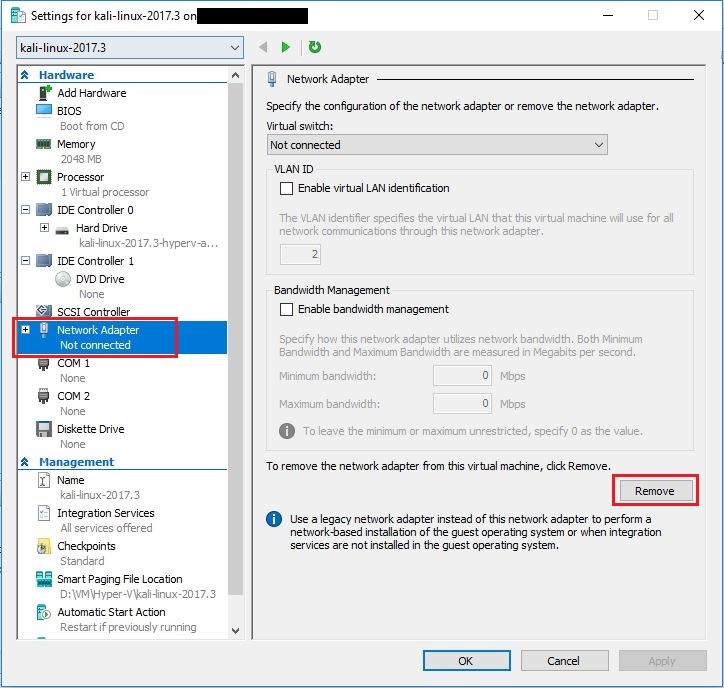
- Select Network Adapter from the Hardware list in the left and click Remove button and then click Apply button but don’t click OK yet.
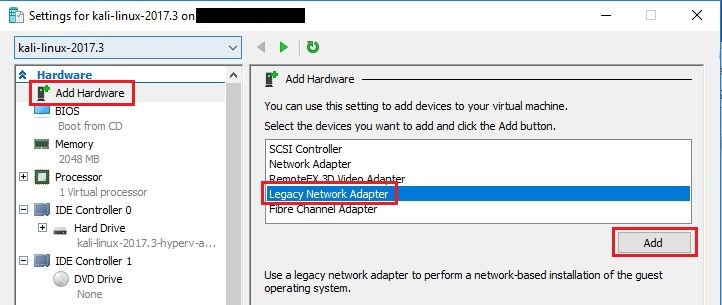
- Select Add Hardware option on top of left menu, select Legacy Network Adapter and click Add.
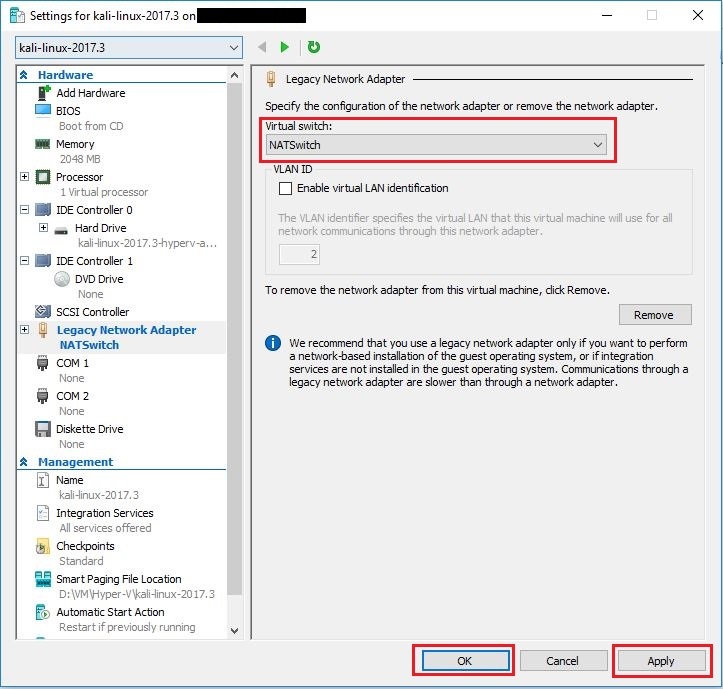
- As soon as you click Add button, you will be taken to Legacy Network Adapter settings. Under Virtual Switch dropdown, select NATSwitch we created above, click Apply and then OK.
Now, your Kali machine is connected to NAT network and ready to be used.

Configuring Static IP in Kali VM
After booting Kali Linux, login using following credentials:
Username: root
Password: toor
After login, click on Network icon and select Wired Settings
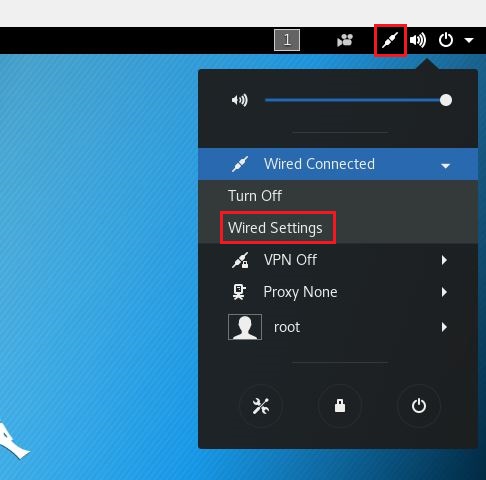
Click on gear icon against Wired network and then select IPv4 tab. Here you can configure static IP as per network range you selected while creating NATNetwork and click Apply button on top right corner.

You will notice that your Kali machine can now connect to internet via NAT and you are good to go.

Tip: Checkout the best USB WiFi adapters supporting Aircrack-ng, Monitor mode and Packet injection in Kali Linux.
Setup Metasploitable 2 Linux Virtual Machine
Now that we have configured our attacker machine (Kali Linux), it is time to setup the victim machine (Metasploitable).
Downloading Metasploitable VM
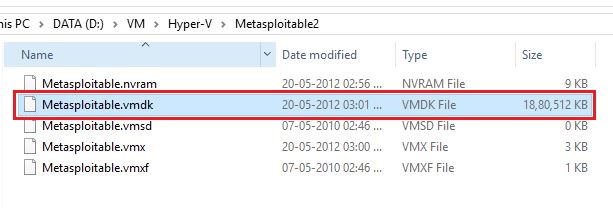
Metasploitable is a virtual machine running Ubuntu Linux that is intentionally designed vulnerable to carry out attacks while learning penetration testing. It is available for download on Rapid7 website. You need to fill your basic information before you can download it. You will get a zip file after download gets finished. If you extract it, you will notice that the file format is .vmdk.
For those who don’t know, let me explain a bit about .vmdk file.
VMDK is a virtual machine disk file format which is natively used by VirtualBox and Vmware (another virtualization software). Since we are using Hyper-V (instead of VirtualBox and Vmware), we will have to convert this .vmdk file to .vhd or .vhdx (native file format used by Hyper-V). This is not that difficult. Fortunately, there is a free tool called Microsoft Virtual Machine Converter 3.0 which can convert these file formats to one-another. You can download if from Microsoft website.
Update: Microsoft Virtual Machine Converter is now deprecated so you can use a free tool called SolarWind V2V converter to convert the files.
Converting Metasploitable VMDK to VHD
After downloading and installing Microsoft Virtual Machine Converter, follow these steps to convert the file:
- Open an elevated PowerShell console
- Use the following command to import the MVMC module:
Import-Module "C:\Program Files\Microsoft Virtual Machine Converter\MvmcCmdlet.psd1"
- Prepare the source path with vmdk disk and the destination path. I extracted my Metasploitable VM on source path “D:\VM\Hyper-V\Metasploitable2\Metasploitable.vmdk” and I want to store the converted file in same location. So, my command would be something like shown below:
ConvertTo-MvmcVirtualHardDisk -SourceLiteralPath "D:\VM\Hyper-V\Metasploitable2\Metasploitable.vmdk" -DestinationLiteralPath "D:\VM\Hyper-V\Metasploitable2\" -VhdType DynamicHardDisk -VhdFormat Vhd
Command description:
SourceLiteralPath: It is the location of the .vmdk file
DestinationLiteralPath: It is just the path to new .vhd (or .vhdx) disk
VhdType: You can use FixedHarddisk or DynamicHarddisk
VhdFormat: The format of disk can be vhd or vhdx
- Copy the above command and paste it in PowerShell console and hit enter. If everything goes fine, you will see progress bar that says Converting drive.

- It will take some time for conversion and at the end you will see success message as shown in below image

Creating Metasploitable VM
- Open the Hyper-V Manager
- Go in the right Pane Actions and click New – – > Virtual Machine. A new virtual machine wizard will open up.
- On first screen, click Next.
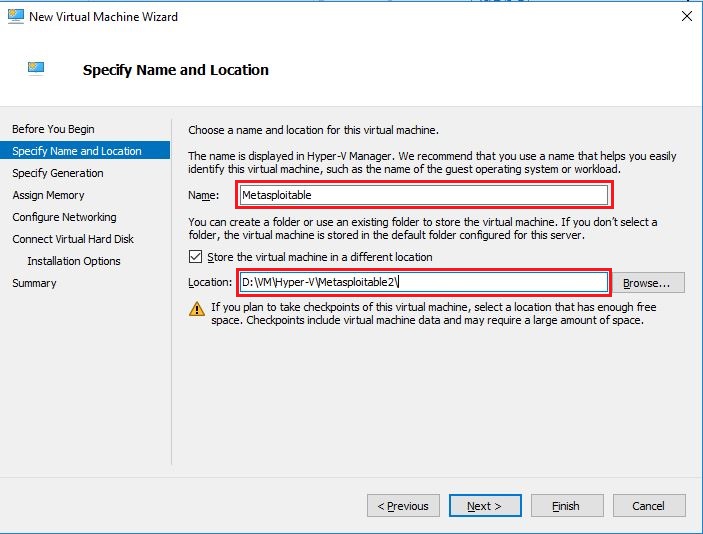
- On next screen specify name and location of virtual machine
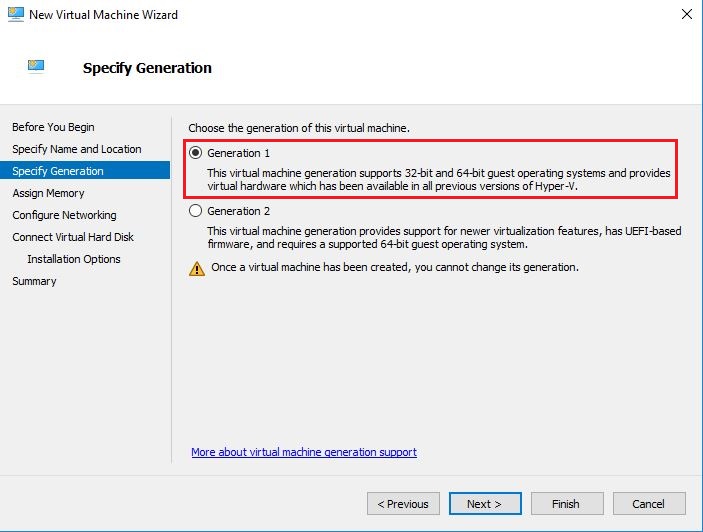
- On Specify Generation screen, leave it default (Generation 1) and click Next.
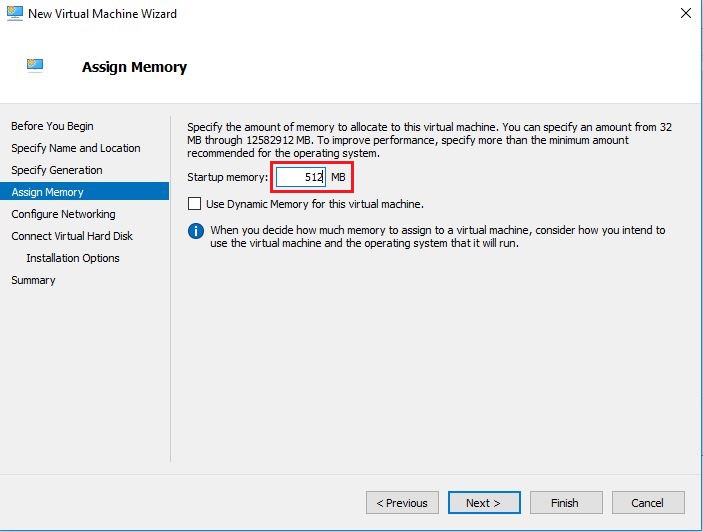
- On Assign memory screen, enter 512 to assign 512MB of memory, clear the checkbox against Use dynamic memory and click Next. Since Metasploitable is just command based VM, 512MB is enough for this.
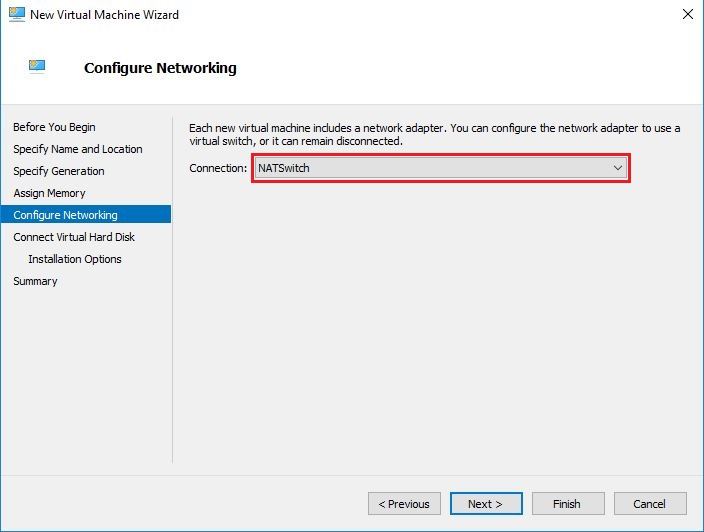
- On Configure Networking screen, select NATSwitch (we created earlier) from dropdown list and click Next.
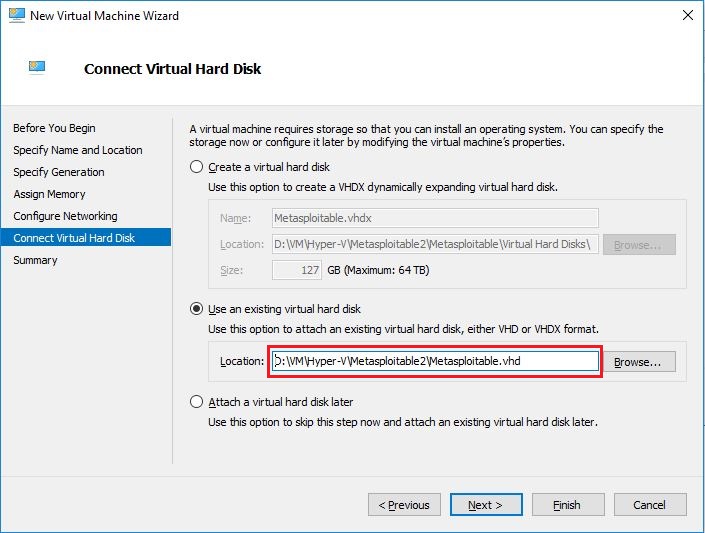
- This is the main step. On the Connect Virtual Hard Disk screen, check the radio button against Use an existing virtual hard disk and then browse to select the virtual hard disk file we just converted via PowerShell command and then click Next.
- On Summary screen, check your settings and click Finish to create the Metasploitable virtual machine.
Connecting Metasploitable VM to NAT Network
Follow exactly the same process as mentioned in Kali Linux section. First remove the existing Network adapter and then add the Legacy Network Adapter.
Configuring Static IP in Metasploitable VM
After creating & connecting Metasploitable VM to NAT Network, start it and login via following credentials:
Username: msfadmin
Password: msfadmin
Since Metasploitable just works with command-line, you will need to set the static IP configuration using commands. Follow these steps:
- Use the following command to open main config file:
sudo nano /etc/network/interfaces
This will prompt for root password, just enter msfadmin and hit enter.
- When the file gets opened, change this:
auto eth0
iface eth0 inet dhcp
To this:
auto eth0
iface eth0 inet static
address 192.168.10.11
netmask 255.255.255.0
network 192.168.10.0
broadcast 192.168.10.255
gateway 192.168.10.1
dns-nameservers 8.8.8.8
Make sure you adjust these numbers according to address range you selected while creating NATNetwork. At the end, your config file should look like this:
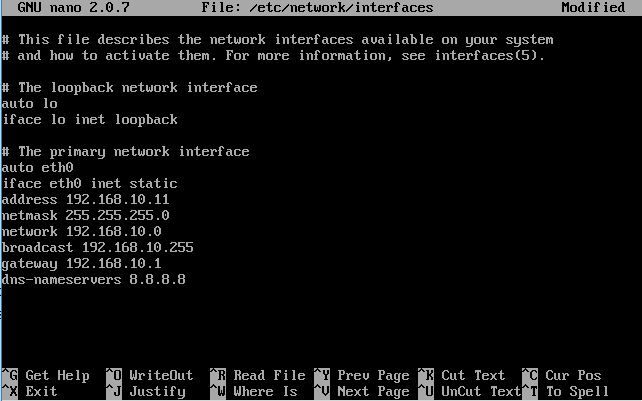
To save and close the File, press Ctrl + X keys. It will prompt you to save the modified file. Just type y and hit enter twice.
- Now you need to restart the networking services for new IP settings to take effect. You can do this by following command:
sudo /etc/init.d/networking restart
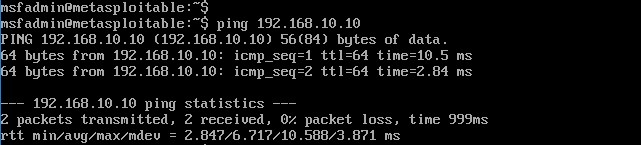
That is it. You can now verify the connectivity of both Kali VM and Metaspolitable VM by Ping.

Congratulations. You just finished setting your Lab environment for Ethical Hacking and Penetration testing on Windows 10 using Hyper-V.
Very informative, Thanks for clearing my doubt.
Thanks.
Awesome mate.
Very informative…
Thank you very much
I was struggling with NAT part. Your article helped me to fix this.
Thank you very much.
Thank you for writing. I am glad I could help.
I believe I followed all the above steps correctly for metasploitable but I have no eth0. It was not present in ifconfig -a even before configuring /etc/network/interfaces. Any ideas why I may only have lo and no eth0 on a default spin-up?
Hi there, Maybe you could try stopping the Metasploitable VM. Then remove the existing adapter and try adding Legacy network adapter once again.
If still does not work, tell me what version of Windows you are using.
Thanks! Ran into the same issue and this worked.
Glad to know that 🙂
Please feel free to share the article with others.
Thank you very much, very helpful. I have the same problem like above(no eth0), and I solve it by exchange network setting of “network adapter” to “legacy network adapter”?as you say?. Hope to highlight this issue to help others who like me.
Secondly, offensive security do not offer the hyper-v image now, it’s ok but disappointed.
Thank you for pointing that out. I have updated the article and included a Google drive download link for Hyper-V image just in case someone need it.
Thanks a million for posting this instructional and informative link…greatly, greatly, greatly appreciated!! I can now continue with more learning. You have no idea how much you’ve helped me. Thank you again!
Glad to know I could help you. Please like & subscribe me on social media.
YouTube: https://www.youtube.com/techtutsonline
Facebook: https://www.facebook.com/techtutsonline
Twitter: https://twitter.com/techtutsonline
Awesome article.
excellent work! tnx
Brilliant! Solved my setup issues. Thanks!!
Glad to hear that!
Thank you for the tutorial. I followed these steps and sudo etc/init.d/networking returns:
/etc/network/interfaces:2: misplaced option
ifdown: couldn’t read interfaces file “/etc/network/interfaces”
/etc/network/interfaces:2: misplaced option
ifup: couldn’t read interfaces fie “/etc/netowrk/interfaces
Looks like your interfaces config file has some problem. The error indicates the line # 2 of
/etc/network/interfacesfile has the error.Microsoft Virtual Machine Converter has been deprecated. I recommend StarWindV2V Converter. It is free and easy to use. Everything else was spot on, thank you.
You’re right. I used StarWind V2V converter a while ago but forgot to update the post. I have updated the post now. Thank you for the suggestion.
Yeah, had the same issue, looks like the second line is missing a # to denote a comment.