
- January 13, 2022
- Posted by: Surender Kumar
- Categories: PowerShell, Windows Server
Manage Network Adapter Settings via PowerShell
Table of Contents
In this article, I will cover How you can manage network adapter settings completely via PowerShell whether it is running a Windows Server OS or a client OS (Windows 10 or Windows 11).
Setting Static IP, Subnet Mask and Default Gateway
To setup the IP configuration and to make your machine ready for network, follow these steps.
Use the following command to list all the network adapters available on your machine.
Get-NetAdapter | ft ifIndex, Name, Status -Auto
Just note the ifIndex number or Name of interface that you want to configure (see the following image for reference).
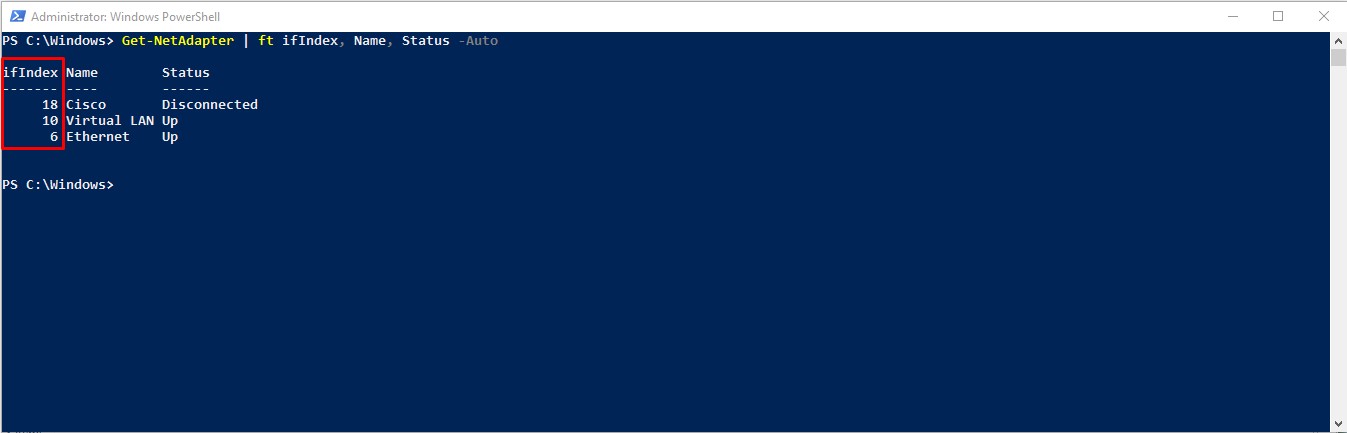
I will choose the interface with index 6(Ethernet adapter) to configure. Now run the following command to set IP address, subnet mask, and default gateway:
New-NetIPAddress -InterfaceIndex 6 –IPAddress 192.168.1.100 -DefaultGateway 192.168.1.1 -PrefixLength 24
Please modify the parameter values as per your requirements.
Setting DNS Resolving Servers
To set the DNS server addresses, run the following command:
Set-DNSClientServerAddress –InterfaceIndex 6 –ServerAddresses 192.168.1.2,192.168.1.3
Please note that you can provide multiple IP addresses (in comma-separated format) with -ServerAddresses parameter.
Managing Network Adapter via PowerShell
There are a whole lot of things related to network adapters you can do with PowerShell. If you’re interested in learning more, you can continue reading the remaining article.
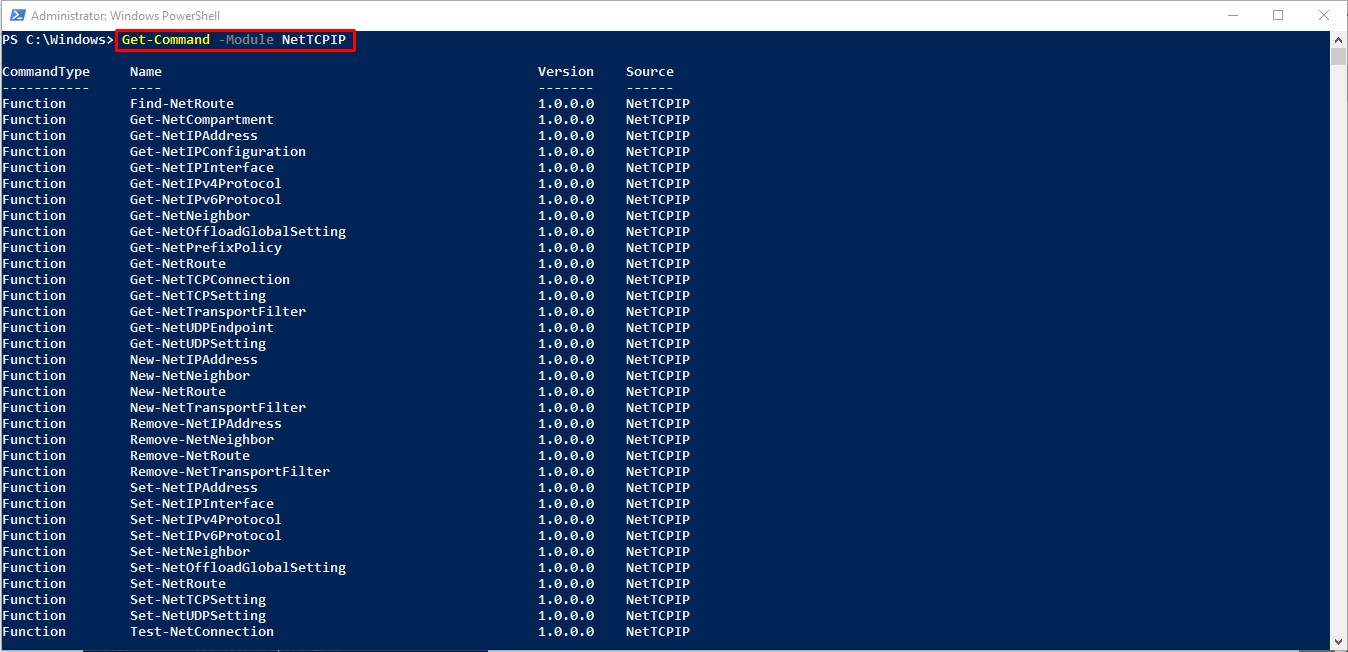
PowerShell version 3.0 introduced a built-in NetTCPIP module which provides various commands to manage your network settings. To see all the commands related to NetTCPIP module, you can use the following command.
Get-Command -Module NetTCPIP
You will see a list of all the commands that you can use to manage TCP/IP settings on your machine (see the following image for reference).
Covering all the commands is beyond the scope of this article but I will show you the most useful commands. You can experiment with other commands on your own.
To see all the commands related to NetAdapter, you can use the following command.
Get-Command -Noun NetAdapter
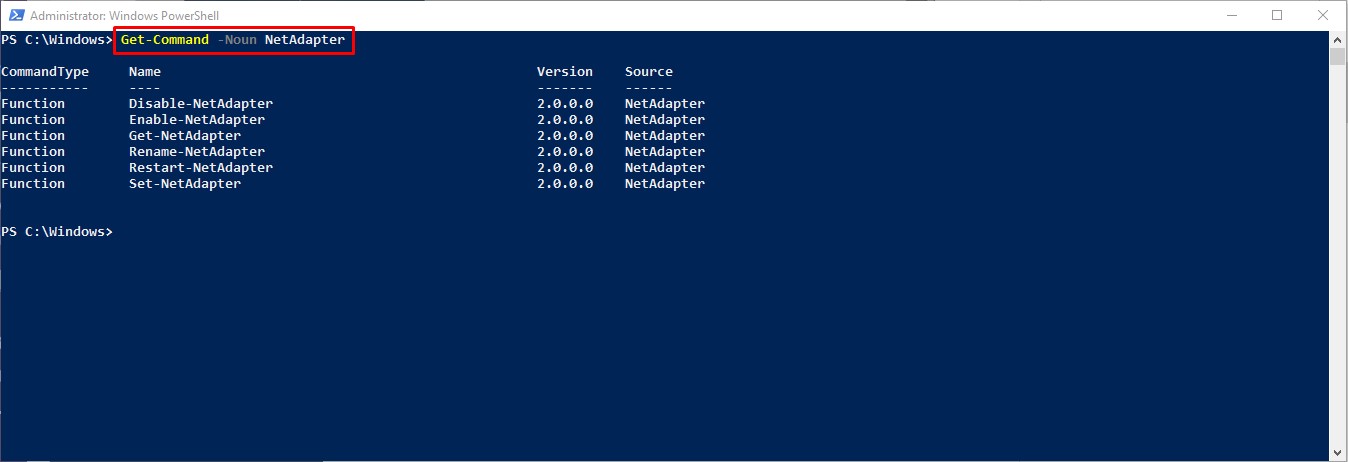
These commands help you perform various operations on network adapters. The commands are self-descriptive but you can use Get-Help command to get a detailed help about each (e.g., Get-Help Get-NetAdapter -Detailed).
Now, I will list a few important commands along with their use case:
View Physical and Active Network Interfaces only
Get-NetAdapter -Physical | ? {$_.Status -eq "Up"}
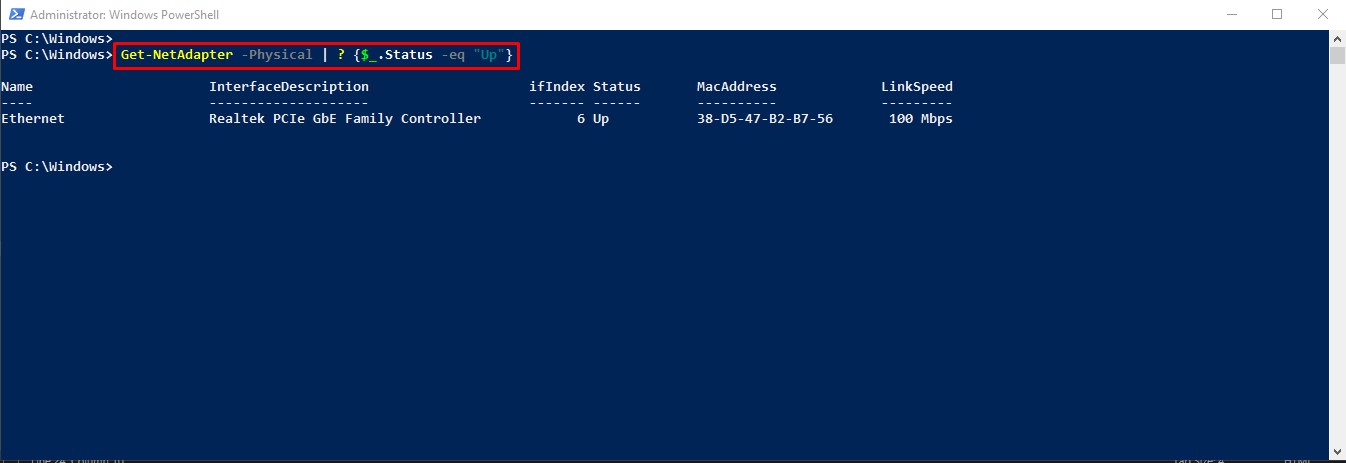 This command shows the Active (Enabled) and Physical network interfaces only. If you want to see the virtual interfaces too, just remove the
 -Physical parameter.
Disable/Enable the Network Interface
Get-NetAdapter -InterfaceIndex 10 | Disable-NetAdapter
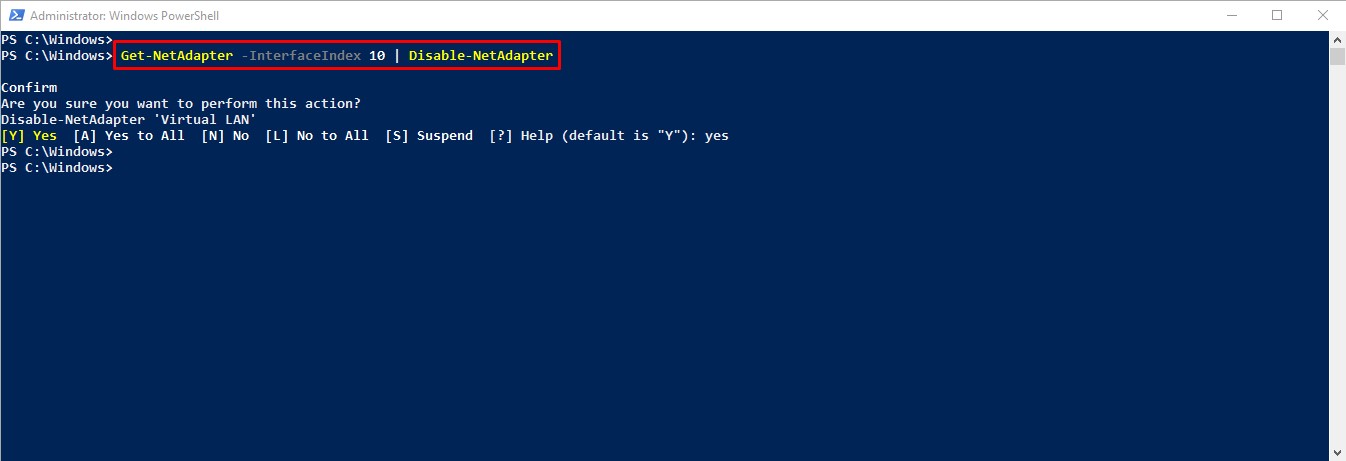 This command disables the specified network interface (interface with index “10” in this example). It requires you to type
 Yes to confirm before actually disabling the interface.
To enable the network adapter, you can use Get-NetAdapter -InterfaceIndex 10 | Enable-NetAdapter command.
Show TCP/IP Configuration of Network Interface
Get-NetIPConfiguration -InterfaceAlias Ethernet
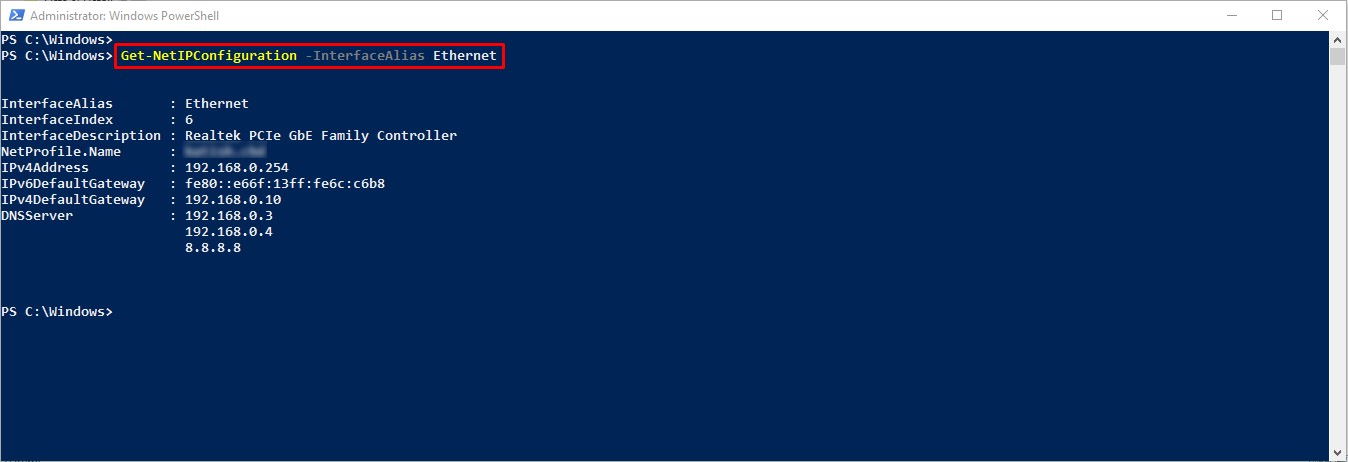 This command displays a brief information about the specified interface (interface with alias “Ethernet” in this example). If you need to see the detailed information, you could add
 -Detailed parameter at the end of command.
View IPv4 Address only
(Get-NetAdapter -ifIndex 10 | Get-NetIPAddress).IPv4Address
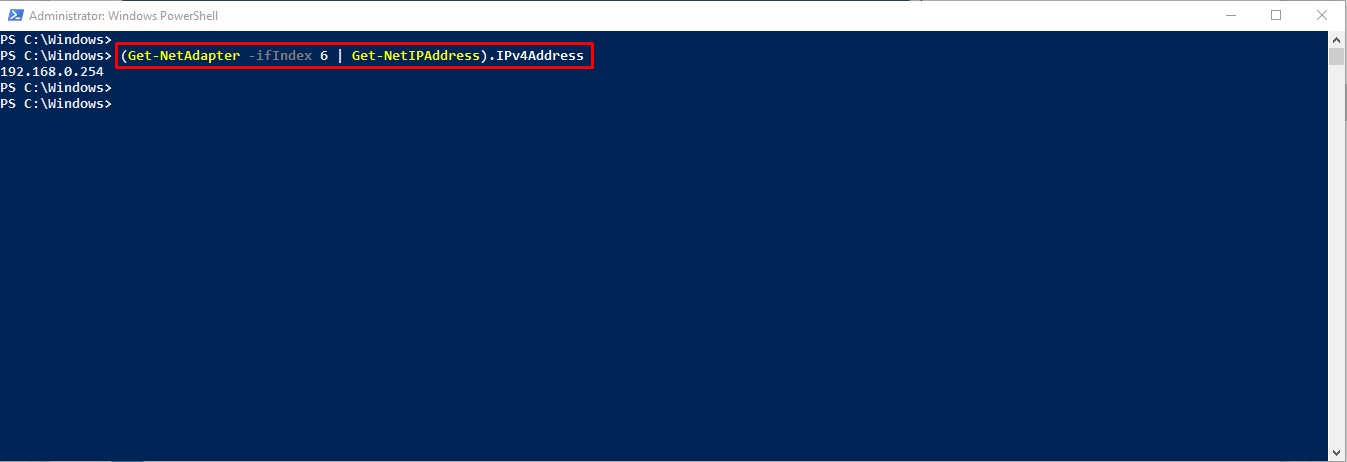
This command displays the IPv4 address for the specified interface (interface with index “10” in this example).
Disable/Enable DHCP on Network Interface
Set-NetIPInterface -ifIndex 10 -Dhcp Disabled
 This command disables the DHCP protocol on specified interface (interface with index “10” in this example).
To enable the DHCP on interface, you can use Set-NetIPInterface -ifIndex 10 -Dhcp Enabled command.
Managing the Routing Table
Warning: Modifying the routing table on your computer could break your network and internet connectivity. Please use these commands carefully.
Get-NetRoute -InterfaceAlias Ethernet
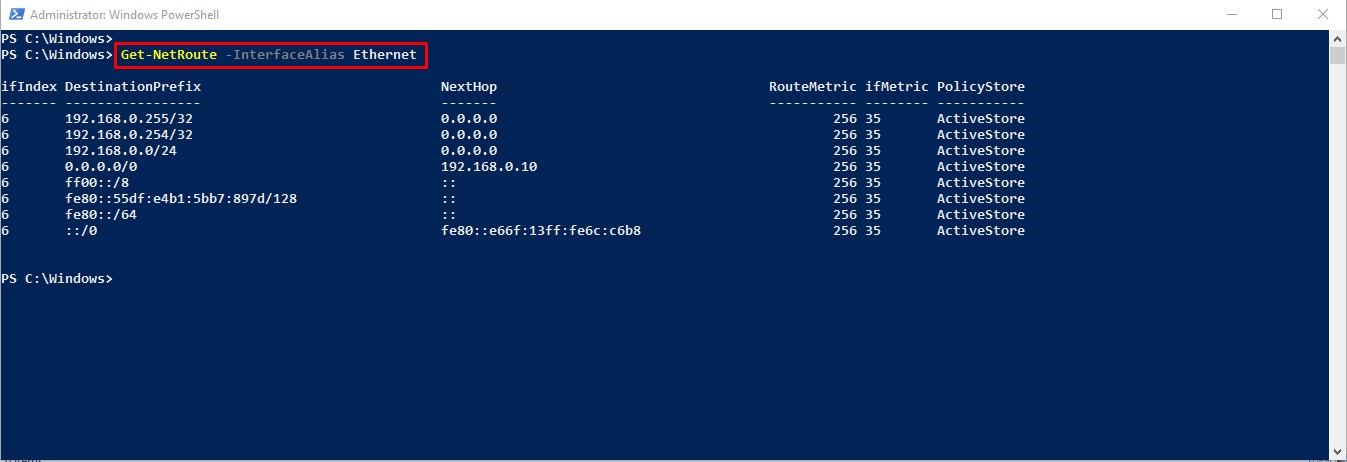 This command displays the routing table for specified interface (interface with alias “Ethernet” in this example).
To add a new default route for interface with index “6”, use the following command.
New-NetRoute -DestinationPrefix "0.0.0.0/0" -NextHop "192.168.0.1" -InterfaceIndex 6
This command sets a default route with a next-hop 192.168.0.1. Please replace 192.168.0.1 with your own gateway router. By default, the New-NetRoute command adds the route to the “Active Store” and “Persistent Store”. The “Active Store” is not persistent across reboots. If you want to add a temporary route which goes away after reboot, you can add -PolicyStore "ActiveStore" at the end of above command.
This was just a gist of commands. There is a lot more you can do with PowerShell and NetTCPIP module. If you think I ‘ve missed something, leave a comment below and I will try to cover that too in this article.