
- February 15, 2022
- Posted by: Surender Kumar
- Categories: Tips & Tricks, Windows 11
Disable Windows 11 Modern Context Menu
Table of Contents
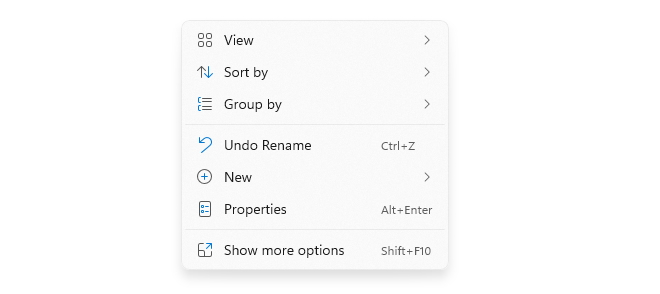
The new Windows 11 includes a lot of design improvements. The context menu (or right-click menu) is one of the most noticeable design changes that you will experience after switching from older version of Windows to Windows 11. The following image shows how the modern context menu looks like in Windows 11 by default.
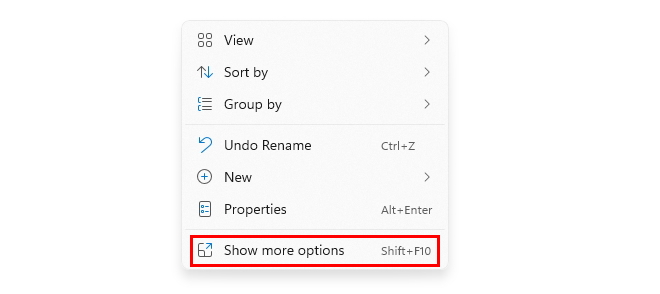
If you want to see the detailed context menu, you need to click on Show more options. While most of the people will appreciate the new context menu, there are still a lot of folks who would rather want to have this menus disabled. If you’re the one looking to disable the modern content menus of Windows 11, this article is for you.
In this article, I’ll show how you can disable Windows 11’s modern context menu and enable the legacy context menu. You can do it either using Windows PowerShell or Command prompt.
PowerShell Method
If you like doing things using PowerShell, use the steps mentioned in this section to disable or enable Windows 11’s modern context menu. If you’re comfortable in working with command prompt or batch files, you can directly jump to command prompt section.
Disabling Context Menus via PowerShell
To disable Windows 11’s context menus using PowerShell, follow these steps:
- Open notepad or your favorite text editor.
- Copy and paste the following code and save the file with a name like
Disable-Win11ContextMenu.ps1. Any name will work as long as you keep theps1file extension. It is important.<# .SYNOPSIS Disables the modern context menus in Windows 11 .NOTES Author : Surender Kumar Author URI : https://www.techtutsonline.com/staff/surender-kumar/ Version : 1.0 Purpose : Disabling the modern context menus in Windows 11 #> $regPath = 'HKCU:\Software\Classes\CLSID\{86ca1aa0-34aa-4e8b-a509-50c905bae2a2}' $regItem = 'InprocServer32' if(!(Test-Path $regPath\$regItem)){ Write-Output "Creating the registry key..." New-Item -Path "$regPath\" -Name $regItem –Force | Out-Null Set-ItemProperty -Path $regPath\$regItem -Name '(Default)' -Value $null -Type String -Force | Out-Null Write-Output "Restarting Windows explorer..." Get-Process explorer | Stop-Process -Force; Start-Process explorer } else { Write-Output "The registry key already exists! Exiting..." } - Now open the “RUN” dialog, paste the following command and hit enter to execute the PowerShell script you just created:
powershell.exe -file "D:\MyScripts\Disable-Win11ContextMenu.ps1" -ExecutionPolicy BypassI am assuming the script is saved in
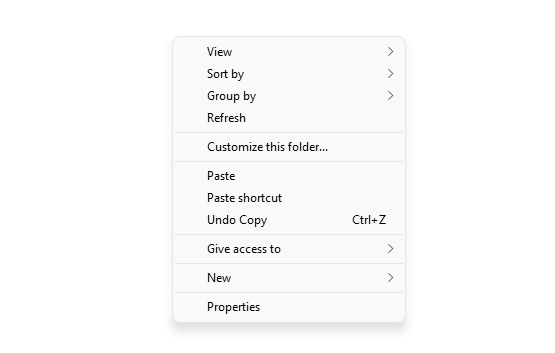
"D:\MyScripts\Disable-Win11ContextMenu.ps1". You need to adjust the path and name of script as per your system. - If the script runs successfully, it will create a Registry key and restart your Windows explorer. Once this is done, you will see the modern context menu is gone and legacy menu options are enabled.

At any time, if you want to re-enable the Windows 11 context menus, just follow the steps mentioned in next section. If you don’t see the legacy context menu enabled, it probably means you did something wrong. To learn about how to create and run PowerShell scripts, you can read our Writing and Running PowerShell Scripts article. If PowerShell way doesn’t work, you can jump to the command prompt section to do it using a batch file.
Enabling Context Menus via PowerShell
To enable Windows 11’s context menus again using PowerShell, follow these steps:
- Open notepad or your favorite text editor.
- Copy and paste the following code and save the file with a name like
Enable-Win11ContextMenu.ps1.<# .SYNOPSIS Enables the modern context menus in Windows 11 .NOTES Author : Surender Kumar Author URI : https://www.techtutsonline.com/staff/surender-kumar/ Version : 1.0 Purpose : Enabling the modern context menus in Windows 11 #> $regPath = 'HKCU:\Software\Classes\CLSID\{86ca1aa0-34aa-4e8b-a509-50c905bae2a2}' if((Test-Path $regPath)){ Write-Output "Removing the registry key..." Remove-Item $regPath -Recurse –Force -Verbose Write-Output "Restarting Windows explorer..." Get-Process explorer | Stop-Process -Force; Start-Process explorer } else { Write-Output "The registry key doesn't exist! Exiting..." } - Now open the “RUN” dialog, paste the following command and hit enter to execute the PowerShell script you just created:
powershell.exe -ExecutionPolicy Bypass -file "D:\MyScripts\Enable-Win11ContextMenu.ps1"
Of course, you need to adjust the path and name of script as per your system. To save time, you can download Disable-Win11ContextMenu.ps1 and Enable-Win11ContextMenu.ps1 scripts that I’ve created.
- If the script runs successfully, it will delete the Registry key and restart your Windows explorer. Once this is done, you will see the modern context menu is re-enabled.
If the above method does not work for you due to any reason, you can follow the command prompt method section to do the same thing using command prompt or a batch file.
Command Prompt Method
If you like doing things using command prompt or batch scripts, use the steps mentioned in this section to disable or enable the modern context menus of Windows 11.
Disabling Context Menus via Batch File
To disable Windows 11’s context menus using a batch file, follow these steps:
- Open notepad or your favorite text editor.
- Copy and paste the following code and save the file with a name like
Disable-Win11ContextMenu.bat. Any name will work as long as you keep thebatfile extension. It is important.@echo off reg.exe add "HKCU\Software\Classes\CLSID\{86ca1aa0-34aa-4e8b-a509-50c905bae2a2}\InprocServer32" /f /ve taskkill /f /im explorer.exe && start explorer.exe - Now open the file explorer, navigate to the location where you saved your batch file, and double click the file to run it. By the way, you could also copy and run the above lines of code directly in “cmd.exe”.
- If the script runs successfully, it will create a Registry key and restart your Windows explorer. Once this is done, you will see the modern context menu is gone and legacy menu options are enabled.
At any time, if you want to re-enable the Windows 11 context menus, just follow the steps mentioned in next section.
Enabling Context Menus via Batch File
To enable Windows 11’s context menus again using a batch file, follow these steps:
- Open notepad or your favorite text editor.
- Copy and paste the following code and save the file with a name like
Enable-Win11ContextMenu.bat.@echo off reg.exe delete "HKCU\Software\Classes\CLSID\{86ca1aa0-34aa-4e8b-a509-50c905bae2a2}" /f taskkill /f /im explorer.exe && start explorer.exe - Now open the file explorer, navigate to the location where you saved your batch file, and double click the file to run it. To save time, you can Disable_Win11ContextMenu.bat and Enable_Win11ContextMenu.bat scripts that I’ve created.
- If the script runs successfully, it will delete the Registry key and restart your Windows explorer. Once this is done, you will see the modern context menu is re-enabled.
That was all for this tutorial. If you run into any issues while following this guide, please leave a comment below and I will try to respond as soon I can.
Thank You So Much Brother !
It Works !
🙂
Glad to help. 🙂