- September 21, 2015
- Posted by: Surender Kumar
- Category: PowerShell
Writing and Running PowerShell Scripts
Table of Contents
Microsoft Windows PowerShell has the ability to perform so many actions in an interactive fashion. For many network administrators, one-line PowerShell commands will indeed solve many routine problems. This can become extremely powerful when the commands are combined into files known as scripts. However, there are some very good reasons to write Windows PowerShell scripts, the number-one reason to write a Windows PowerShell script is to address recurring needs. As an example, consider the activity of displaying a directory listing. The simple Get-ChildItem cmdlet does a good job, but after you decide to sort the listing and filter out only files of a certain size, you end up with the command shown here
PS D:\MyScripts> Get-ChildItem *.ps1 | Where-Object Length -gt 1000 | Sort-Object -Property Name

    Directory: D:\MyScripts

Mode                LastWriteTime     Length Name
----                -------------     ------ ----
-a---        01-04-2015  12:49 PM       1966 Get-Printer.ps1
-a---        06-10-2014  01:51 PM      14158 Get-SQLInstance.ps1
-a---        01-04-2015  11:59 AM       1764 Get-Uptime.ps1
-a---        15-04-2014  02:31 PM       4031 Hardware_Inventory.ps1
-a---        31-03-2015  02:51 PM       1100 Run-SQLBackup.ps1
-a---        05-08-2014  10:00 AM       1316 Test.ps1
Even using tab completion, the above command requires a lot of typing. One way to shorten it would be to use aliases and create a user-defined function. The easiest solution is to write a PowerShell script.
To writing scripts, I would recommend using Windows PowerShell ISE. For more details on Windows PowerShell ISE, visit this page. Change the PowerShell ExecutionPolicy on your computer to allow script execution as shown here.
To write your first script, Open PowerShell ISE and copy the following lines and paste into Script Pane.
#Get-ChildItem with Custom Attributes
Get-ChildItem D:\MyScripts\*.ps1 | Where-Object Length -gt 1000 | Sort-Object -Property Name
The PowerShell ISE window is shown below:
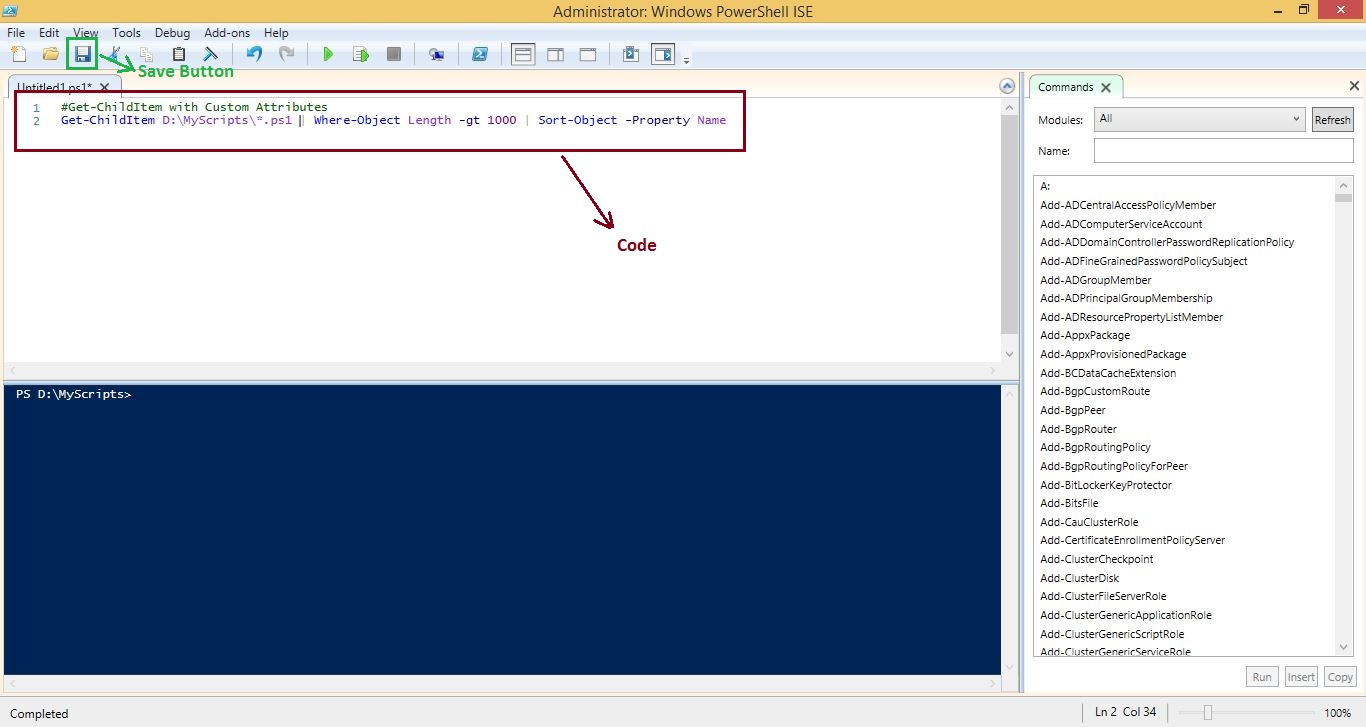
Of course replace the D:\MyScripts path with the directory you want to chose according to your computer.
After writing the above code, click on save button and save the file with Get-DirContent.ps1 name. However you can type any name but the file extension should be ps1.
Running PowerShell Scripts
There are several ways to run the PowerShell scripts but the first step is to set the PowerShell ExecutionPolicy. The default ExecutionPolicy is Restricted however the recommended setting to allow execution of PowerShell scripts is RemoteSigned. Learn more about the ExecutionPolicy here.
Use the following command to change the ExecutionPolicy to RemoteSigned:
Set-ExecutionPolicy RemoteSigned -Force
To run the PowerShell script, navigate to the directory containing script file and then run the script:
PS C:\> Set-Location D:\MyScripts
PS D:\MyScripts> .\Close-Outlook.ps1
Where .\ tells the PowerShell console to locate and run Close-Outlook.ps1 script file in current working directory.
If you didn’t like the above approach for running the script, you can directly run the script entering its path like:
PS C:\WINDOWS\system32> D:\MyScripts\Close-Outlook.ps1
If the file name or path contains any space, make sure to enclose the complete path in double quotes like:
PS C:\WINDOWS\system32> "D:\My Scripts\Close-Outlook.ps1"
Executing Script from Run Dialog
If you want to run a PowerShell script from Run dialog or cmd.exe, you cannot do so by directly typing its path as we did above. If you do so, the script will be opened in text editor. To make it run, you need to call the powershell.exe and then pass the PowerShell script as an argument with -File parameter. To make it more clear, lets run the same script again. In Run dialog, type following and hit enter:
powershell.exe -noexit -file "D:\MyScripts\Close-Outlook.ps1"
The -noexit parameter keeps the PowerShell console open even after script is executed. If you dont want to keep the console open after script execution, don’t use -noexit parameter.
The -file parameter is used to specify the complete path of script.
You can optionally use -windowstyle parameter to specify how PowerShell console will look. It accepts values such as Hidden, Minimized, Maximized etc. which are self explanatory.
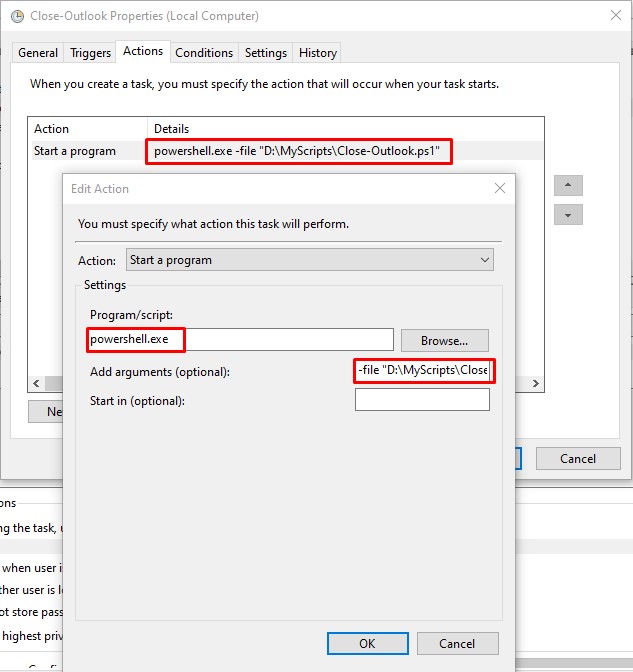
Schedule PowerShell Script with Task Scheduler
To schedule a PowerShell script in Windows Task Scheduler, you can use the approach mentioned for executing the PowerShell script via Run dialog. Under Actions tab, in Action section, select Start a program. In program/script box type powershell.exe. In Add arguments box, type -file along with path of script. See the following image for details.