
- February 9, 2022
- Posted by: Surender Kumar
- Category: Windows 11
Installing Windows 11 in Virtual Machine
Table of Contents
Are you excited on the launch of Windows 11 and wanted to give it a try? But wait a minute! If you take a look at the requirements to run Windows 11, you will notice that Windows 11 will only work on certain devices. It requires a Trusted Platform Module (TPM) and a compatible processor.
TPM is a technology designed to provide hardware-based cryptography functions. A TPM chip is a secure crypto-processor that is designed to carry out cryptographic operations. Since TPM is a hardware, if you intend to run Windows 11 in a virtual machine, you might be wondering how to connect this chip in your virtual machine.
In addition to the trusted platform module, Windows 11 requires a compatible processor. To see a list of compatible processors, checkout the following official articles:
In this article I will show how to enable Trusted Platform Module in a virtual machine in Hyper-V. If you’re using some other hypervisor (like VMware or something else), there might be a similar way to enable the TPM. Once this is done you can go ahead and install Windows 11 like you install any other Windows operating system.
Pre-requisites
There are certain pre-requisites that your virtual machine should meet before you can install Windows 11.
- The VM should be Generation 2 in Hyper-V.
- The Trusted Platform Module and Secure Boot should be enabled.
- At least 2 vCPUs should be allocated to VM.
- The VM should not be in Running or Saved state; it should be powered off.
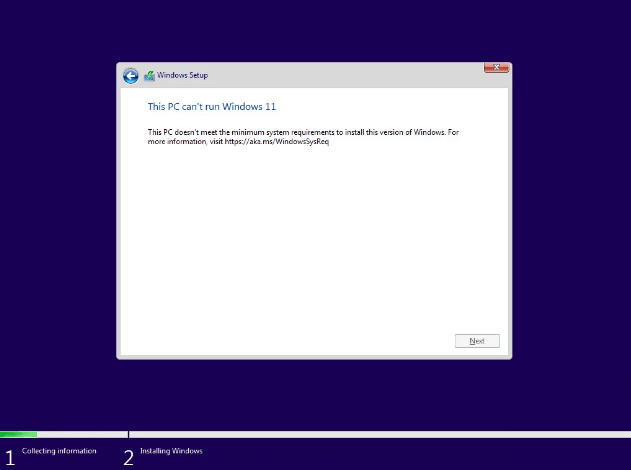
If your VM does not meet these pre-requisites, you’re gonna get an error during Windows 11 setup as shown in the image below.
Configuring the Virtual Machine
If you’re creating a new virtual machine for Windows 11, there should not be any issue meeting the pre-requisites but if you’re upgrading an existing VM running Windows 10, make sure it is properly shutdown and not in a saved state. You cannot modify VM settings if it is in running or saved state. Once you’re ready, follow these steps:
- Open Hyper-V manager.
- Create a new virtual machine for Windows 11. The important thing for Windows 11 is to choose
Generation 2on the Specify Generation page.
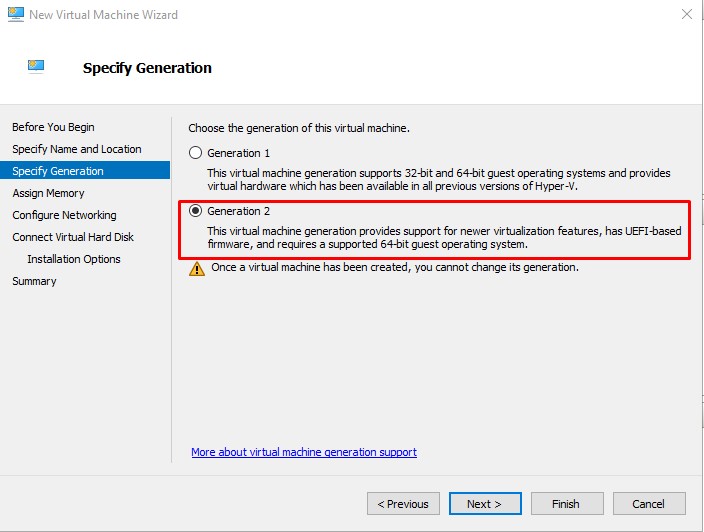

The rest of steps will be same for creating the VM as your normally do.
- Once the VM is created, right click on it and click on
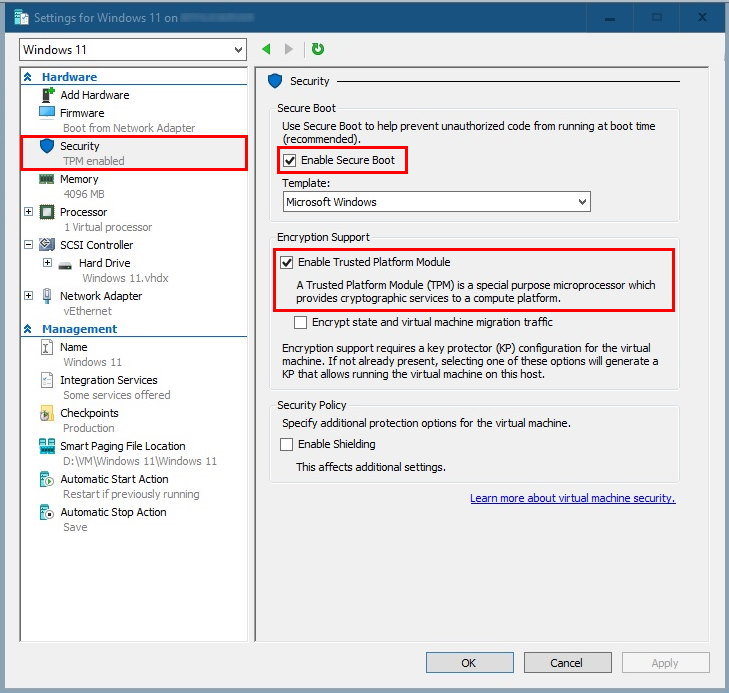
Settingsoption. - Click on the
Securityoption under Hardware section. - Now check the
Enable Secure BootandEnable Trusted Platform Moduleoptions.
- Click on the
Processoroption and increase the Number of virtual processors to “2” or more. Minimum “2” vCPUs are required.
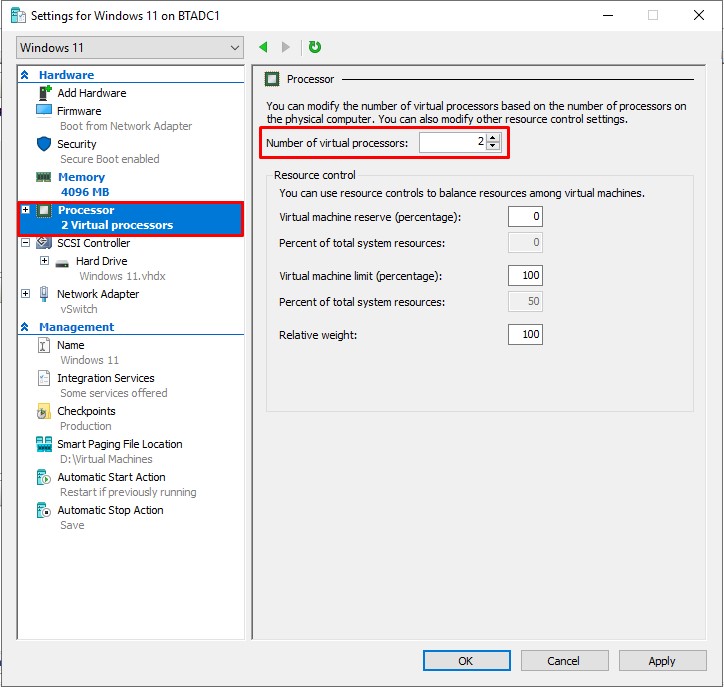
- Click on Apply and OK button.
- Your VM is now ready for Windows 11. Plug-in your ISO file, boot the VM from ISO and install the Windows 11 as you would normally install any other Windows OS.
That was it for this tutorial. If you’ve done everything right, you won’t run into any error and Windows 11 will install just fine. In this article, I covered the steps for Hyper-V but the idea will be same for other hypervisors as well. Make sure you set the pre-requisites for your VM and you’ll be good to go.