
- October 16, 2021
- Posted by: Surender Kumar
- Category: Windows 11
Bypass TPM 2.0 requirement for Windows 11
Table of Contents
Windows 11 is the major version of the Windows operating system which is released on October 5, 2021. If you want to run this operating system on your old PC or laptop, Microsoft had a bad news for you since Windows 11 is only designed to work on devices supporting TPM 2.0.
Trusted Platform Module (TPM) is a technology designed to provide hardware-based cryptography functions. A TPM chip is a secure crypto-processor that is designed to carry out cryptographic operations. While you can purchase an additional TPM module which might help you install Windows 11 without any bypass.
In this article I will discuss how to bypass TPM 2.0 requirements to install Windows 11 on a PC or laptop even if it does not have TPM 2.0 chip. Please note that bypassing this requirement means Windows 11 will not support hardware based cryptographic operations. This guide is not recommended for people who require hardware-level security on their devices. Most of the computers nowadays comes with TPM support out-of-box. By default TPM is disabled in BIOS. Before attempting these steps, please verify that your computer supports the TPM and if it supports, make sure to enable it from BIOS.
Enabling TMP 2.0 from BIOS
Even if your computer supports TPM 2.0, you might need to enable the TPM support in BIOS. You need to enter the BIOS, and then find an option under Peripherals. If you have an Intel chip, you will see it named something like Intel Platform Trust Technology (PTT) and if you have an AMD chip, you will find it named something like fTPM.
Bypass TMP 2.0 through Install Media
If you haven’t already started the install process, you can follow these steps to bypass TPM 2.0 check by deleting or modifying a file from Windows 11 install media.
-
- Just plug-in your USB drive containing Windows 11 installation.
- Go to
E:\sources, where E: is the drive letter for your installation media. - Look for a file named “appraiserres.dll”. Now rename or delete this file.
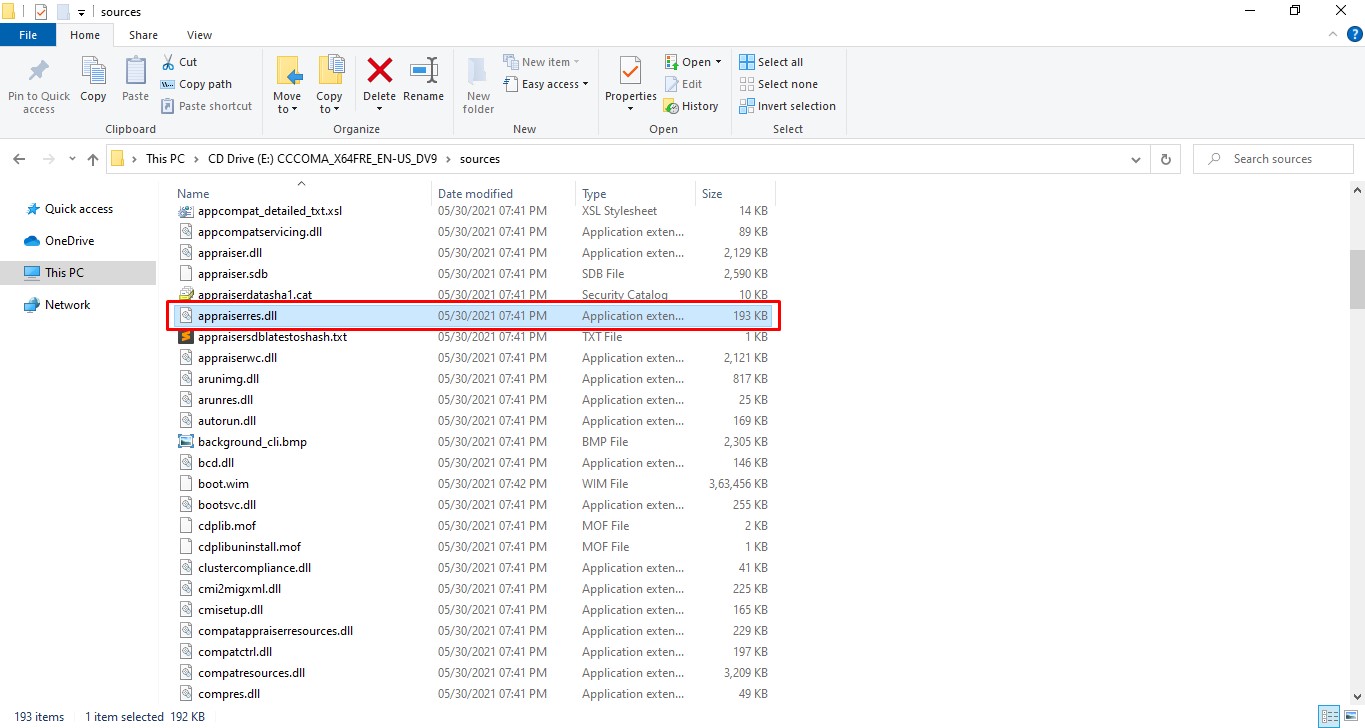
- [Optional] If you don’t want to delete this file, you can copy and replace the same file from the install media of Windows 10.
- That’s it. Now start the installation of Windows 11. You should be able to install Windows 11 without TPM error.
If you still see the TPM error, follow the next step.
Bypass TMP 2.0 during Windows Installation
If you have already started the installation of Windows 11 and your computer doesn’t have support for TPM 2.0, you are likely to get an error that says This PC can't run Windows 11.
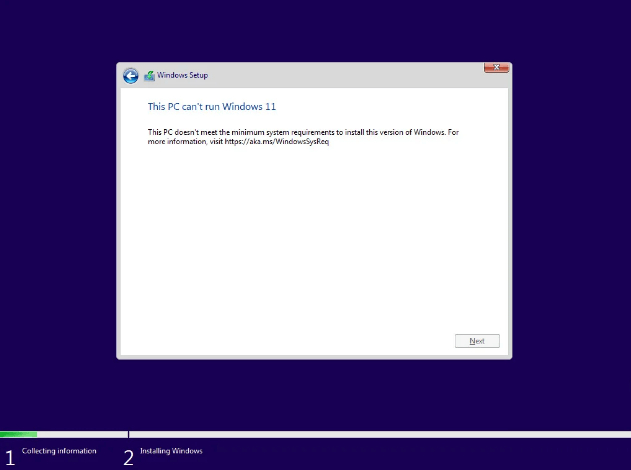
When you see this error follow these steps:
-
-
- Press
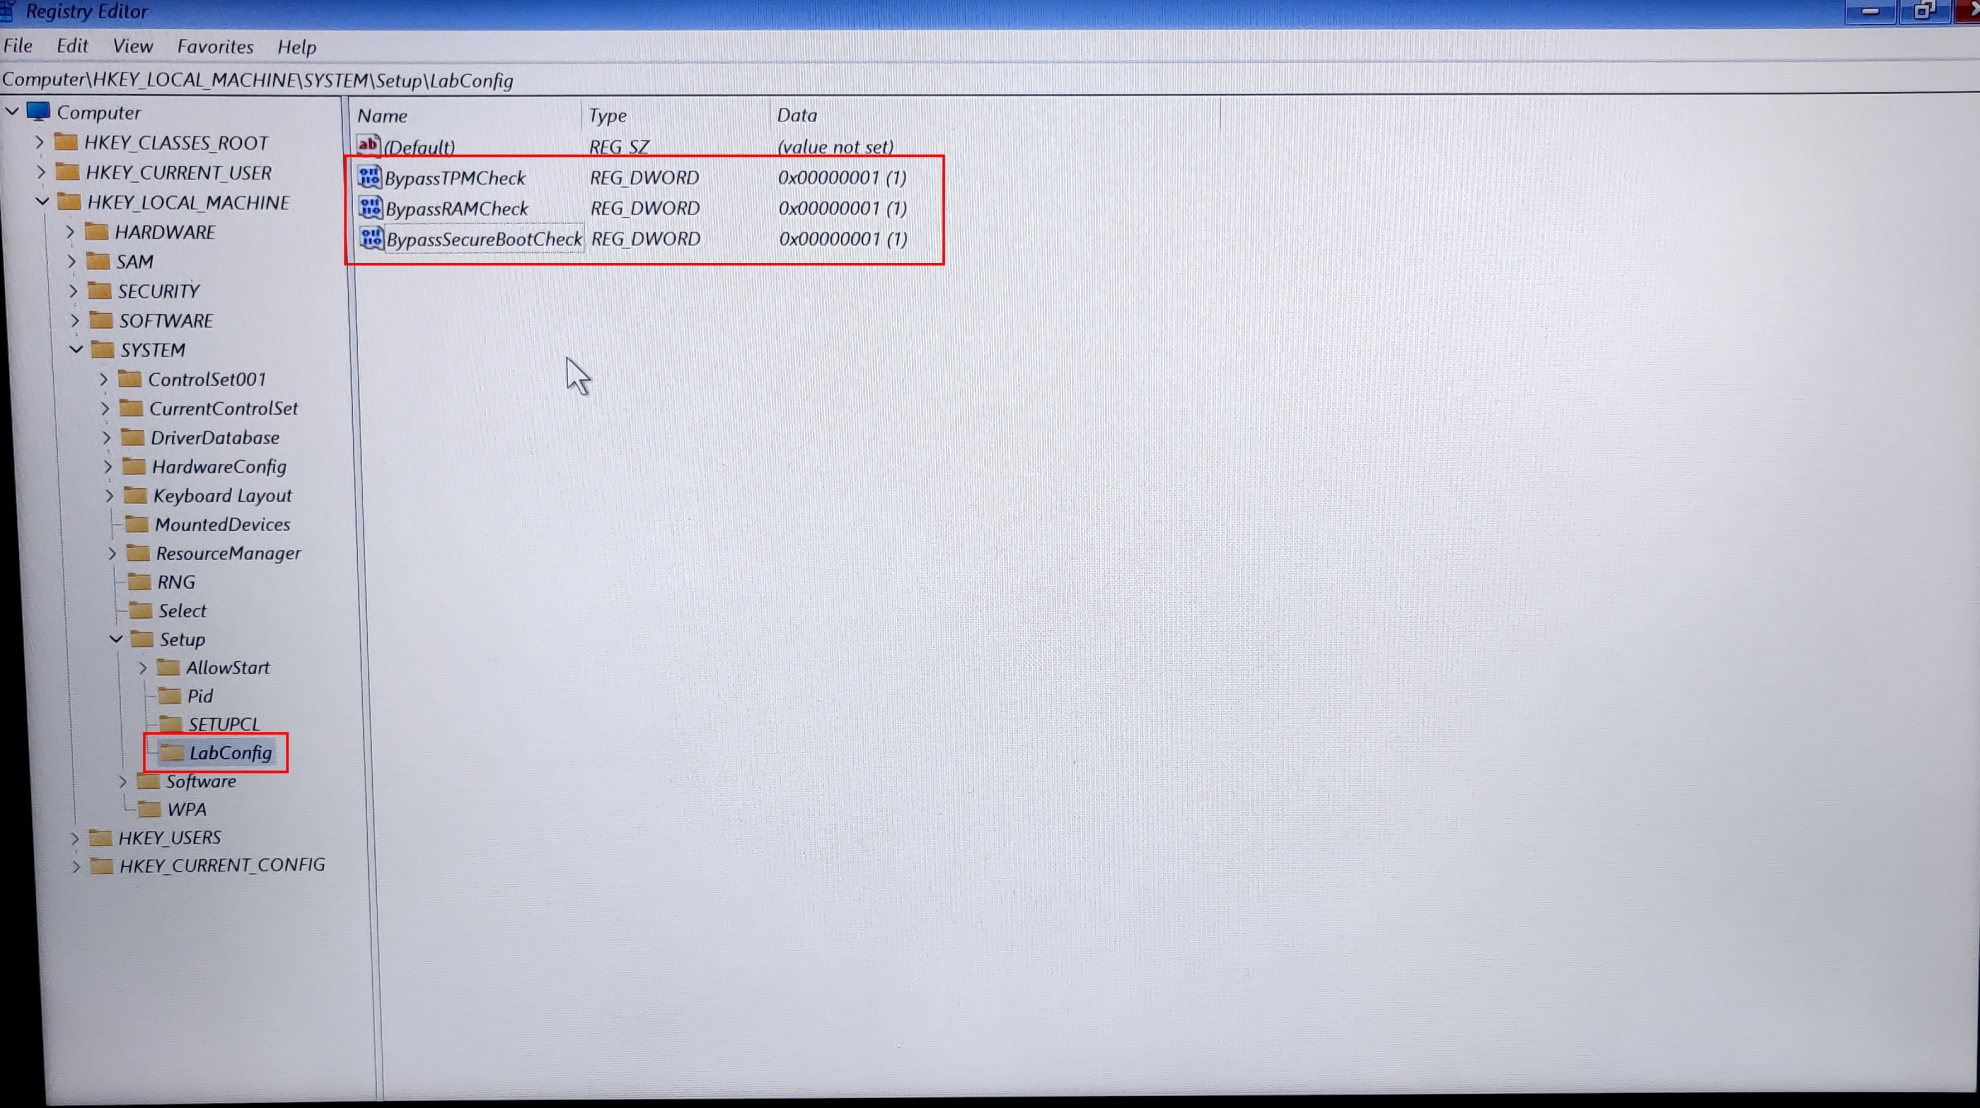
Shift+F10. This will launch a command prompt. In command prompt, type “regedit” without quotes and hit enter. This will launch the Windows Registry Editor. - Navigate to
HKEY_LOCAL_MACHINE\SYSTEM\Setup - Right click on Setup subkey and select
New -> Keyto create new subkey. Name the new subkey LabConfig - Now right click on the LabConfig subkey and select
New -> DWORD (32-bit) Valueand create a value named “BypassTPMCheck”, and set data to 1. - Again, right click on the LabConfig subkey and select
New -> DWORD (32-bit) Valueand create a value named “BypassRAMCheck”, and set data to 1. - Once again, right click on the LabConfig subkey and select
New -> DWORD (32-bit) Valueand create a value named “BypassSecureBootCheck”, and set data to 1.
- Press

- Now close the registry editor and command prompt.
- Click on the close button on the error window where it says “This PC can’t run Windows 11”.
- Now you will be taken back to Install screen.
- Click on Install button and this time you will no longer see the TPM 2.0 error.
- Please note that this trick only works for installing a fresh copy of Windows on unsupported PC. Follow the next step to upgrade an existing Windows 10 to Windows 11.
Upgrading to Windows 11 with TPM 1.2 and Unsupported CPU
The steps mentioned above will only work for installing a fresh copy of Windows 11. But if you want to upgrade from an existing Windows 10 installation, your PC must at least have the support for TPM 1.2 (an older version of TPM 2.0) and Secure Boot should be enabled.
If your PC supports
TPM 1.2and you have enabledSecure Boot, you can upgrade to Windows 11 by following these steps:-
- Press
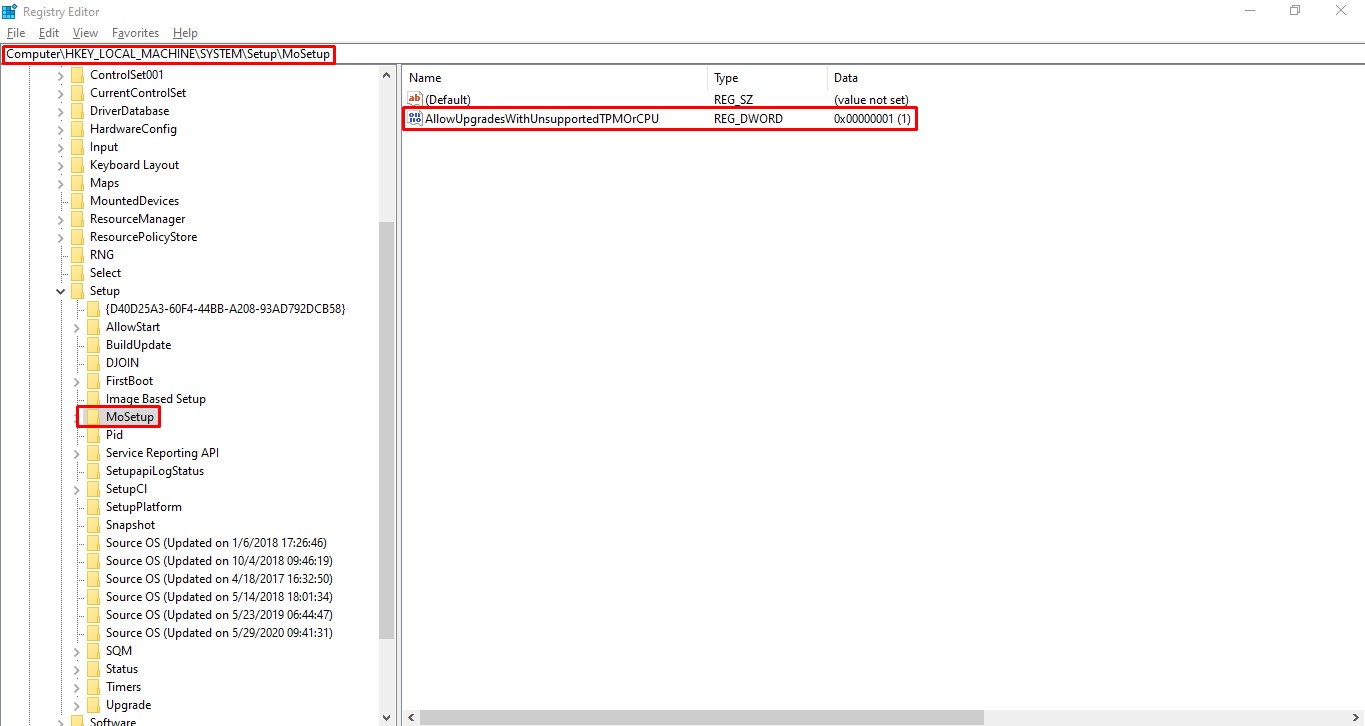
WinKey+Rto launch “Run” dialog. In Run dialog, type “regedit” without quotes and hit enter. This will launch the Windows Registry Editor. - Navigate to
HKEY_LOCAL_MACHINE\SYSTEM\Setup\MoSetup - Now right click on the MoSetup subkey and select
New -> DWORD (32-bit) Valueand create a value named “AllowUpgradesWithUnsupportedTPMOrCPU”, and set data to 1.
- Press
- Now close the registry editor.
- Insert your Windows 11 install media and double click on
setup.exefile to launch Windows 11 setup wizard. - Follow the on screen instructions and you should be able to upgrade to Windows 11 without any error.
That was it for this tutorial. If this article helped you, feel free to share this with others.
-